My make-it-work kitchen makeover is finished! I have a slew of before and after photos for you. Some of the befores are from when I started this recent decorating wave and some are from when we first bought the house, to show how far this space has come. I try to capture the same angle whenever possible. Let’s dive in…
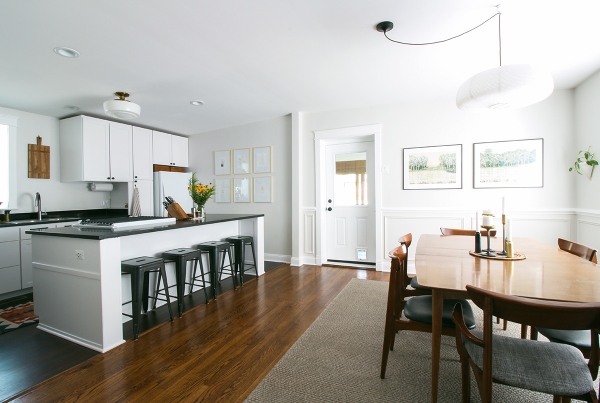
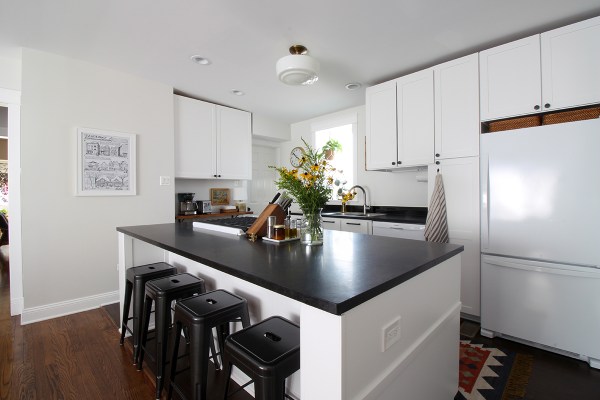
So much better than where we started…

The kitchen cabinets were professionally painted Benjamin Moore Decorator’s White. They turned out exactly as I hoped. There’s plenty of color and pattern elsewhere throughout the first floor, so I’m happy to have this space simply feel clean, bright, and cohesive. An added bonus is that paint, wood filler, and caulk conceal the previous owner’s DIY installation flaws.
Before:
After: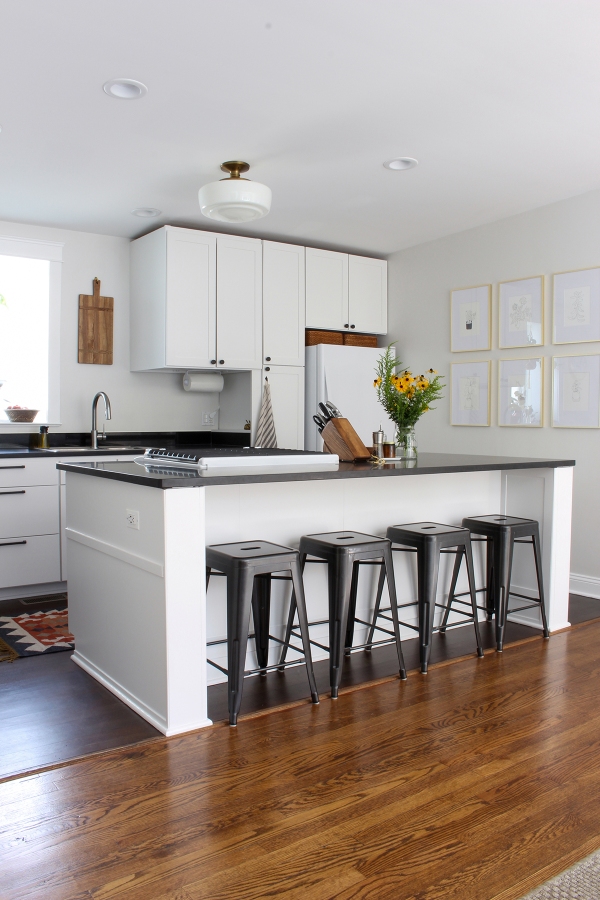
Now that the cabinets are white, I considered replacing the counter stools with something wood and/or woven (like these gorgeous leather ones from CB2), but we really like these metal ones. They’re indestructible: our cat can’t claw them, I use them as stepstools all the time, and the handle cutout on top is really nice for moving them around. They’re from Overstock; all of the sources are linked at the bottom of this post.
Before: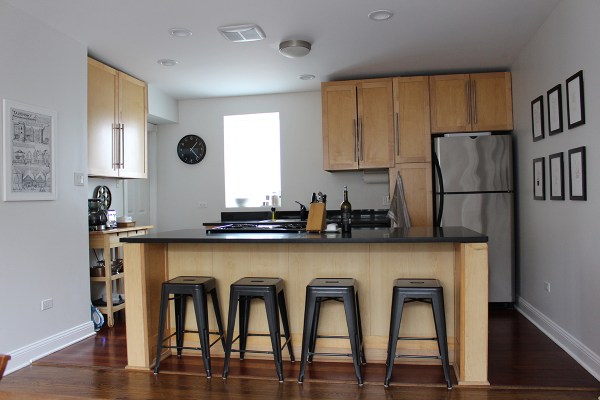
After: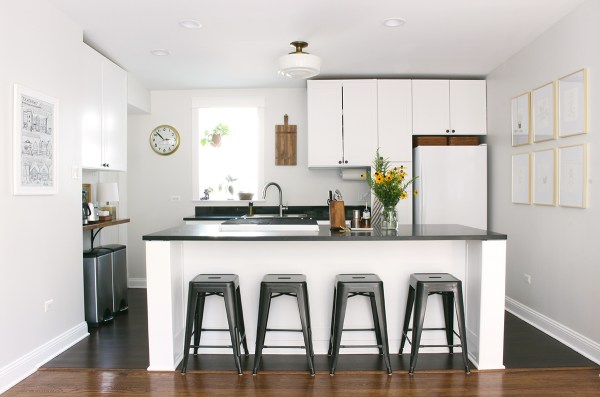
Sorry, it looks washed out here – it was a sunny day and I’m not a great photographer. I trust you come here for realness and not professional-grade photography!
Before:
After: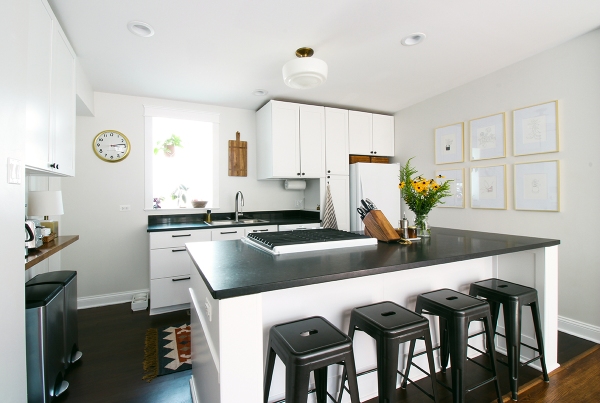
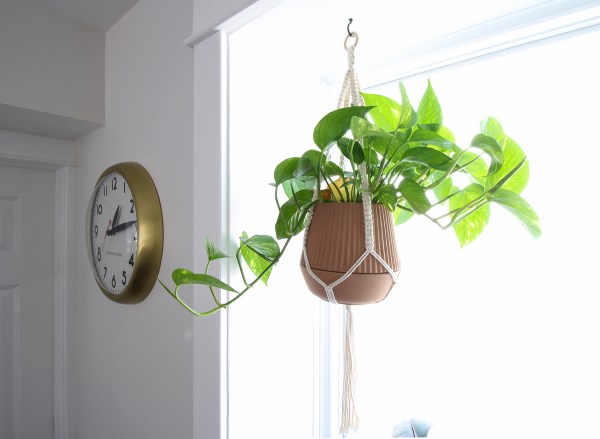
Speaking of photography: do you know what’s impossible to photograph? A freaking window. But I love the way this area turned out. It feels so much more intentional now that there’s a bit of decoration and proper moulding (for details, see Kitchen Progress: Faucet, Hardware, and Window Trim).
Before:
After:
This is a north-facing window, which I covered in frosted film (the view isn’t great) – it’s relatively low-light, but it’s enough for a potted pothos and an assortment of plant cuttings that I’m rooting in water.
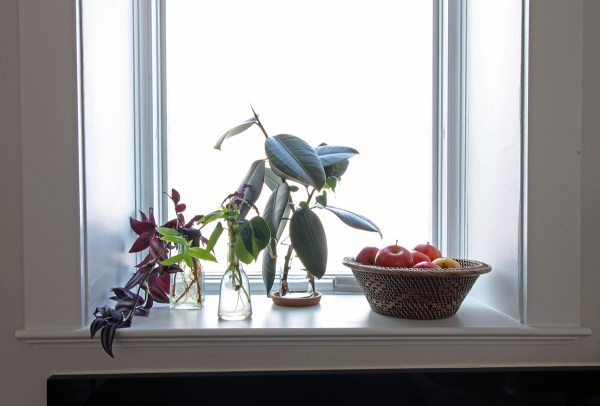
Speaking of plant cuttings: my mother always has plant starts on her kitchen window sill as well. She’s been reusing an old Eggling shell my brother gave her 20 years ago. So, in honor of my mom, I asked my friend Jenni to include a few eggshells when I commissioned these plant drawings from her.

I know you’re supposed to remove the glass for better photographs, but it took a thousand hours to get this grid perfectly aligned and there was no way in hell I was going to take them down to do that.
Moving along, I bought a new dishwasher, refrigerator, and slide-in gas range from Abt. We love having the fridge on top, and we have an ice maker for the very first time! What luxury.
Before:
After: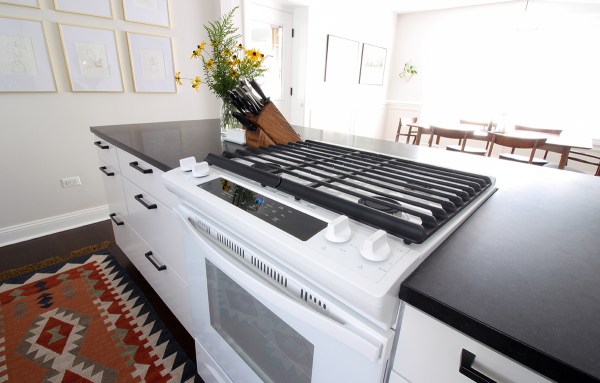
You may remember that I debated getting a white vs. black vs. stainless range (see Kitchen Decision Making). Obviously, I landed on white, and I’m happy with it. The grate helps it blend in with the existing countertop. The control console looks a little like it belongs in a hospital surgical suite, but it’s fine. I do like that the knobs are on top, and I really like the way it looks from the front.
Before: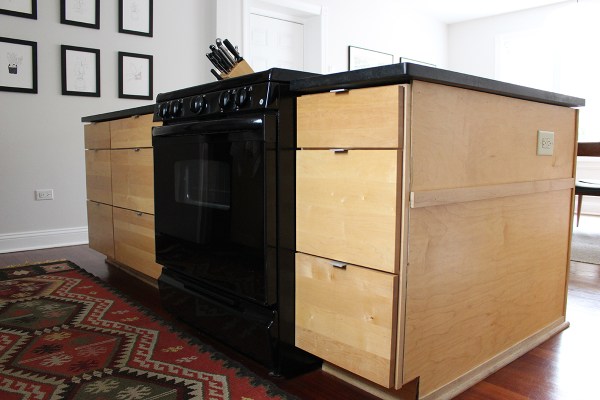
After: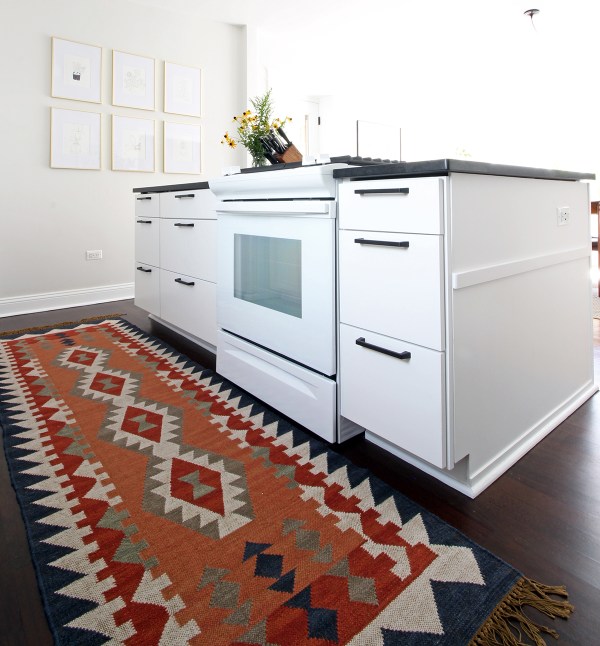
You already saw this coffee + toaster nook in a previous post: Kitchen Progress: Butcher Block Shelf.
Before:
After:
And this door makeover was documented here: Kitchen Progress: New Door, Trim, and Threshold Tile.
Before: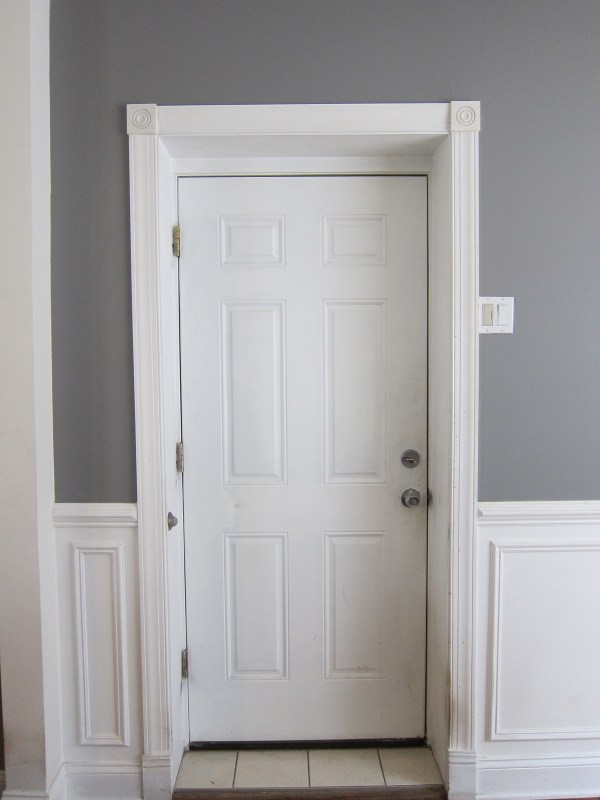
After:
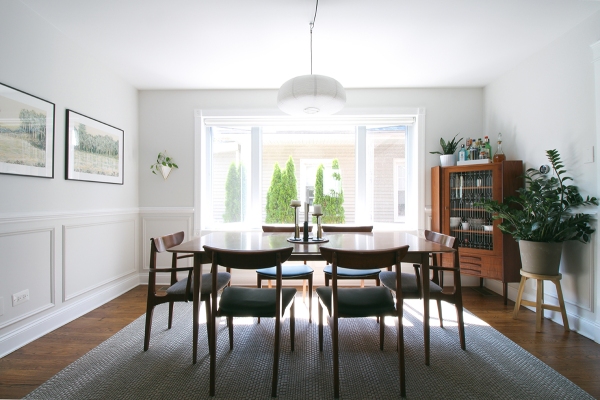
Moving on to the dining area, which is adjacent to the kitchen. I’m using the same rug, chairs, and table from our last place (seen in our Apartment Therapy tour). The light fixture is the same as the apartment as well – that’s one thing still on my to do list. I need to have the junction box relocated above the table before I buy and install a permanent fixture.
Before:
After:
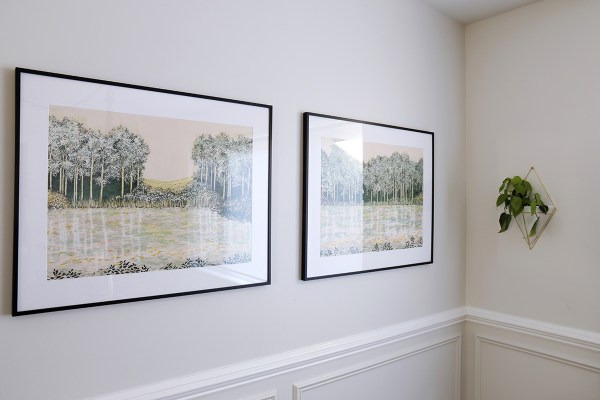
I found the landscape lithograph prints for $5 each at an antique store in my hometown (Jefferson City, Missouri). The moulding around the dining room was installed by a previous owner.
The big splurge in this room is the Danish corner cabinet, purchased from SharkGravy.
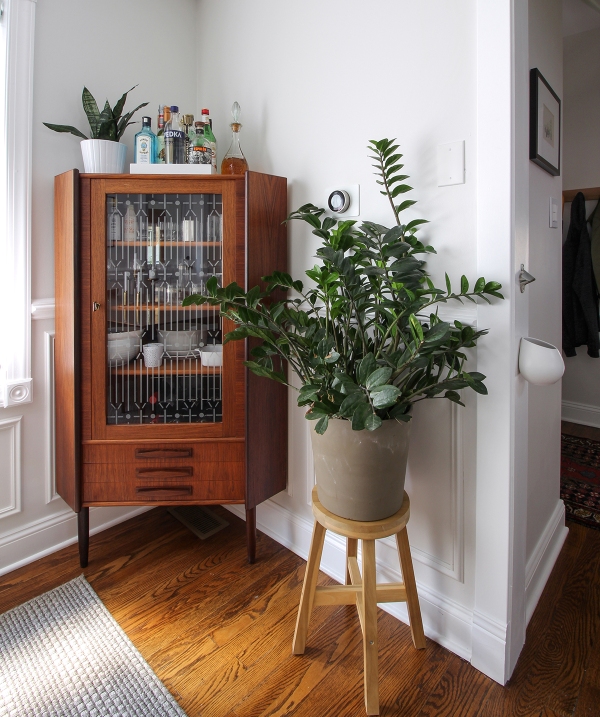
That ZZ plant is turning into a beast – it’s almost overgrown this space. To the right, you can see a wall-mounted bottle opener and cap collector, which I installed at our last place as well (see Wall-Mounted Bottle Opener).
A couple more shots of the cabinet, because I love it so much.
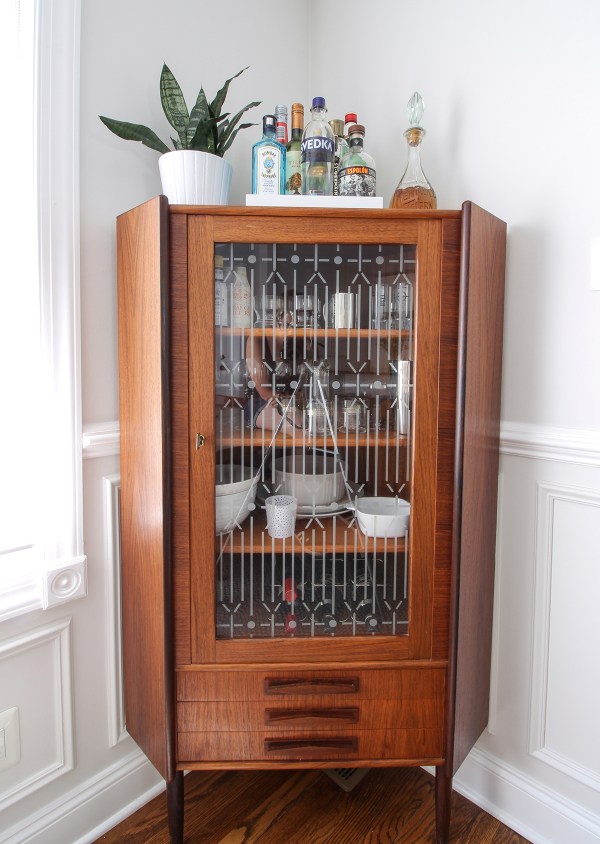

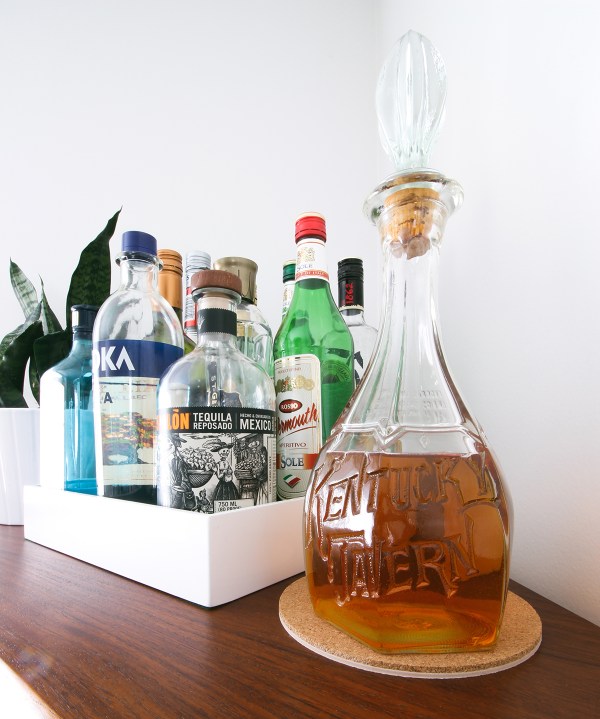
We keep bottles on top – shout out to my sister-in-law Kateri for this vintage Kentucky Tavern decanter. No one needs to know there’s Fireball in there.
One parting shot. I’ll do a follow-up post to share some details and decisions I want to call out. Let me know if you have any questions and I’ll try to address them in that post!

Sources:
- Cabinet painters: Giant Painters
- Kitchen runner: Rejuvenation Balter Flatweave Rug
- Hanging planter: Umbra Pleated Planter (purchased at Alapash in Chicago) + Mkono Macrame Plant Hanger
- Woven bowl on window sill: CB2 Rini Round Bread Basket
- Clock: Schoolhouse Kennedy Clock
- Cutting board: 1761 Wood Large Rectangle General Chopping Board
- Stools: Overstock Tabouret 24-inch Charcoal Grey Metal Counter Stools
- Kitchen light: Rejuvenation Eastmoreland 8″ Semi-Flush Aged Brass Mount with 16″ Opal Shade #B5138
- Plant drawings: Art by Jenni Wu + Target Project 62 Brass Frames
- Faucet: Delta Trinsic Single-Handle Pull-Down Sprayer Kitchen Faucet with MagnaTite Docking in Arctic Stainless
- Cabinet hardware: Amerock Blackrock 1-1/3 in. Black Bronze Round Cabinet Knob and Blackrock 160 mm Black Bronze Pull
- Fridge: Whirlpool Bottom-Freezer Refrigerator – WRB329DMBW
- Oven: Whirlpool White Slide-In Gas Range – WEG515S0FW
- Dishwasher: Bosch 24″ 300 Series Scoop Handle White Built-In Dishwasher – SHS863WD2N
- Door threshold tile: EliteTile Retro Glazed Porcelain Hex Mosaic in Matte White
- Dining room light: IKEA (no longer available)
- Dining room rug: Pottery Barn (no longer available)
- Dining table and chairs: vintage
- Bar cabinet: vintage Danish teak corner cabinet from SharkGravy
- Wall-mounted planter: Umbra Trigg Hanging Planter
For more information about this project, check out these related posts:

Marti, I love it! Your hard work paid off, big time. You have such great taste.
Aw, thanks, Stacy! Your recent post inspired me to install a USB outlet in the island!
Really dramatic seeing the before and after. a totally different look and feel. Well done.
Thank you, Rodger! It really is a big change.
Awesome work, Marti!
Thanks, Russ!
You make me feel like DYI home improvement projects are actually possible and don’t turn out a nightmare. Love what you’ve done.
Haha, thanks!
Looks great, Marti! And your photos are way better than you think they are. I love what you did with the space.
Thanks, Ashley! Excited to see how you tackle your own kitchen.
It’s so beautiful and airy, Marti! And that huge window in the dining room. All the tweaks, even down to changing the wall clock are great. #Kitchen goals. :)
Did you make a decision not to make the cabinets go all the way to the ceiling? Is that what the cool kids are doing?
Great question! Sorry for the delayed reply. I thought about adding a filler piece to the top of the cabinets (I do really like that look), but our ceilings slope – I decided it would look too odd.