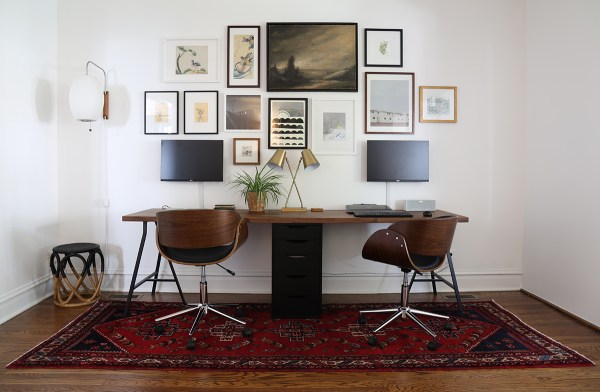
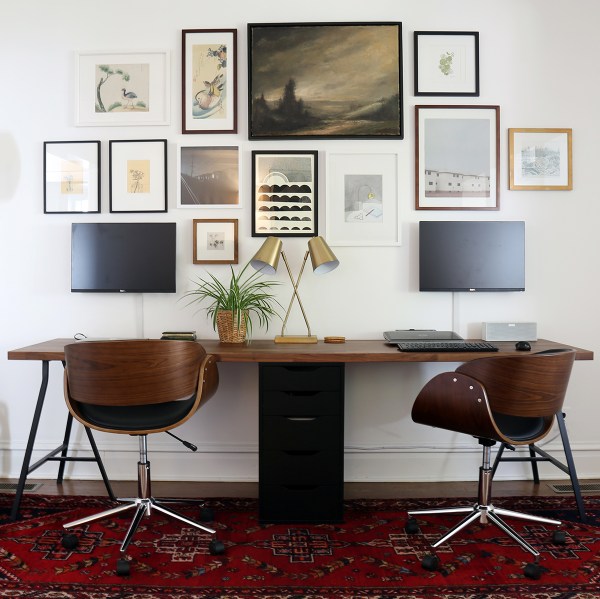
Hey-oh: we’ve got a proper desk area in our living room! I prefer having our computers in our main common area (instead of sequestered upstairs in the guest bedroom, for example), and this side of the living room seemed perfect for an office setup. I wanted a functional, comfortable, dedicated workspace for two people. No more camping out at the kitchen table!
To see what the living room used to look like, check out this post.
The Desk Setup
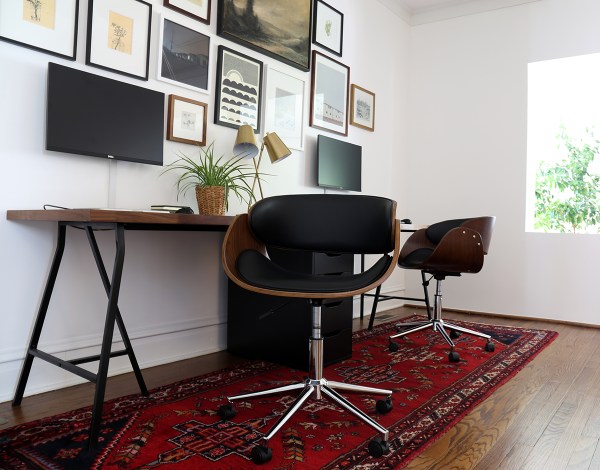
All of the components for this 8 foot desk came from IKEA: I used the 98″ KARLBY walnut countertop, the ALEX drawer unit, and LERBERG trestle legs. IKEA used to carry the ALEX and LERBERG in black – which I prefer – but they transitioned to gray this year. I was able to snag a black drawer unit before they went out stock, and I spray painted the metal trestle legs black.
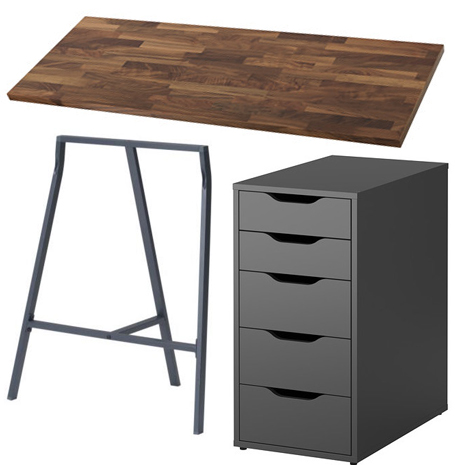
Putting together the desk was super simple: the countertop simply rests across the legs and the drawer unit. It’s a big, solid setup. Hanging frames and wrangling cords was the time-consuming part. Oh, and I built a frame for the first time! Let’s start there.
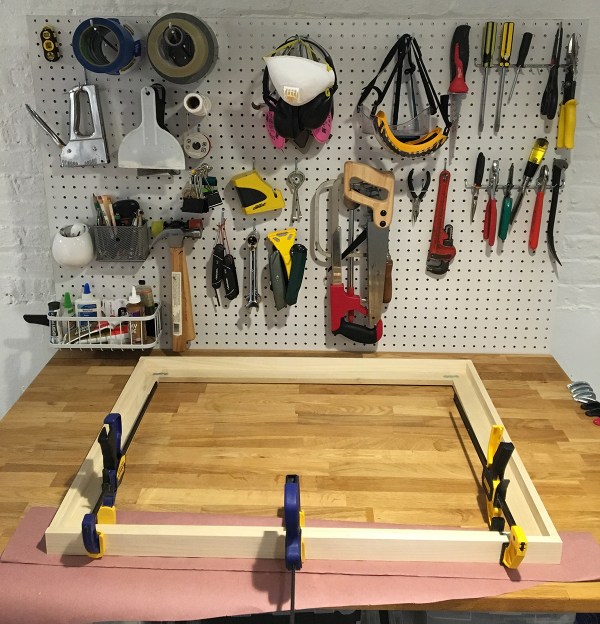
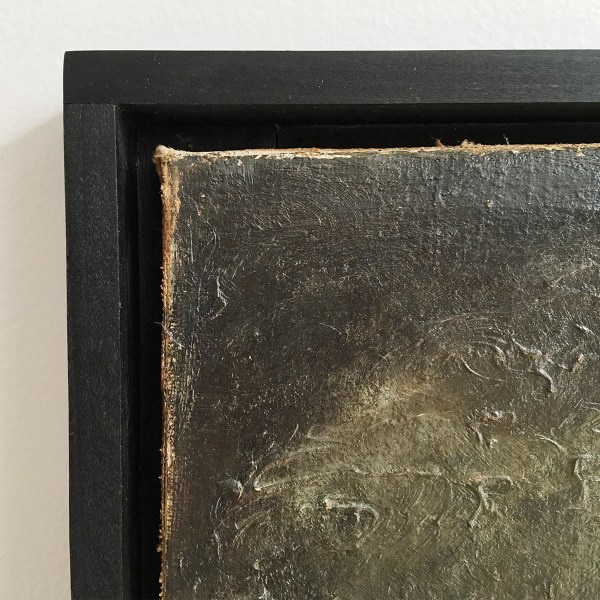
Building a Floating Canvas Frame
I already owned most of the art I used in this project. But I knew I wanted to add a large antique oil painting to the mix, for some texture and warmth. I dug through eBay until I found a painting that I really liked. Good lord, there’s a lot of crap art to wade through on eBay. Filtering by time period (1900-1949) helped a little.

The original frame was overly ornate and, in my opinion, distracted from the painting. To replace it, I built a simple floating frame using cheap pine from Home Depot. It was a lot of careful measuring and cutting and making it up as I went along.
I stained the wood black to match the moodiness of the painting, and to help balance the black wall-mounted monitors.
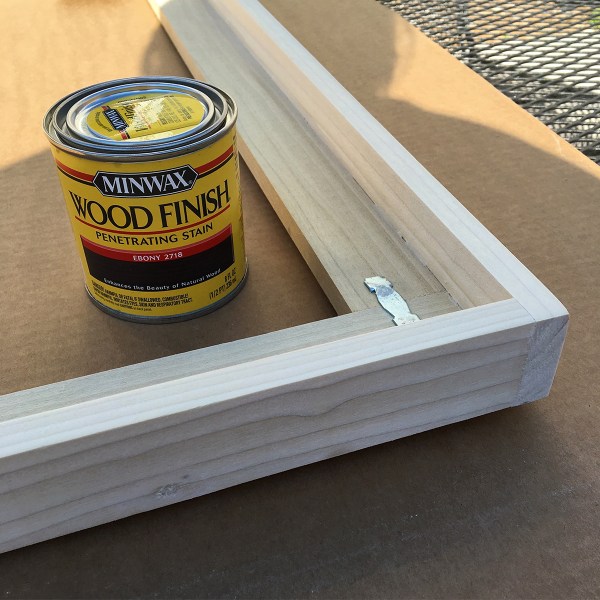
I totally winged this entire process, and I’m really happy with the way it turned out!
Cat inspector on the job again.

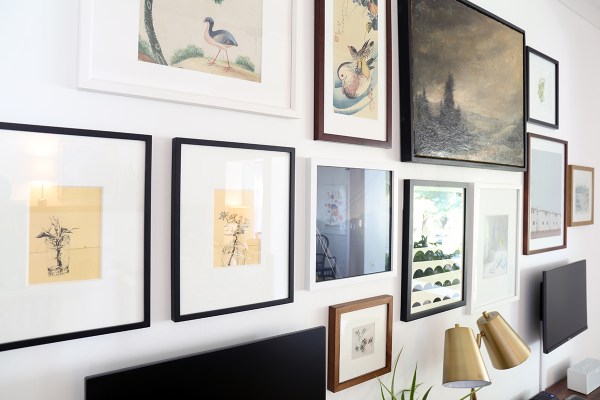
Hanging the Gallery Wall
Having wall-mounted monitors meant the gallery wall needed to be planned out pretty well. It’s easy to tweak the placement of a frame by moving a nail a few inches, but I wouldn’t have any flexibility with the monitor placement once heavy-duty toggle bolts were in the wall. So, I over-planned, as I do.
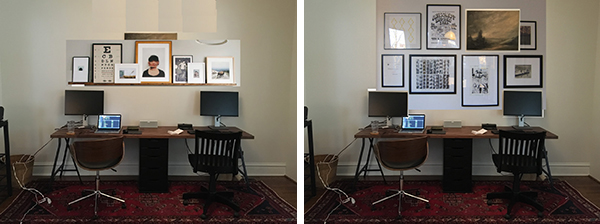
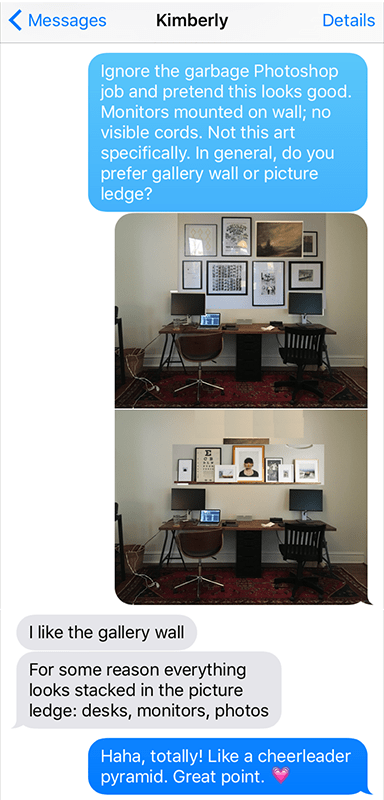
First, I did a real crappy job of Photoshopping my two options: gallery wall vs. picture ledge. For the mock-ups, I used Chris Loves Julia’s picture ledge and our previous dining room’s gallery wall.
Then I solicited input from a friend who has good taste in nearly everything, with the exception of appropriate footwear.
I used a mix of white, black, and brown wood frames. The art is a mix of screen prints, paintings, and photos that I’ve collected over the years, and there’s a bit of a theme to it – mostly plants, houses, and birds (thanks for the Japanese ducks, Kei!).
I fussed around with the frame arrangement on the floor.

I also did the thing the internet suggests you do: used paper to visualize the frames on the wall.
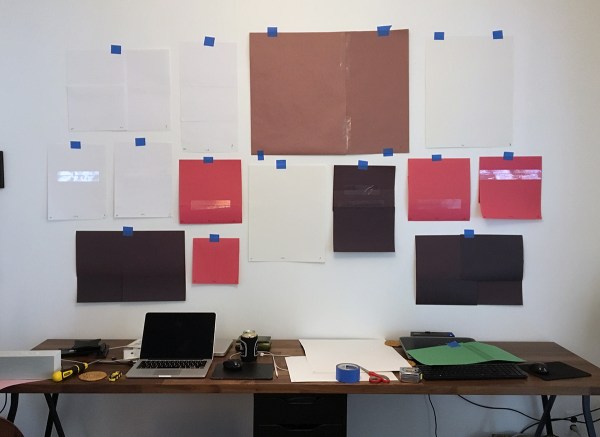
This step seems excessive for most purposes, but it was helpful here. I did not want to regret my placement of the monitors.

All hung!
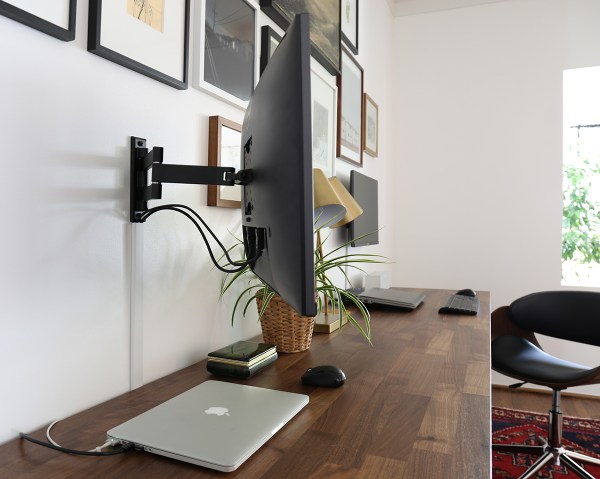
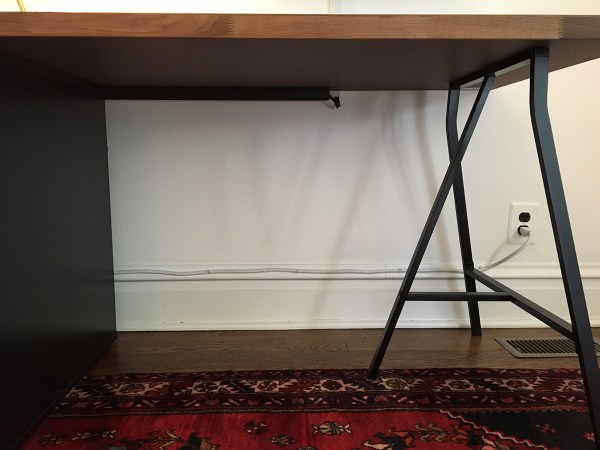
Hiding the Cords
Did you notice what you don’t see on that office wall? All the cords. A whole lot of wire wrangling went into this. If I could make a living hiding cords, I would change careers. So gratifying!
On the wall, I used a raceway for the monitor power and DVI cords. That monitor arm is a cheap guy from Amazon, by the way: VideoSecu TV Wall Mount Articulating Arm Monitor Bracket. It lets us push the monitor back when not in use, and pull it forward when we’re working / wasting time on the internet.
Under the desk, I added a J channel cable raceway – I bought one and cut it in half to use on either side of the cabinet. The raceway routes all of the wires to a power strip I mounted on the wall behind the cabinet.
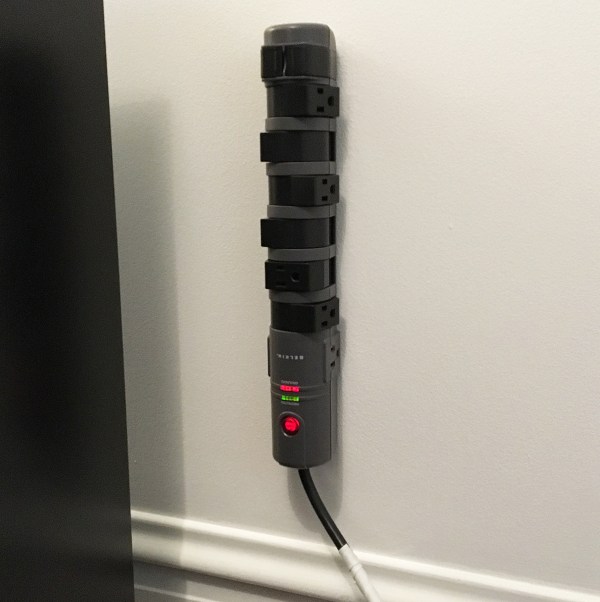
I bought the Belkin 8-Outlet Pivot Surge Protector with 6-Foot Cord (based on The Wirecutter’s recommendation); the pivoting outlets are awesome and crucial for this setup.

This hidden surge protector powers everything – my Apple charger, Jarrod’s Dell dock, the monitors, the desk lamp, the Jambox – with only one visible cord. To make it even less conspicuous, and because crazy, I wrapped it with white ribbon.
The Finishing Touches
The Kurdish runner rug is vintage from eBay. The rolling chairs are from Overstock: Porthos Home Monroe Adjustable Office Chair. I would have preferred something vintage, but finding a pair of reasonably-priced vintage adjustable chairs was not happening. These Overstock chairs are sturdy and comfortable, and they’ll do until I have a lucky find.
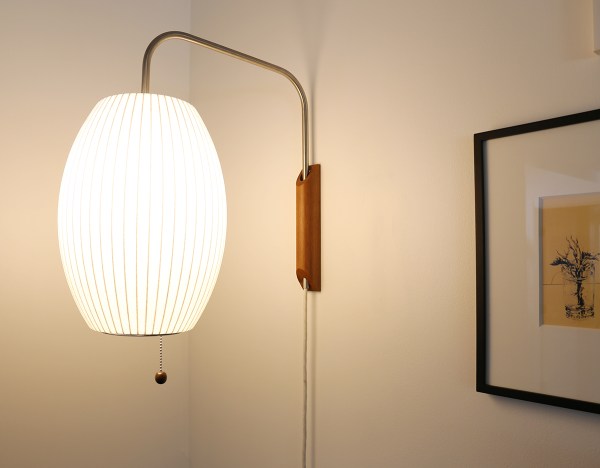
I did have a lucky find in the floor sample pile at Room & Board: this Nelson wall sconce. At 30% off, it was still a splurge, but I love it so. It provides such a nice glow.
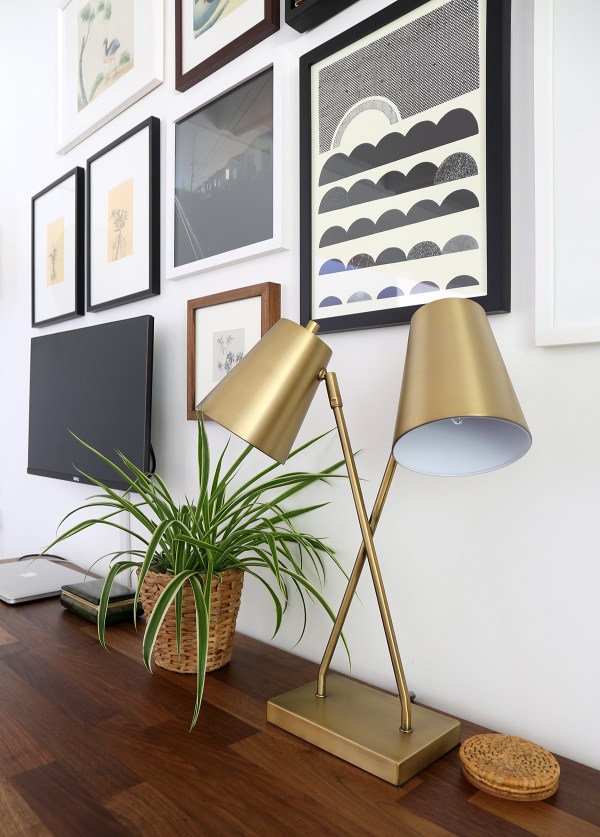
I also added a Threshold Two Head Task Lamp from Target. The rattan stool is from Target as well – I plan to add a plant on top.
And that brings us to where we are today, and where I’m typing this blog post right now.

It looks something like this:
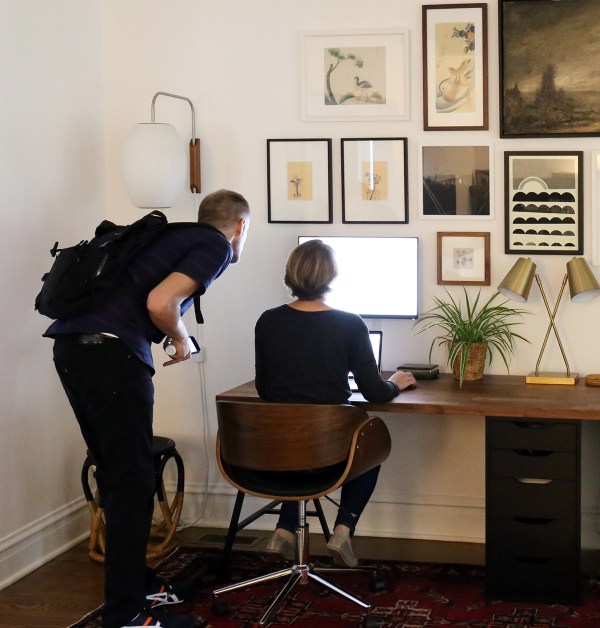
Thanks to Jarrod’s dad Rodger for the action shot, and for letting me experiment with his camera this weekend! I also borrowed my friend Carolyn’s camera (thanks, buddy!), so I have a lot of photos in the hopper for more posts in the coming weeks.

Looks great, Marti! Mary
Thanks, Mary!
This turned out beautifully, Marti. i have to figure out something similar for the kids. I’ll refer back to this idea. In my head, I have been making it very complicated.
-Stacy
I am trying more and more to adopt the mantra “Keep it simple, stupid.” I can get caught up thinking I need more things or more color or more something, and then I return to my Pinterest board to remind myself that simple and practical is what I like most.
Love it! So clean and pretty.
Thanks, Kat!
I wish I could have hired you as we moved into our new home and started imagining our already existing art and thinking about adding new pieces. I’d still hire you if you’d come to Iowa City, though I’d have to swallow some embarrassment at mistakes already made, however, I think of us as a work in progress. :)
Your work is beautiful!!
Mistakes are absolutely part of the process. A good chunk of any project I embark on is spent making mistakes and correcting my course. Thanks for the vote of confidence!
This looks awesome, Marti! I am about to move into a new apartment, and you’ve given me some great ideas.
Thanks so much, Jessica! I hope you’re doing well. I’m sure you have an over-abundance of great art for your new apartment’s walls.
Creeping Grinnell alum…love your blog! thought it was funny to see a similar post on Emily Henderson today. I agree with your friend’s assessment of the photo ledge (even divided) and like your gallery wall better :)
Ha, thanks! Emily Henderson and I have so much in common, it’s true – arranging frames, paying Task Rabbits to clean our plant leaves, living across the street from Katy Perry…
Where did your chairs come from?
The rolling chairs are from Overstock: https://www.overstock.com/Office-Supplies/Porthos-Home-Monroe-Adjustable-Office-Chair/9613069/product.html
Looks great! Do the legs and center drawer unit seem sturdy enough to hold the top? I am debating getting the same legs you have (same setup really), or getting custom steel legs from Etsy.
Thank you! Yeah, it’s really sturdy: that was important to me – I don’t like it when things feel precarious. The drawer unit is built like a tank (it’s quite heavy), so it does the heavy lifting, and then the trestle legs provide added support.
It looks so great! Did you consider having the desk span the entire wall – to increase storage?
Thanks, Anne! I chose not to do that because we have a wall-to-wall mantle on the other side of the room, and I didn’t want it to look like a weird mirror image. We have plenty of storage in the drawer unit and in the cabinet below the TV (not pictured here).
Yes!!!!!! I love the solution! It’s beautiful, but you had me at CORD MANAGEMENT!!! Thank you for showing everyone that a stylish room and excellent cord management can coexist in the same space! Kudos on a job done. :)
Thanks so much, Rae! I’m glad someone shares my rabid enthusiasm for cord management!
Hi!
Love you setup, definitely trying it in the future!
One question, what are the measurements for your rug?
Thanks!
Hey, Vanessa! The rug is approximately 45″ x 128″ (a little under 4′ by 11′).
amazing article, thank u!
I have been trying to figure out how to do exactly this is our basement to function as either work space for myself and my husband, or gaming bench for our boys. Nothing was fitting the bill (desks not wide enough….), beyond getting a carpenter to create it and attach to the wall. The IKEA hack was perfect. I’m sitting at the desk now. Thanks for the time you took to create that detailed post.
I am so happy to hear that! Thanks for leaving a comment – I appreciate it!
Hi Marti!
I love this transformation it looks incredible. I am working on a content piece and i’m wondering if I could potentially feature one of your images? I would be sure to include your name and a link to your website below the image. I look forward to hearing from you.
Thanks!
Gabby
Hi, Gabby: Thanks for asking! You’re welcome to use any image as long as you credit me and link back. Let me know if you need a higher resolution file.
I know this is an older post, but I have to comment on this perfection!! I had this same ikea hack in my mind of what I wanted to do with my work space and y’all inspired me so much more of what I can pull off with my space. Excited about a new project!
Totally buying almost everything and copying your desk. Love it!
Ha, that’s great – thanks! We love this desk setup.
Thanks for sharing this! I am just heading to Ikea to buy the Karlby to use as our new desk, and decided to google and see if the Lerberg’s had been used and voila! Your post came up! I’m super excited now because it means I’m on the right design track haha.
Also I’m totally wanting a gallery wall now too because yours looks A++! Thanks again!
How did you affix the power strip? Is it stuck to the wall of drawer unit?
The power strip is mounted on the wall – there are notches for screws on the back.
This is so great. So excited to put this together. How did you mount the countertop on to the drawer and legs? Did you just lay it on top, how does it stay secure?
Hello, Diana! The countertop is simply laid on top. The drawer unit is super sturdy, so it does the heavy lifting, and then the trestle legs provide added support. The countertop is heavy enough to stay in place on its own. Enjoy your new desk setup!
Maybe I missed this but your monitors are so wonderfully thin – do you have a link you could share? Thank you!
Hey, Chelsea! The monitors are Dell Ultrasharp U2415 – https://www.amazon.com/gp/product/B00NZTKOQI/ They are indeed thin and I love that the bezel is so slim.