When we bought our house, the basement laundry room area was thoroughly gross and rather dangerous. It is significantly less gross and dangerous now! Here’s all the unglamorous work that went into that.
First step: making sure the water heater doesn’t kill us.
During our home inspection, our inspector pointed out that the melted plastic on the top of our water heater indicated our flue was blocked. This meant dangerous fumes were not venting out of the basement like they should. He suggested we remove the vent to see if we could find the cause.
Such a happy new homeowner! About to find something awesomely morbid.

Yep: that’s a fully cooked bird. Poor little guy. We removed his bones, which solved the problem.

Up next: so much cleaning.
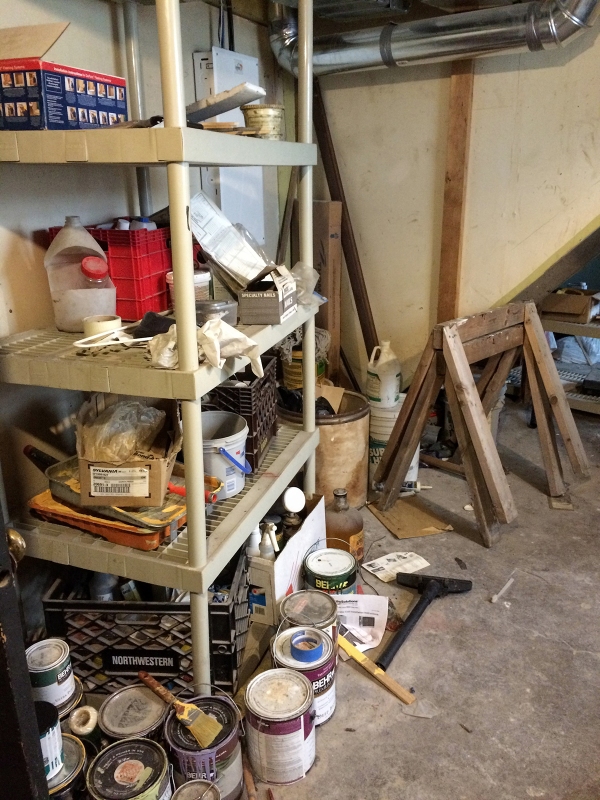
Our house was purchased as-is, which meant that the previous owners were not legally obligated to clean it out before closing day. They took full advantage of that fact and left a lot of crap in the basement.
We’re lucky to have helpful friends. Thanks, friends!

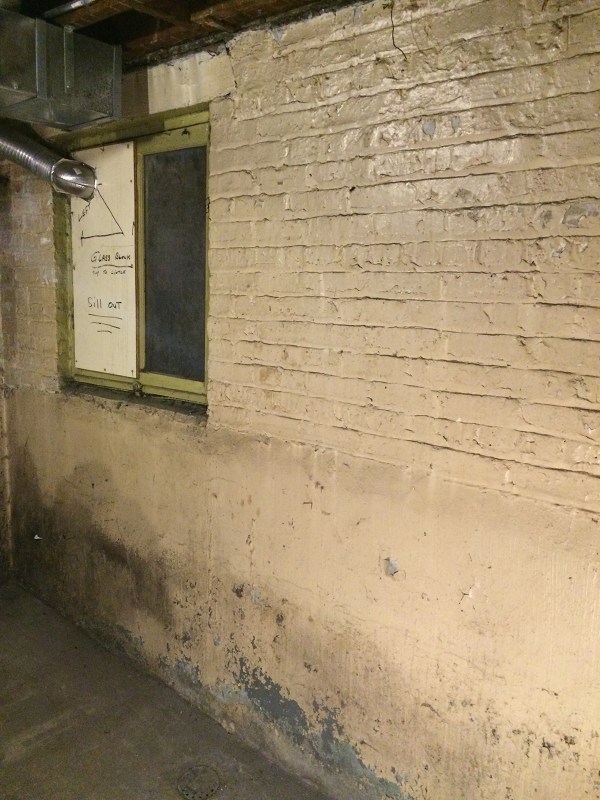
Our favorite feature in the basement was this open drain.

That paint tray kept the flow of water from the kitchen sink and the laundry tub directed into the hole. (We had this fixed shortly thereafter.)

The sign next to the open drain reminded you of your manners: it says “Do not pee pee in here.” Our friend Kimberly said we should assume that any area without a sign had been peed on. She’s probably right.
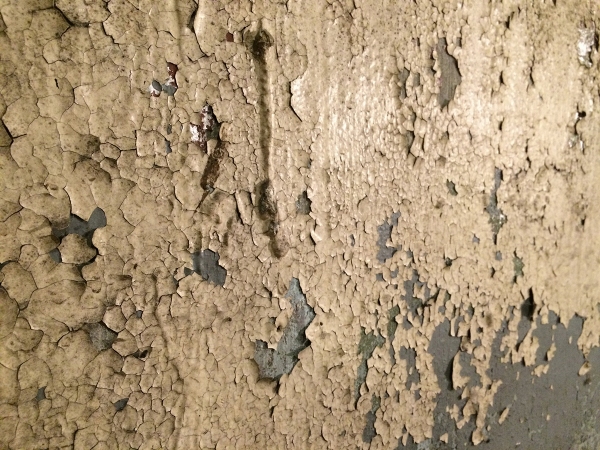
Once all the junk was gone, Jarrod and I started cleaning. I scraped flaking paint off the walls. There was several rounds of wall and floor washing with bleach, TSP, and Simple Green. It took weeks. It was equal parts loathsome and satisfying. I cannot overstate just how gross this basement was. I’m going to make you look at several photos so you’ll believe me.

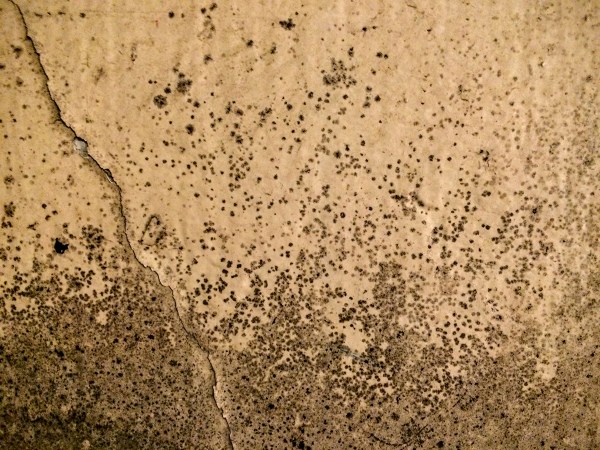
Yep, that’s mold. The bleach killed it, and a dehumidifier has stopped it from returning. Initially alarming but ultimately not a big deal!
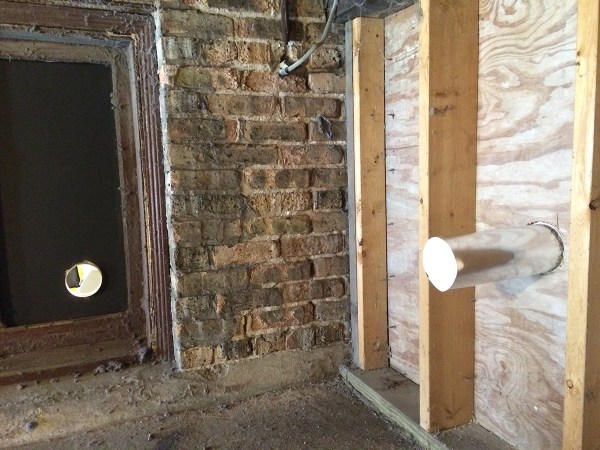
Another thing: making sure the dryer doesn’t kill us.
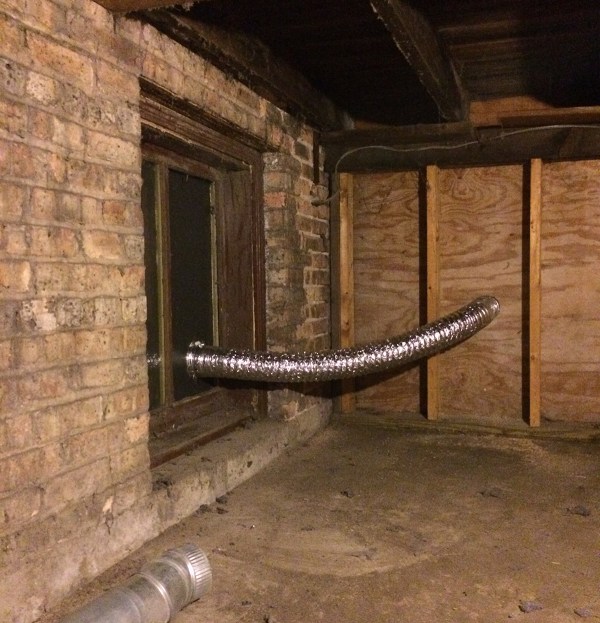
Lint is super flammable, which is why you’re supposed to keep your dryer vent clean and unobstructed. Our dryer vent set up was remarkably terrible. (The previous owners wrote on that board, by the way, not me.)
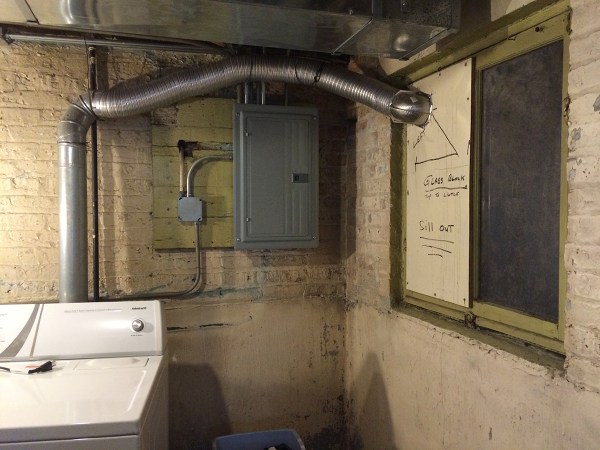
They had the dryer venting into an old window, which would have been fine except 1) they didn’t remove the window screen, and 2) that window is under our back porch/mudroom (outside our kitchen, glimpsed here, and one of my current big projects). So, they were pumping hot, damp air into a semi-enclosed space. This is what I discovered when I crawled back there:
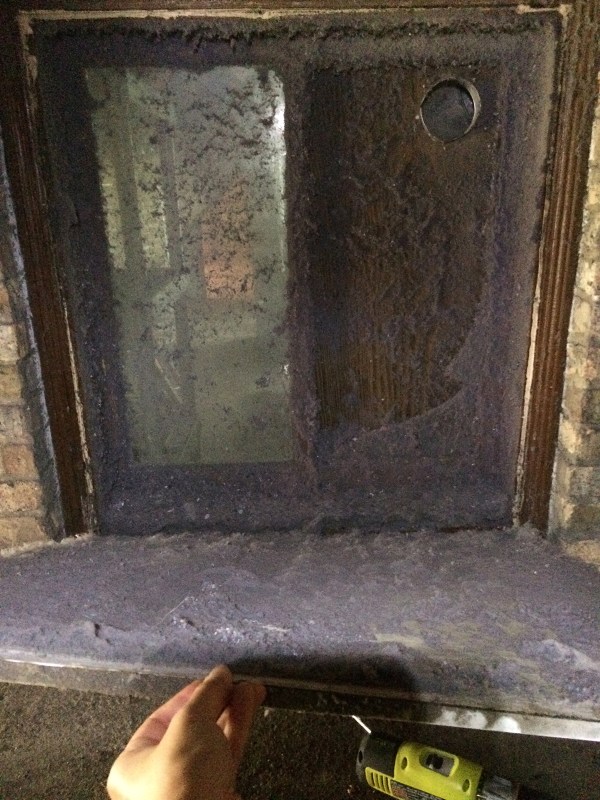
The window screen essentially served as a secondary dryer lint collector, which is far more gross than that dead bird and nearly as dangerous.
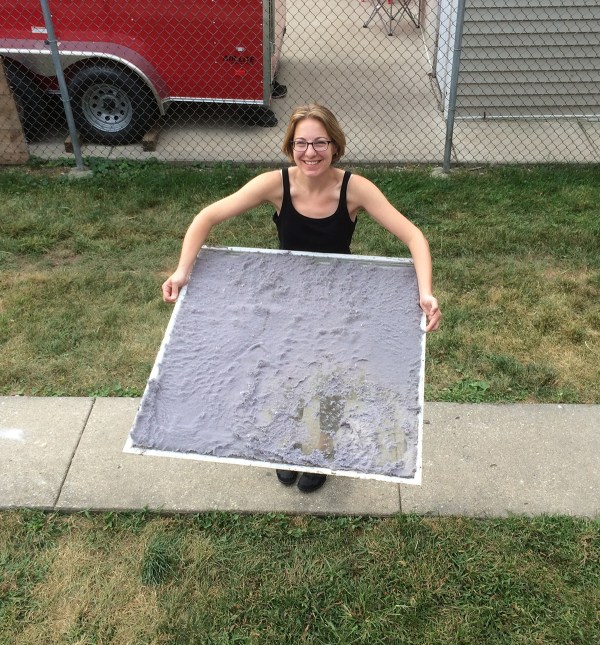
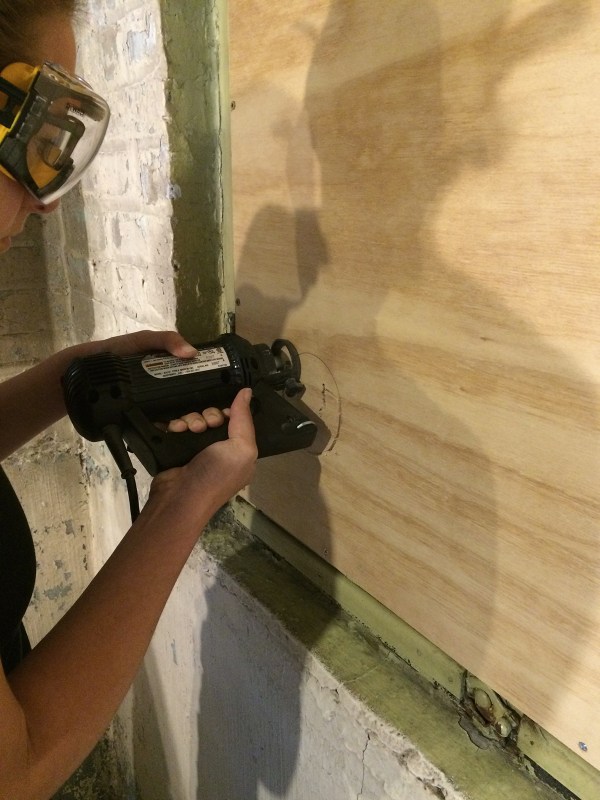
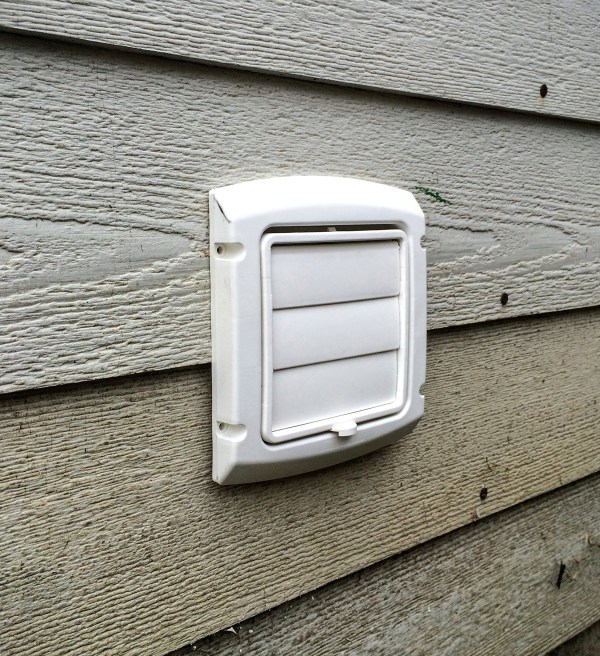
I threw away the screen, put up a board, learned a lot of about dryer vents, and installed a new one that ran all the way to the exterior wall. Exciting times, guys.
It would be nice if this duct were in a less visible place, but this is the best option for the current configuration.

Finally: paint it white.
So much painting. Two coats of primer on the brick/concrete walls, one coat of primer on the rest of the walls, followed by two coats of paint.
Before:
After:
I realize my “after” photos could very well be someone else’s “before” photos (and they’ll eventually be our before photos when we do a full basement remodel), but I’m still proud of the progress I’ve made with not much money and one thousand hours of hard work. It went from feeling like a place where you might get killed to being a pleasant area to do laundry.
Before: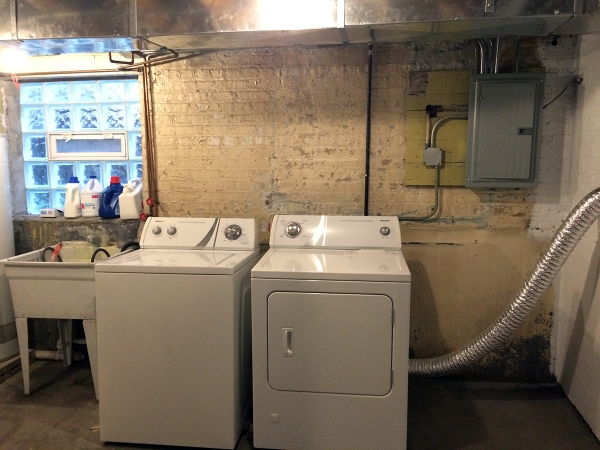
After:
Before:
After:
I was so excited to buy a new utility sink to celebrate the culmination of this project.
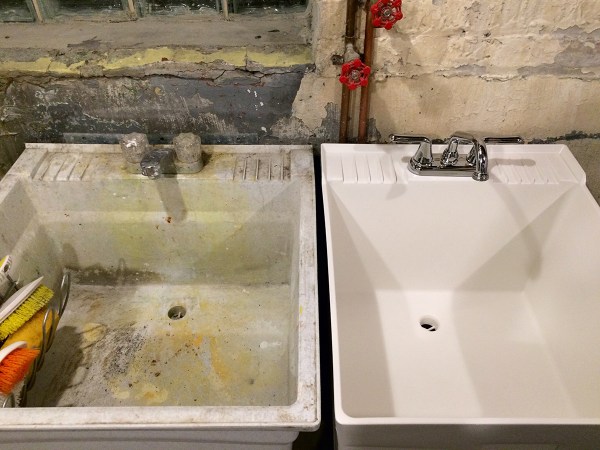
Isn’t that the the most beautiful thing you’ve ever seen? I bought the Mustee Utilatub (such a name!) at Home Depot, and the American Standard Colony Soft Double-Handle Laundry Faucet from Amazon. I removed the old sink and installed the new one myself. It was my very first plumbing project.
Before:
After:
I built a simple wood shelf to hide the crumbling concrete of the window ledge. That black hose is from our washer – not pretty, but necessary.

To commemorate the previous owners, I framed the sign and a water color painting they left tacked to the bathroom wall. Don’t even think about peeing in here.


I won’t pee in there, Marti! Its looking great- very impressed by the dryer hose project.
Kimberly, you earned your right to pee anywhere you want in our house.
I’m glad to see someone has same sort of laundry room I have. Except I have 2 washers that drain into ground
I wasn’t sure if you’d address the ‘do not pee pee’ sign, glad to see you did. I think it is hilarious that you framed that and hung it over the dryer lol. Great job making the basement look less like a scene from a horror movie and more like a place you’d want to do laundry. Can’t wait to see what you do with it next. So… what’s next on the list of things to tackle and blog?
Oh, geez, what ISN’T on my list?! Major things right now are the mudroom and the yard. I’m tackling the former and we’re paying for the latter. Posts coming soon!
This is great! I’ve got a very similar project going on right now in my laundry room of horrors and its encouraging to see your before and afters. Was it hard to paint around the electrical panel etc?
This is so awesome! I’m super impressed. We just pay people to come in and fix shit and then sit around moaning about how much it costs. I need to grow more of a spine.
Thank you! But don’t discount the merits of paying people to do shit: they’re doing the work AND giving you someone to blame if you’re unsatisfied with the end results.
Oh my god, loathsome is exactly the right word. It reminds me of my childhood basement, plus significant bird-related horror.
(The “before” stuff, I mean. “After” looks great!)
Thanks for appreciating the loathsomeness, and glad your childhood was spared bird-related horror.
Wow! What a transformation! Great work! The pee sign made me laugh. :)
Stacy :: Blake Hill House
Thank you, Stacy! Excited to see your pantry come together – good luck in the final sprint!
LOL – that sign is hysterical. Perfect finishing touch. Great job! Lindsey via LindseyVogelDesign.com
Thanks! Though I worry sometimes that visiting contractors will think it’s a message for them…
You have amazing determination and fearlessness, super powers necessary for older home renovation. I love these Chicago houses and they deserve some love! What beautiful work you are doing.
Super powers might be overstating it, but I’ll happily admit to dogged determination! I agree that old houses are worth it.
This looks SO fantastic! I love that you honored the pee pee sign.
Thank you, Kim! We’re a long way off from pocket doors and awesome wallpaper, but I’m inching my way there.
Really appreciated your renovation indecision post, by the way. Definitely feel ALL of that.
Marti, couldn’t you just move the washer and dryer closer to the wall if you wanted to cover up the vent?
Unfortunately, nope. The washer needs to be near the sink so it can dump out there, and the dryer needs to be near the existing gas line.
Ok, new idea, cover some boxes in aluminum foil and make it look like a robot cock.
Anyway, these are very enjoyable, thanks, Marti.
UGH LOOKS SO GOOD
I just reread your blazers post and am snorting into my wine glass.
Your posts fill me with an amazing sense of accomplishment and I don’ t even have to clean or do anything. Please never stop.
Now that your basement is beautified, when can we have a dance party?!
Probably when I’m visiting, duh.
First time home buyer- single gal- your post is EXACTLY what I needed to help tackle my basement! Love your writing style, will be looking at more of your posts! Thank you!
oh man, our basement laundry situations are so similar! Can you tell me how you added the great wooden ledge to the window sill?
Sorry for the delayed reply! The wood shelf is simply resting on top of the concrete ledge. The vertical piece of trim is attached to the shelf (not the concrete).
Looks amazing, Marti. Can’t wait to do mine. Pee pee I can handle, poo poo? no thank you!
I love that you took an ugly old basement and made it useable cute and clean. I’m renting and wouldn’t pay to redo the basement so this is inspiring.
You are helping to make me brave! 💪🏽 About to tackle my basement and turn it into a ray of sunshine.
Where did you get that little caddy that hangs on your utility sink? It’s exactly perfect.
This is so similar to our house. We have the meandering dryer vent. Prior to us installing it, the dryer just blew into the little laundry room. Humidity. We have the black hose that goes into the utility sink. The prior utility sink was concrete and a plumber came in to bust it out of here! I came to your site to get ideas on white paint on block. This was inspiring. We also found a rat skeleton in our attic, about the size of a house cat. Finally, in the scary laundry room, we found a plastic banana and “cigarette” rolling papers in the panel area of the old furnace. We’ve lived here 21 years, so it’s time to paint that laundry room. Thanks for the laughs and the inspiration.
Did your walls leak when it rained? If so, what did you do to remedy the problem?
Just found this when searching basement laundry rooms. I too have a ratty basement and I’m working on mine too! You did a great job it looks amazing!
Hi! How did you build the shelf For the basement window? I have a similar set up and would love to build a little shelf. Thanks!
Do you have a video on the reorganising of the plumbing? and what is the name of the thing holding the washer drain?
Amazing job
I too have a basement ‘scary’ laundry area….. Painting mine will improve it alot…what type of paint did you use?
Yours looks amazing!!!
Wow, wow, WOW! How satisfying and rewarding! I just painted my unfinished basement as first step to creating a pottery studio there! Your post gives me lots of ideas! Thank you!! Where did you get that laundry tub drainer? Brilliant! Must have one.
You did an awesome job ! I have a basement laundry room that’s almost as scary as yours was … you’ve inspired me to finally do something about it !!
Wow! Just wow!!! That pee sign is awesome and so is your sense of humor!!! Kudos on a wonderful job!!!
This is waaaaay old but I would love to know how you made that shelf. My basement is almost identical. I’ve cleaned and painted over the years but need to do more. Fabulous job! Love the pee pee sign. Ha!
Beautiful job! I love all the pictures. One idea for you: put a shallow bookshelf in front of the vent pipe that would hide the pipe and be wide enough to fill in the gap between the dryer and the window. You could store your cleaning products on it and cute knick knacks.
And it would be tall enough to hide the utility box on the wall. You could just swing out the bookshelf if you need to get back there.
And it would be tall enough to hide the utility box on the wall. You could just swing out the bookshelf if you need to get back there.
I am in the process of a very similar remodel.
Finished stripping off all the old paint this week. And started repainting, also white like you. Love the idea of putting the wood shelving over the old ledges. I’m definitely going to copy you on that one. Thanks for the inspiration!
Great job with the laundry room! I’m going to borrow a lot of your ideas. Where did you get the rack in the utility sink?