As I mentioned in my Kitchen and Dining Room Before and After post, I wanted to share some details and call out a few decisions I made throughout this makeover project. Turns out there was a lot I wanted to share, so I’m breaking it into two roundups. I know grand before-and-afters are fun, but I find the small changes really gratifying and important as well. So, here goes!
Cutting Board and Knife Block
To add some warmth and cohesiveness to the all-white kitchen, I DIYed three wood elements: the butcher block shelf was the biggest component, but I also worked on the cutting board and knife block. Our Wüsthof knife block was a light maple color. The cutting board’s original finish was closer to gray than it was to brown.
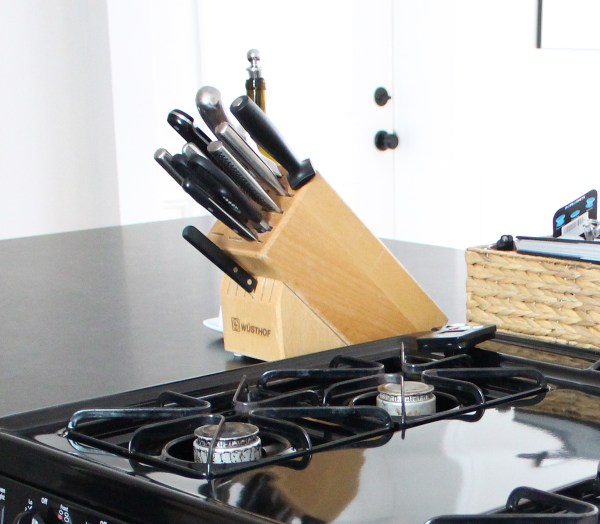

I sanded both items and stained them using the same mid-tone walnut stain color that I used on the shelf.
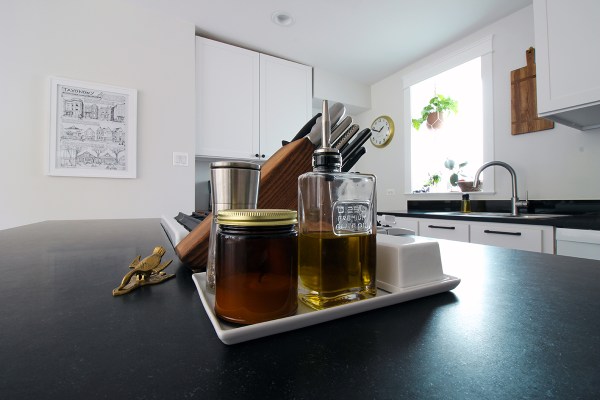
Counter Tray
This isn’t a DIY; it’s just something I like. I corralled our most frequently used kitchen items with a Cuatro Platter from CB2:
- This Optima Oil Bottle from Crate & Barrel is a cool shape (different from the classic tall bottle) and holds a lot of olive oil
- Acacia Salt Cellar, also from Crate & Barrel
- Pepper grinder (not sold anymore)
- Porcelain Butter Dish from Sur La Table
- A fancy candle from Alapash
That brass bird back on the left is a vintage clip – we use it to leave notes on the counter (my notes always say “Went to Home Depot”).
Hidden Microwave
Everyone always asks “Where’s your microwave?” Just kidding – no one has ever asked that. But I’m going to tell you anyway: it’s in the cabinet above the dishwasher.
This cabinet is actually a base cabinet: it’s far too deep to be hanging over a counter. (It’s a miracle Jarrod hasn’t rammed his head into yet.) The upside of this cabinetry oddity is that it’s big enough to hold the giant microwave I bought off Craigslist 8 years ago.
There was a center piece of wood that came out easily by unscrewing it. That piece is what bridges the space between the cabinet doors – you may notice a small gap between the doors, but it doesn’t bother me.

I installed this sturdy tray divider from The Container Store to keep our cutting boards corralled and standing proud. It also ensures there’s plenty of ventilation around the microwave, which is something people like to get preachy about online.
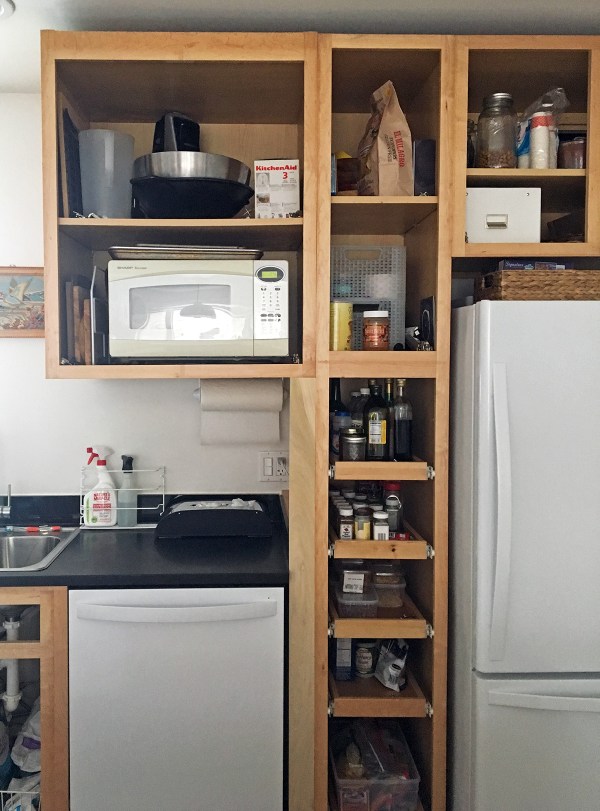
The power cord runs discretely from the outlet below through a small hole I drilled in the bottom of the cabinet.
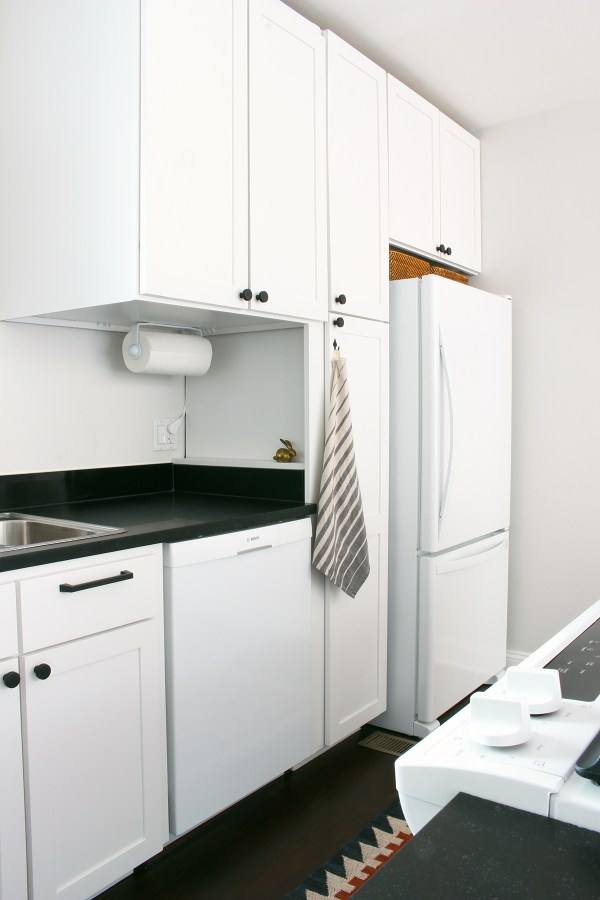
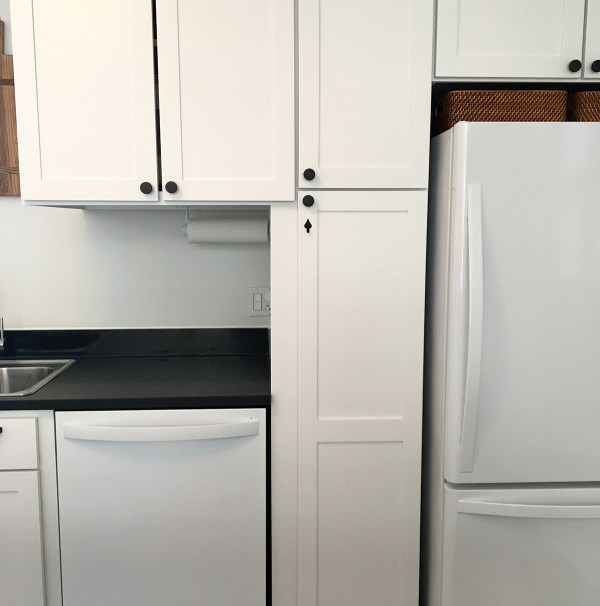
Cabinet Filler Piece
If you scroll back two photos, you’ll see a piece of non-matching wood next to the dishwasher. Previously, there was a several inch gap between the dishwasher and the cabinet, which made the dishwasher insulation and counter support really visible. Oddly, there were two filler pieces there (installed side-by-side), but they didn’t bridge the gap.

I removed those pieces and replaced them with one larger piece of wood. Once painted, it looks seamless.
Towel Hook
No detail is too small for this post! This cabinet door is the ideal place for a hanging towel: it’s accessible from the sink and the stove, and the towel doesn’t get closed in a door/drawer like it would elsewhere. I wanted a very small hook that coordinated with but wasn’t identical to our knobs – I didn’t want it to look like this door had two knobs installed in it.
Solution: this Forged-Iron Colonial Heart Hook from House of Antique Hardware. Love it.
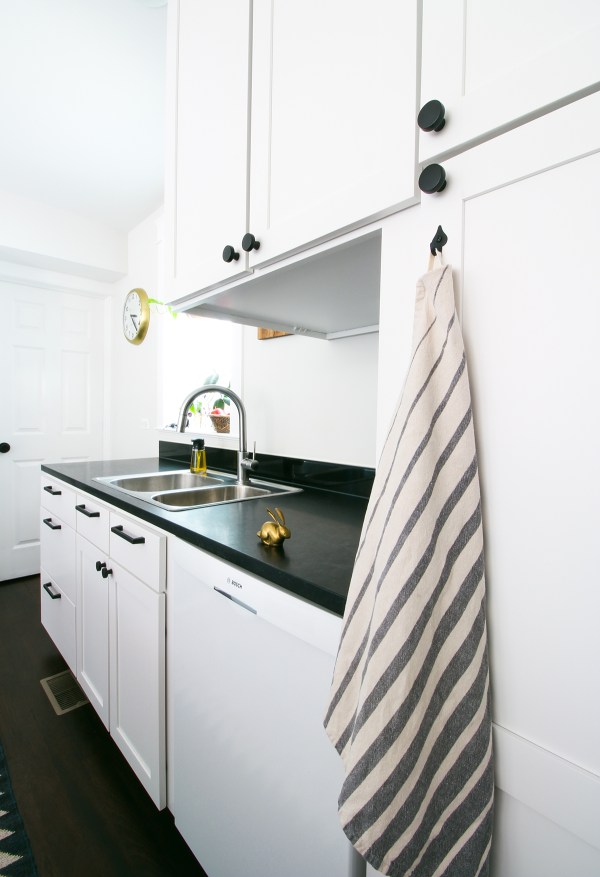
That brass bunny is our “dishwasher is clean” reminder – I set it on the counter after I start the dishwasher.
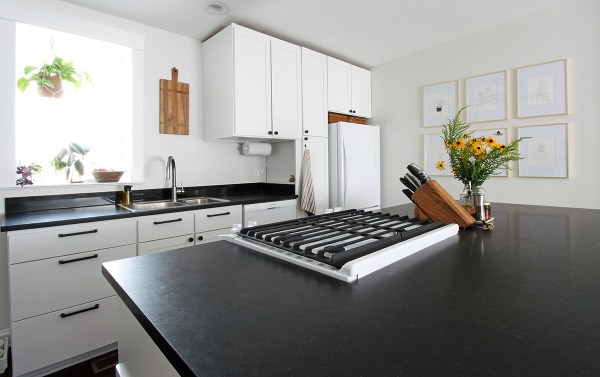
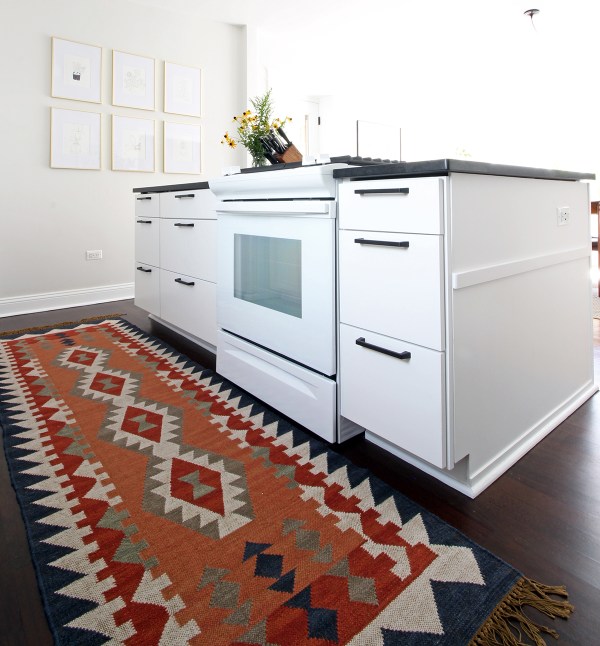
Slide-in Range Cut-out
The counter cut-out for a slide-in range was very shallow. The previous range wasn’t flush with drawers, and the new one protruded even more. This wasn’t a surprise or an accident – I had planned to get the hole enlarged after the range was delivered, so it could be cut to size.

I hired Perfect Granite and Marble to do the cut – it was a high-stakes 5 minutes, and it turned out perfectly indeed.

Appliance Decals
Did anyone notice a small change in the two range photos above? I removed the Whirlpool decal from the range and the fridge.
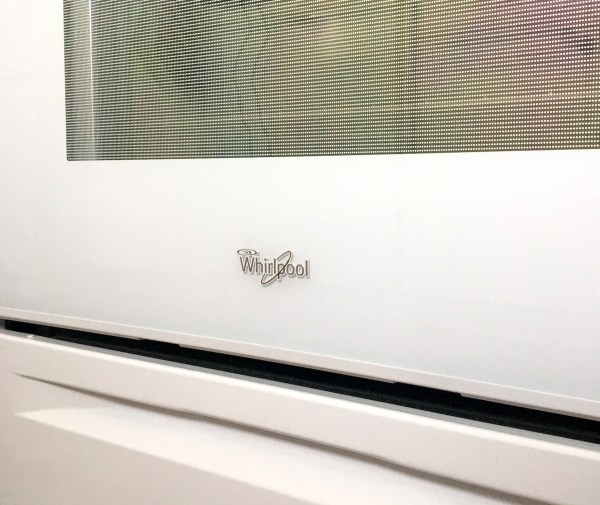
Why do appliances have to come with big logo decals on them? I know they’re Whirlpool – I don’t need corporate branding to remind me. If anyone visiting our house wants to know what brand they are, they can ask me or visit projectpalermo.com on the world wide web.

I used a hair dryer to warm up and loosen the adhesive, and then ran a piece of floss behind the decal to remove it.
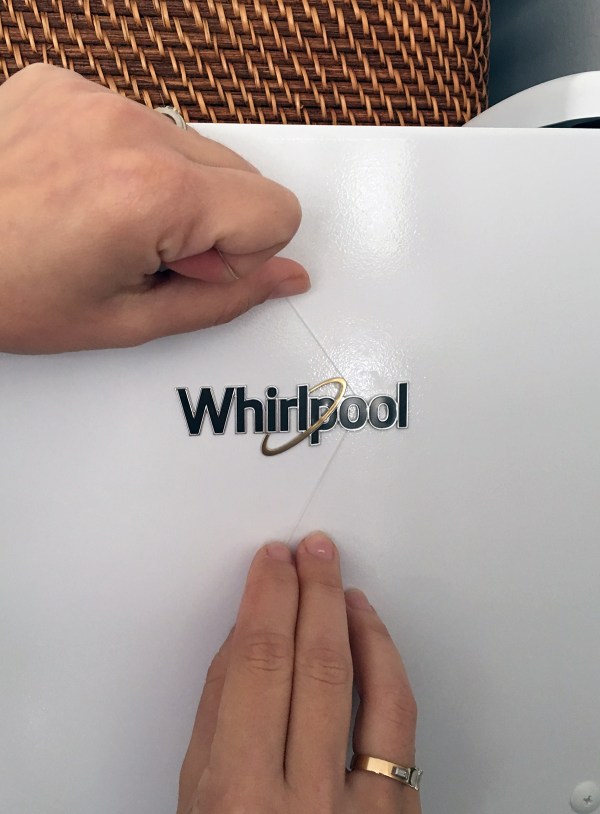
They both came off easily, leaving only a small amount of residue, which I scrubbed off. Byeee, Whirlpool!

I’ll return by the end of the week with the second roundup.
