Shortly after we moved in, I bought a used IKEA cart from a friend and that’s been our toaster and coffee station ever since.

It did the job well and looked okay, but it was too narrow to balance out the width of the cabinet above it. I knew I’d want to replace it with something in a walnut finish after we had the cabinets painted white (more on that in a future post, and you can check out my saved Instagram Story.)
When I first started thinking about a replacement, I was focused on finding another multiple-shelf cart because that’s what we’ve had for so long. I do this sometimes: get focused on one option – thinking it’s THE solution – at the expense of considering other routes. Once I realized A) we have plenty of storage elsewhere and B) the trash and recycling would fit well here, everything clicked.
Before purchasing anything, I installed a test shelf using supplies I had on hand to make sure Jarrod and I liked this setup.
This trial balloon immediately made the kitchen flow so much better. Having the trashcans here makes the basement door much less crowded – it was fine for the most part before, but awkward/cramped when carrying things (e.g. laundry) downstairs.
By moving them, the door is more easily accessible and the trashcans are aligned with our work areas. It’s a straight, natural path to throw things away, as opposed to turning right around the counter.
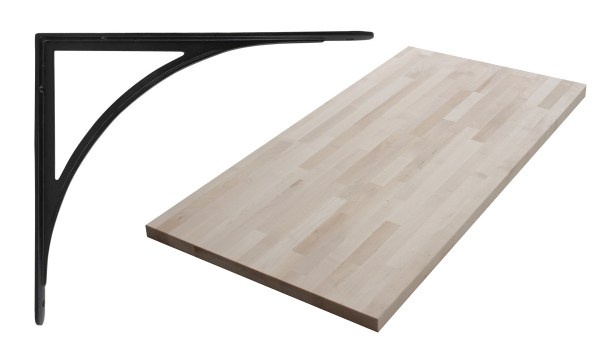
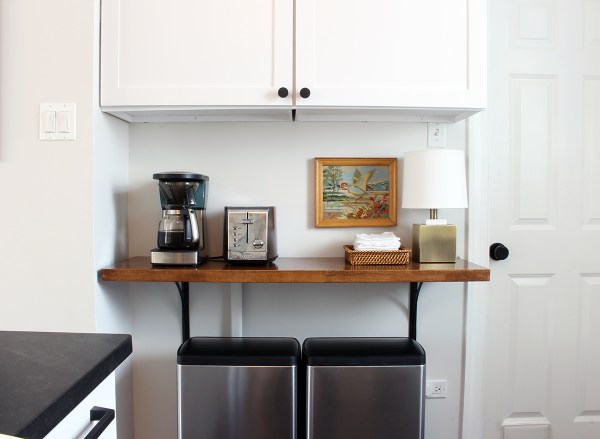
I ordered these heavy-duty cast-iron brackets from House of Antique Hardware. I bought this butcher block countertop from Menard’s, which I cut to fit. While I love the look of the IKEA KARLBY countertop I used for our two-person desk, that surface is a thin veneer over particleboard. Jarrod has a major coffee catastrophe at least once a quarter (e.g. turning on the coffee maker without the carafe in place to receive the brewed coffee), so we need a solid wood surface that can take abuse and be refinished down the road.
I did sample swatches of two Varathane stain colors: American Walnut and Dark Walnut. American Walnut looked a little too country.
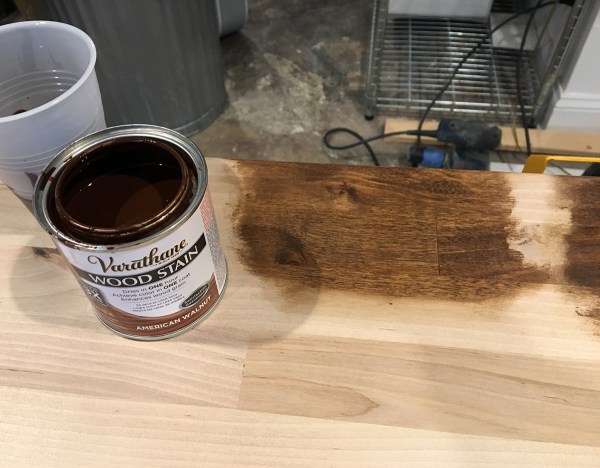
Dark Walnut looked a little too flat brown.
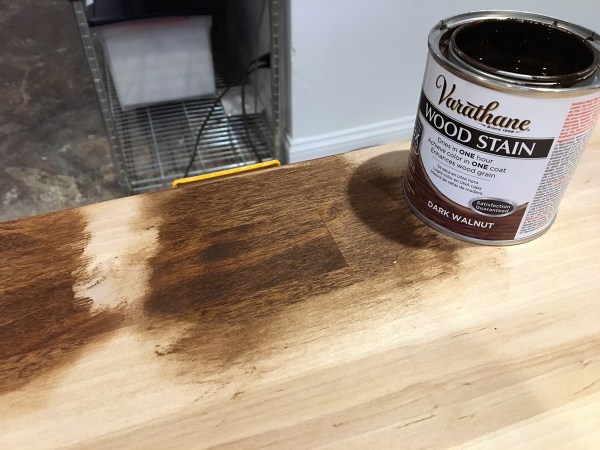
So, I ended up doing a 50/50 blend. I used Minwax’s Pre-Stain wood conditioner before applying the stain. This was my first time using Varathane stain and I really liked it – it’s less runny than Minwax stain and the pigmentation seemed richer.

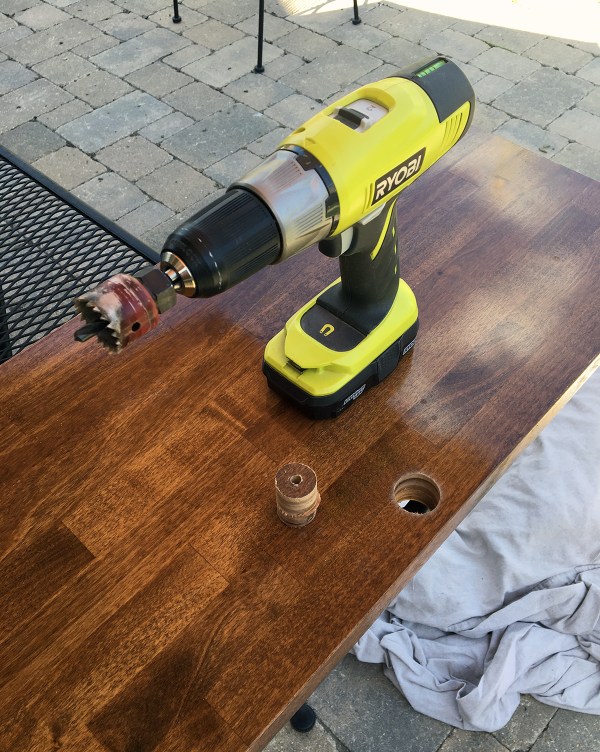
I sealed the wood using four coats of Waterlox, following the steps Yellow Brick Home describes. Afterward, I drilled a hole for the appliance cords. (I knew that if I drilled the hole first, it would lead to a lot of messy drips.) I applied stain to the inside of the hole using a paper towel. In the end, you don’t even see it.
The dustbuster moved to the adjacent mudroom, the cat food station is now tucked next to the sink, and the cookware is in cabinets or the under-oven drawer (our previous range didn’t offer storage because the burner was in the bottom drawer).
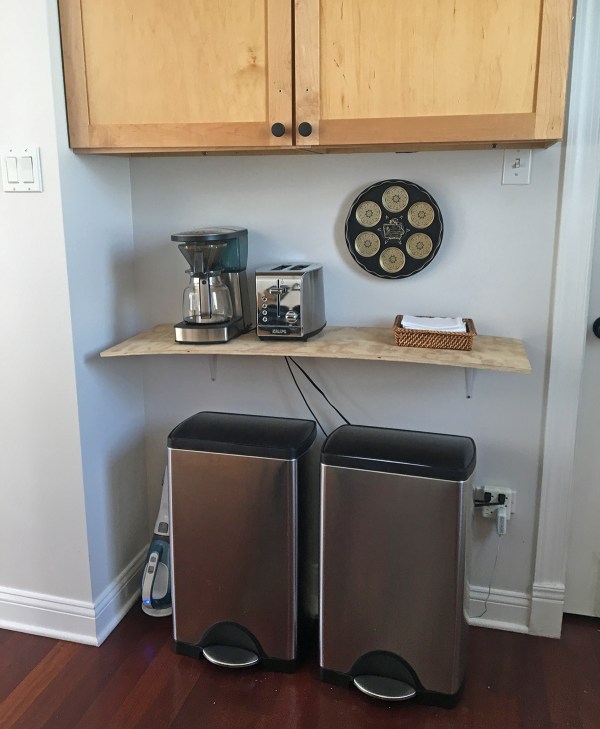
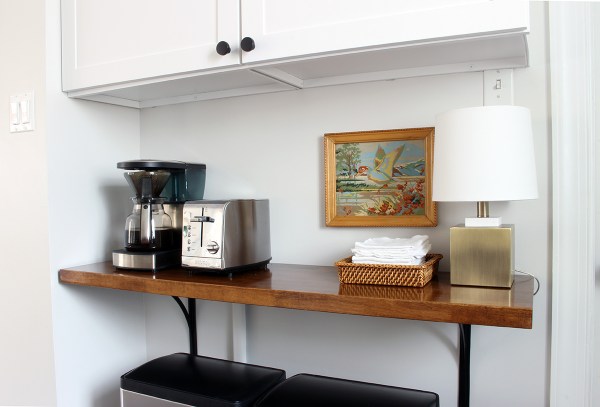
Here’s what it looks like now:

I used this J-channel raceway to route the cords. It’s a little larger than other options, but I like that the design offers easy access to the cords – e.g. for removing the appliances when Jarrod has his quarterly coffee catastrophe. I painted it the same color as our walls (Irish Mist).
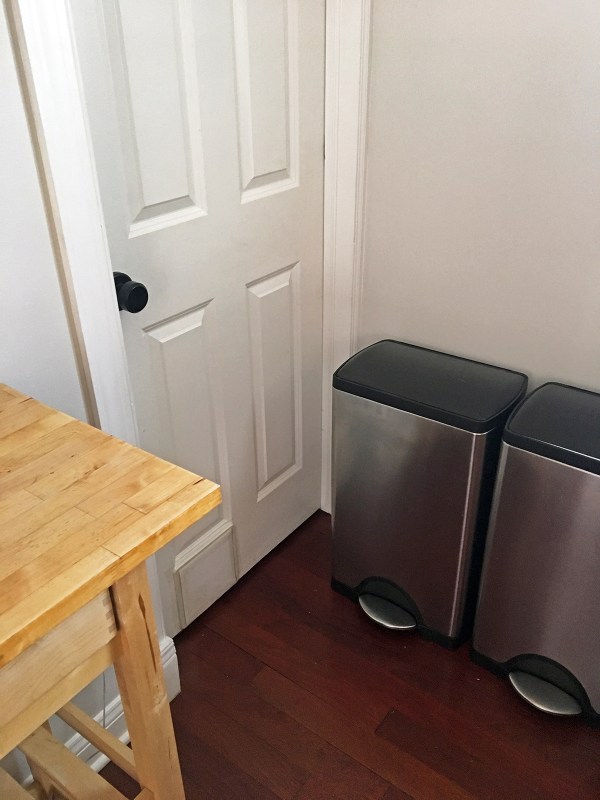
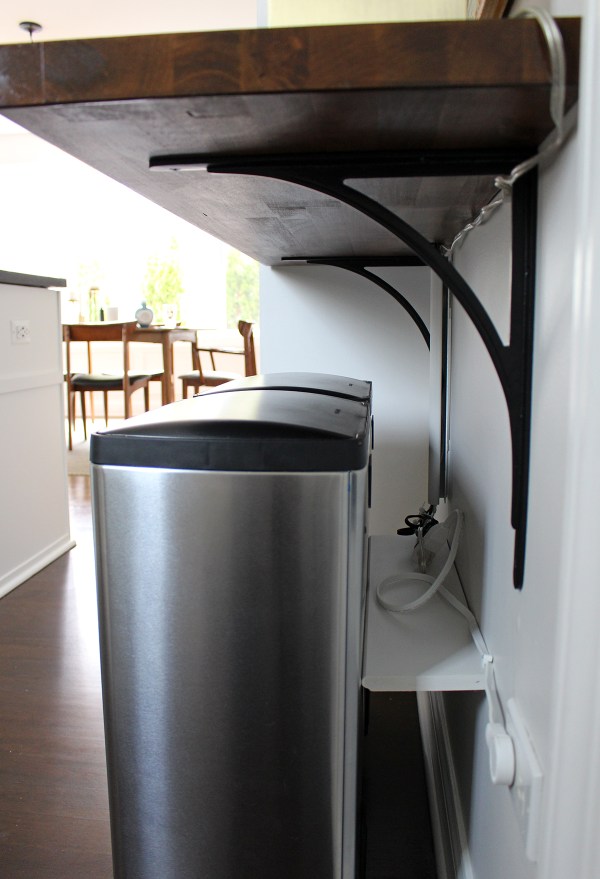
The shelf height allows the can lids to open nearly entirely – at least 90%, which is totally sufficient for throwing stuff away. (The shelf is 36″ high, same as our counters – it just looks higher because of the camera perspective.) Ergonomically, the most important part of this placement is keeping the trashcans pulled toward the front of the shelf. If they’re pushed to the back, it’s less comfortable to use. Below, you can see how they align with the adjacent wall.
There’s a secret trick: I installed a simple 5-inch deep ledge behind the trashcans to keep them in place and perfectly aligned. It also hides the cords and keeps them off of the ground.
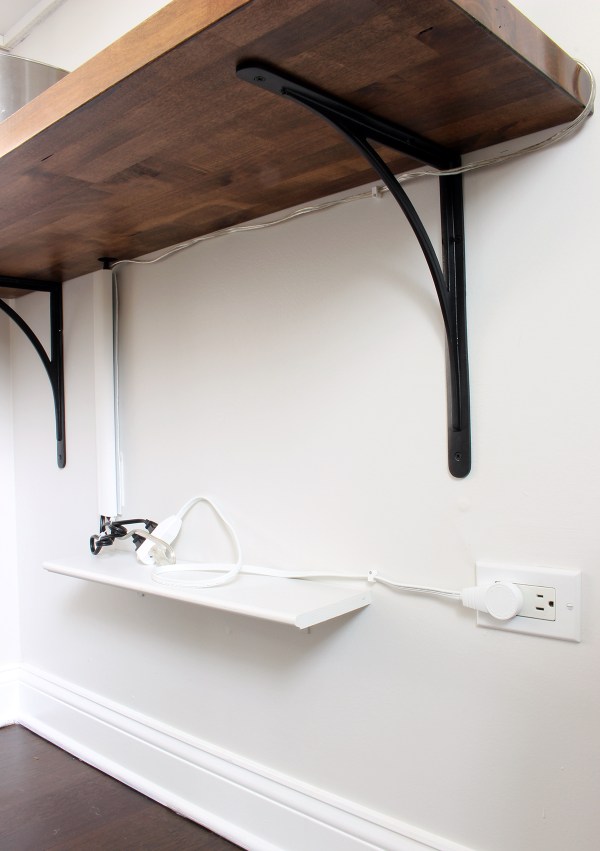
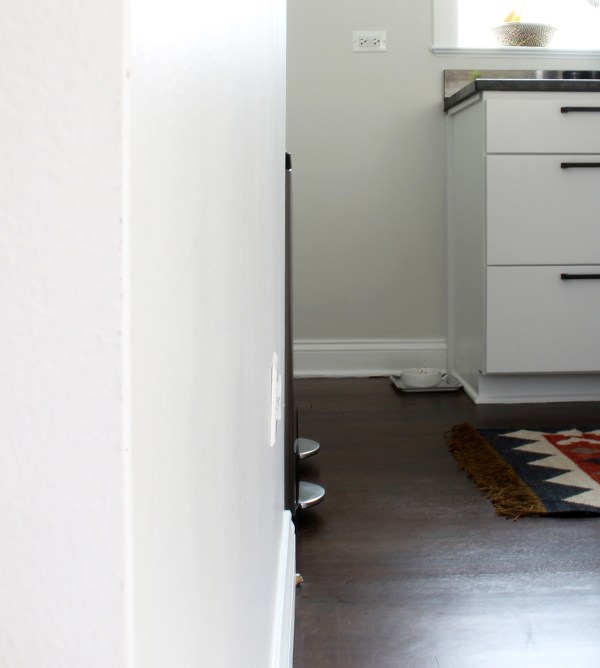
The ledge is hidden unless you’re crouched looking at it from this back angle, which is not where folks usually hang out.
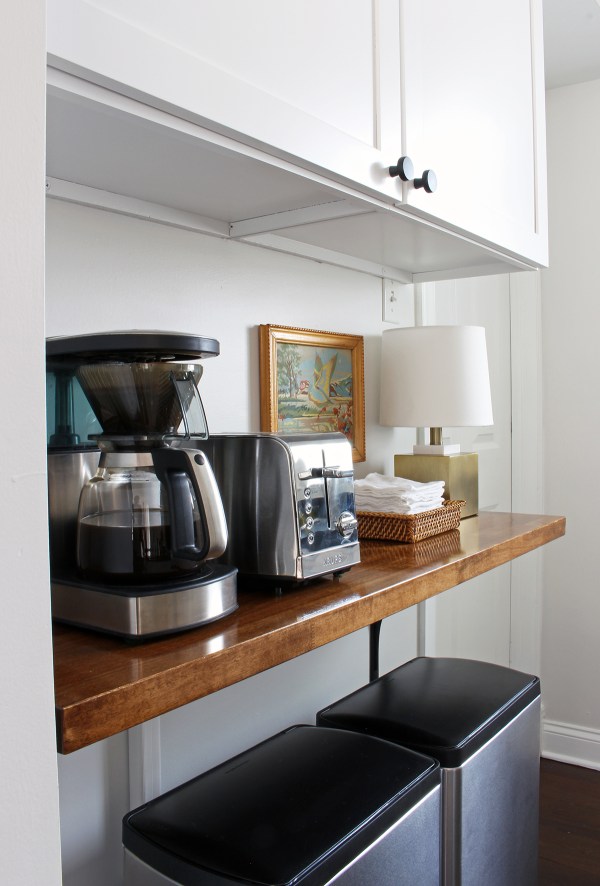
The accent lamp adds some warmth to the space, especially in the evenings. The art is a vintage paint-by-numbers I found at an antique store in Normal, Illinois on our way to my nephew’s Bar Mitzvah. I’m still deciding on the frame – I think I like that it’s a little offbeat/ugly.
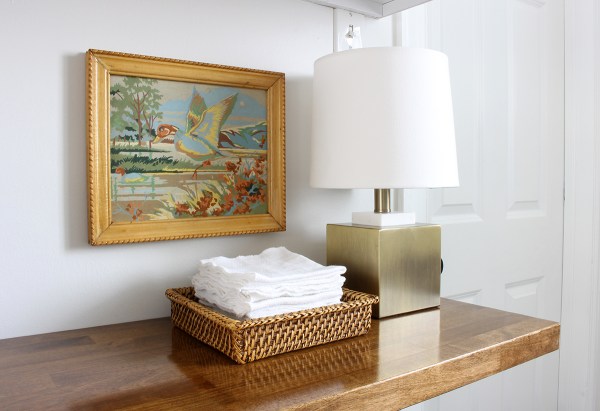
The basket holds our reusable napkins, which I love. They’re smaller than the average cloth napkin, absorbent, and perfect for daily use. I bought our first batch in 2013; in 2017, I replaced them with a new batch and the old batch is now used as rags. Five stars, highly recommend!
I’m still wrapping up the final details on the rest of this makeover. I’ll be back with a couple more kitchen posts once I do!

Hi there! Love the update to the coffee bar. I actually do like the quirky nature of the paint by number frame, it’s pretty unique. Also, wanted to let you know the link to the Etsy site for the napkins is incorrect. :)
Thank you! And thanks so much for letting me know about the link – fixed now.
Beautiful job on that stain! Love the painting.
Thanks, Kimberly! Can’t wait to see what you do in your new kitchen.
Hi! Maybe it’s my phone but I’ve been thinking about napkins and would love to checkout the ones you recommend but the link isn’t working for me? Thanks in advance!
This looks so good, Marti.
Thank you, Stacy!
ARE NOT YOU GETTING SLICK? LOVE DAD
On Sun, May 13, 2018 at 6:56 PM, Project Palermo wrote:
> Marti posted: “Shortly after we moved in, I bought a used IKEA cart from a > friend and that’s been our toaster and coffee station ever since. It did > the job well and looked okay, but it was too narrow to balance out the > width of the cabinet above it. I knew I’d want t” >
Haha, thanks, Dad! I am your most clever daughter, it’s true.
Yay! I love it! I love the walnut finish, and your secret cord ledge. That’s so clever; I’m totally going to use it in future.
Thank you! I’m super happy with out this nook turned out.
Great transformation!
Is that a goldfinch on the painting?
Thank you! The painting is of a duck – probably a mallard, but the artist took some liberties with its colors.