I dove into my kitchen makeover this past month and knocked out three things that already have me liking the space a lot more: a new faucet, cabinet hardware, and window moulding.
Faucet
Our previous faucet had a leak that was getting progressively worse: the water would only shut off when the handle was turned to a precise 9 o’clock position. Also, the faucet head was low which – when combined with our rather shallow sink – meant dishwashing space was kinda cramped.

To replace it, I bought this Delta Trinsic faucet in stainless steel. It’s really nice and was easy to install. The feature that sold me on this one is the MagnaTite pull-down head: it has magnets, so it connects really securely to the faucet neck and, because magnets are magic, that connection won’t weaken over time.
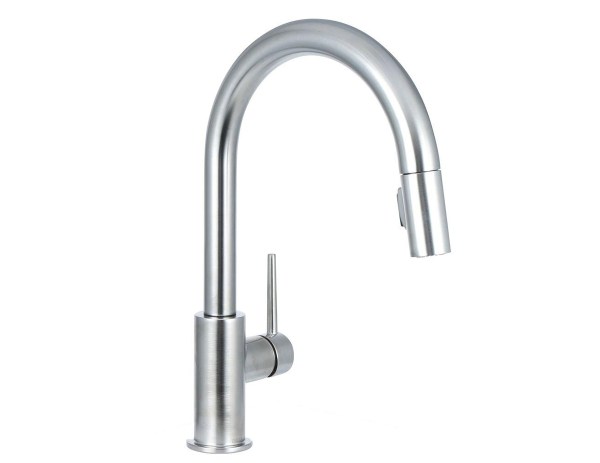
You’ll have to stick around until the end of this post for faucet After photos…
Hardware
As I mentioned in my Kitchen Decision Making post, I ordered Amerock’s Blackrock knobs and pulls. Five of the drawers already had pulls, so I was able to simply swap out those.
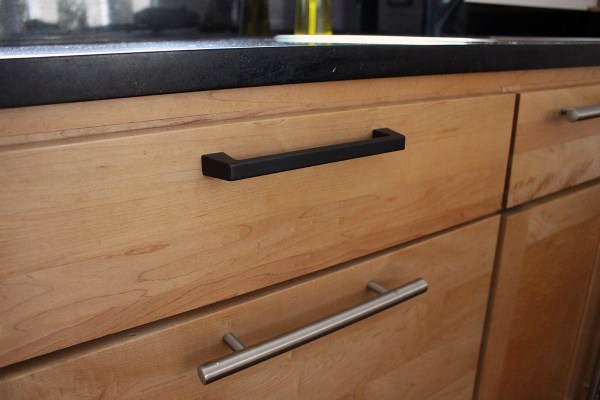
The other nine drawers had these tiny pull tabs – you could only grab them with your pincer fingers. (Thanks to this guy’s blog post for addressing the pincher/pincer word choice issue for me.)

The pulls weren’t practical, especially on the giant drawers laden with heavy cookware. Thanks to Jarrod for hand modeling the pincer issue for me.

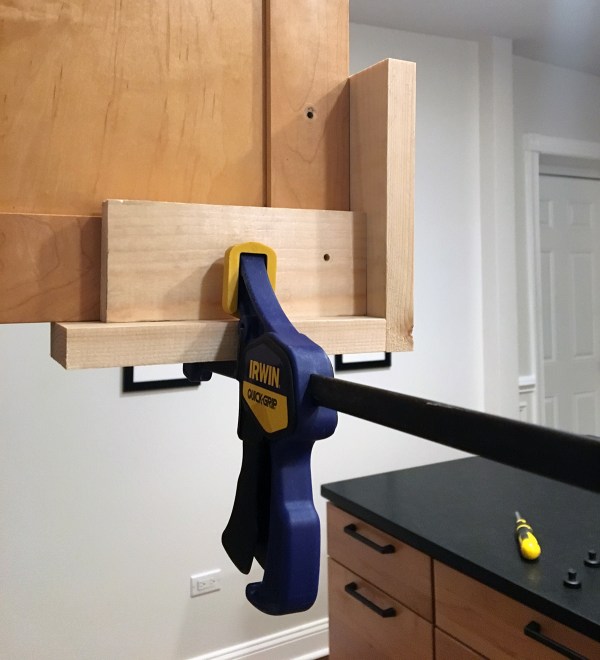
I bought a hardware installation template set and neither worked for my needs. The pull template wasn’t wide enough and the knob template didn’t have a hole option that aligned with where I wanted to place the knobs. D’oh. So, I improvised.
To install the pulls, I removed the front from one of the drawers that originally had a pull and used that as a template for the other drawers. I aligned the tops, made sure it was centered, clamped them together, and drilled.

I kept it simple and used the same size pulls on all of the drawers. It’s narrow enough to not look ridiculous on the smaller drawers, and wide enough to not get lost on the bigger drawers. EZPZ.
For the knobs, I made a simple template using scrap wood.
Window Trim
In addition to my miter saw and drill, I used three new tools for the first time on my window trim project, so I thought I’d round them up quickly here.
Table saw: I finally bought my first table saw this year. It’s the final frontier of saws for me. Despite regularly using several other power saws, a table saw has always seemed daunting. I purchased this Dewalt 745S – Home Depot offers this “Special Buy” that packages the DW745 with a stand, which is indeed a good deal. It sat unopened in our basement for weeks until I discovered Steve Ramsey on YouTube. I don’t usually like how-to videos (I prefer to read instructions) but this 7 Things To Get You Started Using a Table Saw video is great: it gave me the confidence I needed to safely use my new saw.
Kreg Jig: Confession: I’ve had a Kreg Jig kit since 2013 and have never used it until now. Again, I watched a Steve Ramsay video – Beginner’s Guide to Pocket Hole Joinery – and then used it to join the wood for my window stool.

Brad nailer: Whenever I see bloggers installing trim, they’re usually using a pancake compressor and gun (like trim pros Yellow Brick Home), so I assumed I’d have to invest in that as well. But I discovered this Ryobi AirStrike, which uses the same battery system as my drill (which I love) and my string trimmer (which I hate). This brad nailer worked great on my window trim and it’s made me more excited (read: less full-of-dread) about replacing the rest of the first floor moulding.
Now that we’ve addressed the tools, here’s the order in which I tackled the window trim.
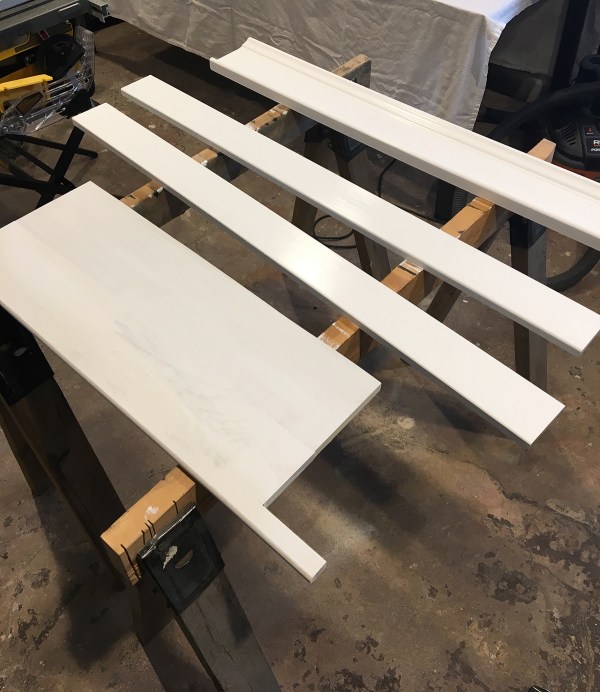
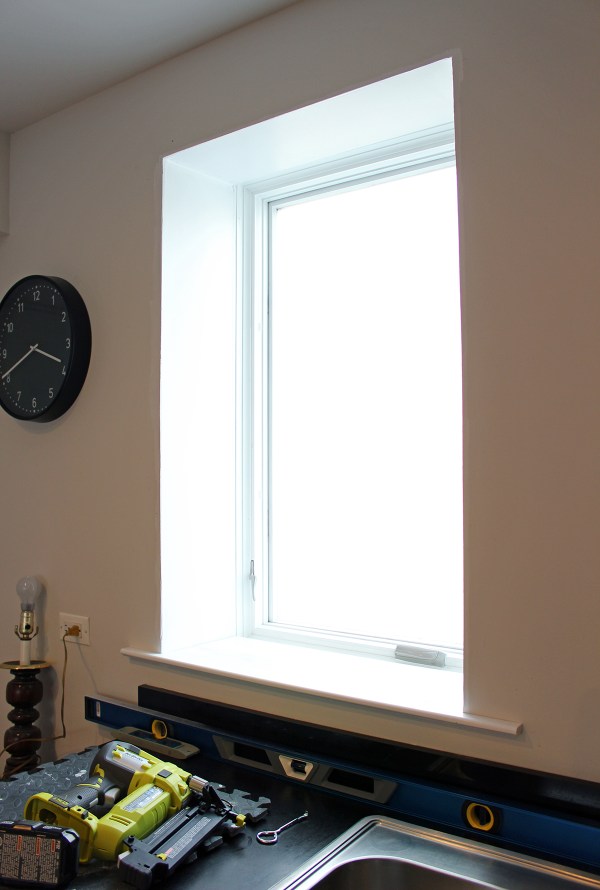
1. I did a dry-fit of all the component parts, cutting everything to size with my table saw and miter saw. One tool I don’t have is a router, but I wanted a rounded edge for my window sill. This Alexandria Moulding Stool—available by the foot in-store—did the trick. It’s not deep enough for my window well (our bungalow’s exterior walls are built with two layers of bricks!), so I attached another piece of wood cut to the appropriate depth as shown above.
This picture of me dry-fitting everything cracks me up because a) Where is my head? and b) Those shoes are hideous. Fleet Feet (a local shoe store) gives you sass if you express concern about aesthetics of athletic shoes instead of fit, which is how I ended up with these froggers.

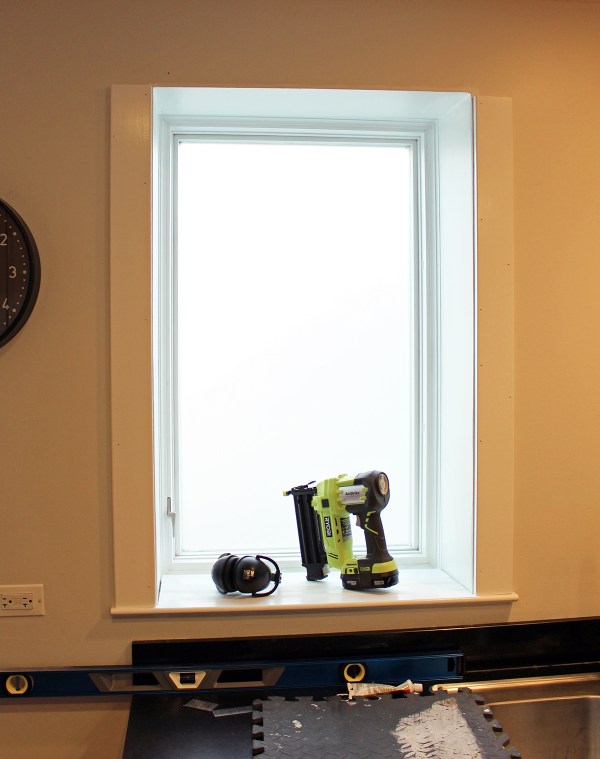
2. Once I confirmed everything fit properly, it all went back to the basement for a first coat of paint.
2. Then it was time to install for real. The window stool went in first; it’s nailed and glued in place.
2. The side trim pieces (AKA casing) went up next. It’s simple moulding from Home Depot.
3. For the header (AKA architrave), I used this Interior Primed MDF Window and Door Casing (Model #538A-MDF8) from Lowe’s. It’s all one piece, making it easier to install – I just needed to cut the return pieces. (See this post from Ana White for more details.)
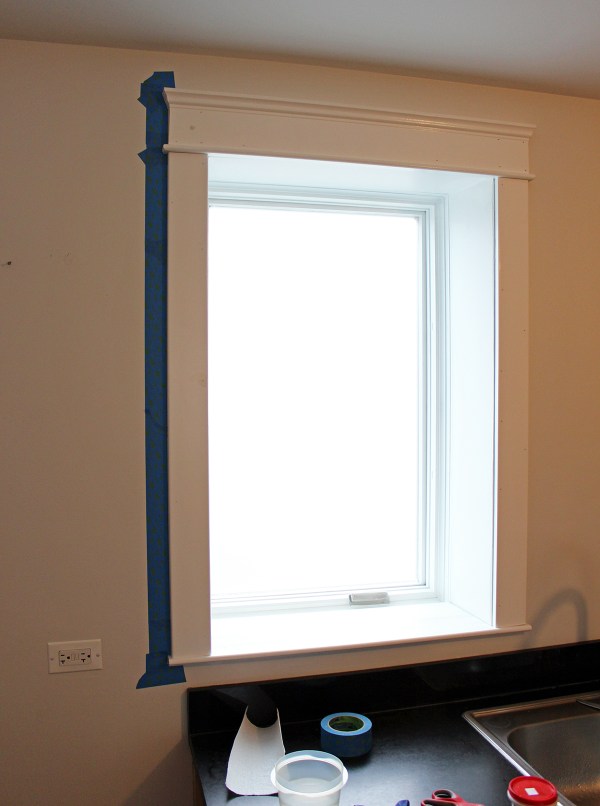
4. I used a piece of cove moulding as a simple apron below the stool. I wanted something under the sill to make the window look more finished, but it couldn’t be very wide because it would further accentuate the slight slant of the counter backsplash. My trim is perfectly level and square, but everything around it isn’t!
I cut the cove moulding at an outward angle to make the ends look more polished.

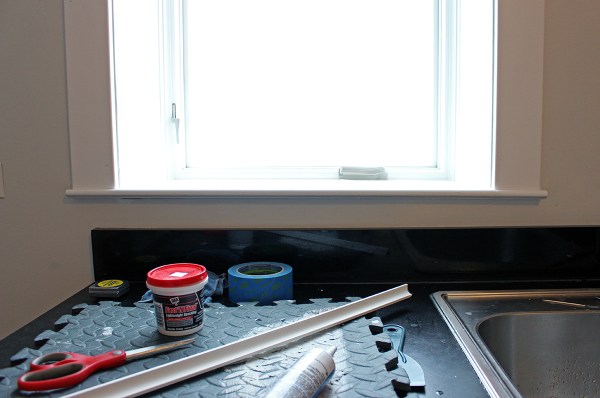
5. The window well is more rhombus than square, so I used backer rod and caulk to fill in the unavoidable gaps on the sides of the stool.

Note: ideally the stool would be flush with the bottom of the window, but that wasn’t an option here. You only notice that it’s raised when you’re looking at it from this angle, and why are you looking at it from this angle?
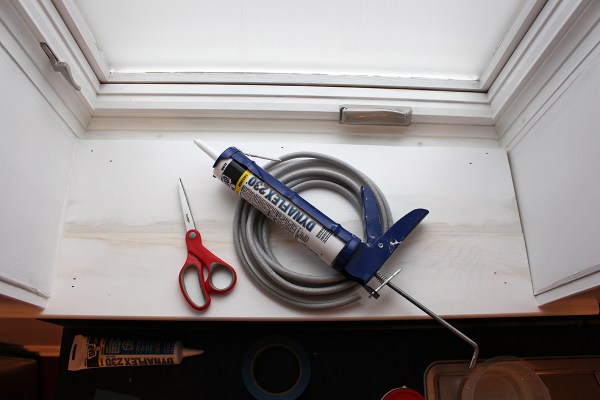
Here’s everything all caulked, patched, and painted, along with the new faucet and hardware:

Just like with my remodeled bathroom window trim, now this window looks like a feature of the room – not an afterthought.
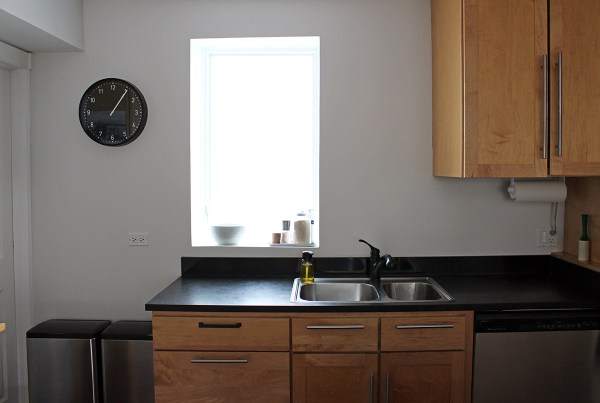

So glad to get rid of those stainless bar pulls. And I don’t have to worry about patching the holes they left behind because the cabinet painter will do it: yessss.
Up next: floor refinishing, then appliance delivery, then cabinet paint. (And art, and lighting, and more!)

It looks fantastic! I have those same pulls and hate them.
We have the same pulls and I’m not fond of them either. I love your hardware choice and I’ve saved the links for both that and the faucet, which I also love in my household replacement folder. Another project done so well!
We picked out the same faucet and LOVE it! I love all of your updates! Keep posting!
We had the Delta Trinsic faucet in our last home and loved it.
http://halfclassicsix.com/the-kitchen-is-finished-finally/
The window frame turned out nice :)