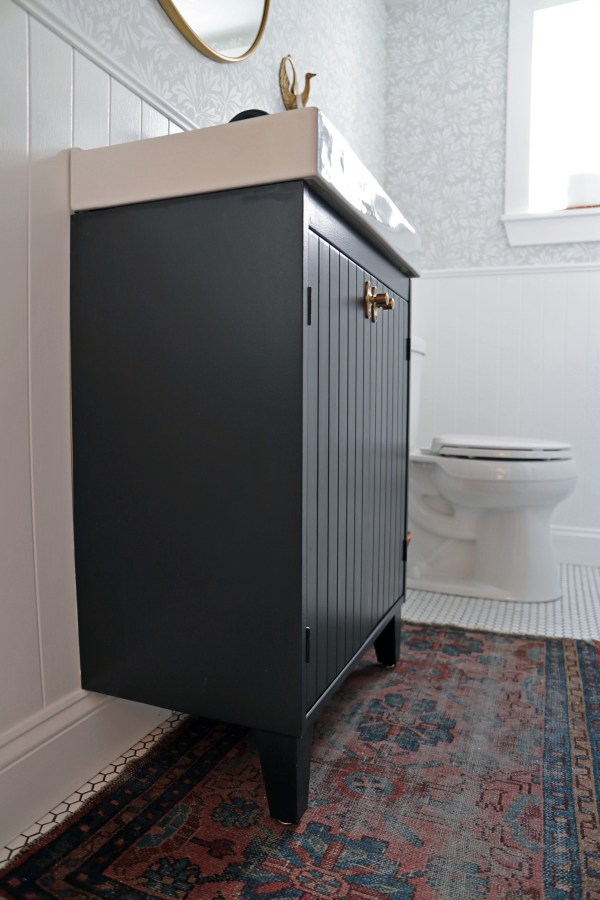
This post details how I customized an IKEA SILVERÅN vanity for our newly-remodeled half-bathroom. Because this powder room is in a visible spot on our first floor, I wanted a vanity that looked like a piece of furniture we’d have elsewhere in the house.

As I mentioned in my Bathroom Decision Making post, I was unable to find an off-the-shelf vanity that fit both my taste and the small space. I got quotes from a variety of places for a simple custom vanity, all of which came in around $1k (for the cabinet only – sink not included). I didn’t want to spend that kind of money on such a small piece and decided to take my chances on an IKEA hack.

There are two IKEA SILVERÅN cabinet finishes: white and light brown. The white one is made up of particleboard and plastic. It’s $20 less expensive, but it feels and looks even cheaper. The light brown one is solid pine. I chose this one because it felt sturdier and would be easier to customize. I bought it when IKEA had a 20% off sale on bathroom products, which made it $88. Cheap! And, I reused the existing sink. Free!
To start, I cut the vanity’s depth down to size to fit our 14″ sink. The 9″ SILVERAN was too shallow, so I bought the 15″ version and cut a couple of inches off the side panels. I won’t go into detail on this because I can’t imagine anyone would find it interesting.
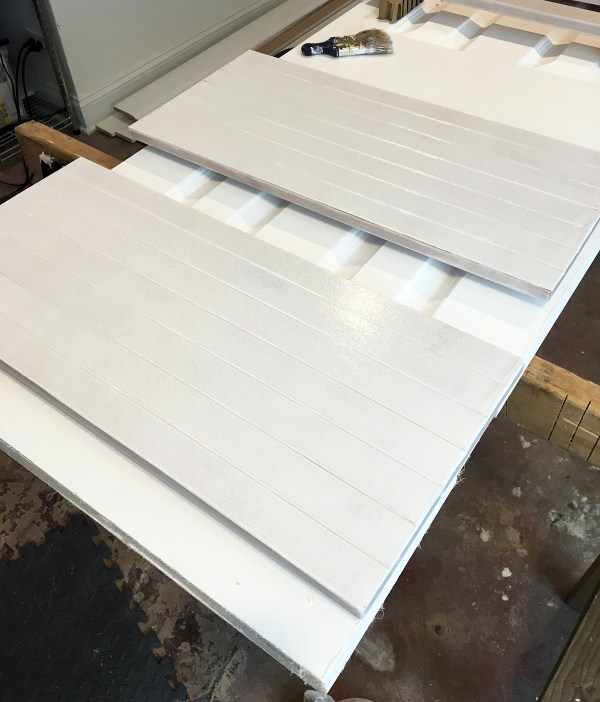
Painting the vanity was straightforward: I sanded the wood to rough up the lacquer, then primed and painted. I used Benjamin Moore’s Mopboard Black; it’s part of their Williamsburg Collection, which also includes the Gunsmith Gray color I used on our house’s exterior. I like curated color collections like this – helps me from getting overwhelmed by options.
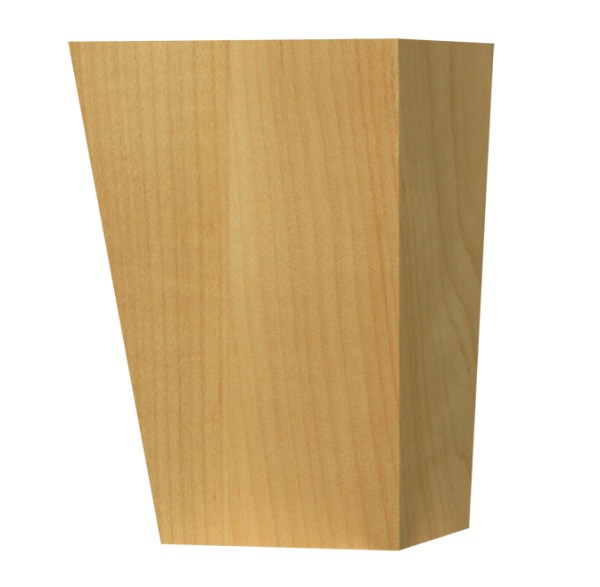
I wanted legs that tapered on two sides, and Google led me to Osborne Wood Products. I ordered the 5″ tapered feet. I chose the red oak option because it’s a hard wood and I figured it would stand up better to dings than some of the cheaper options would. (Did you know there’s a scale called the Janka hardness test?) Osborne offers a lot of nice furniture feet options – way more than you’ll find at a local hardware store.
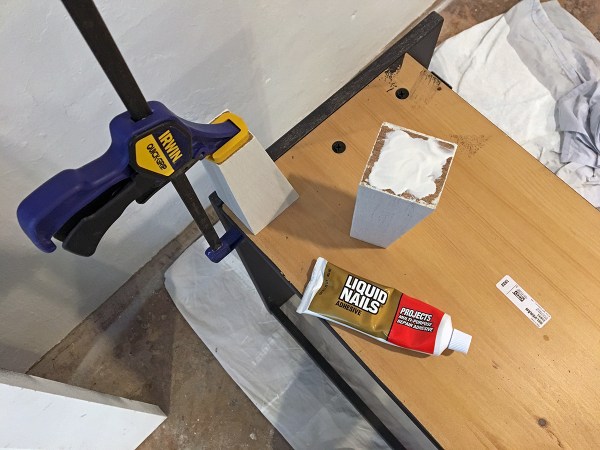
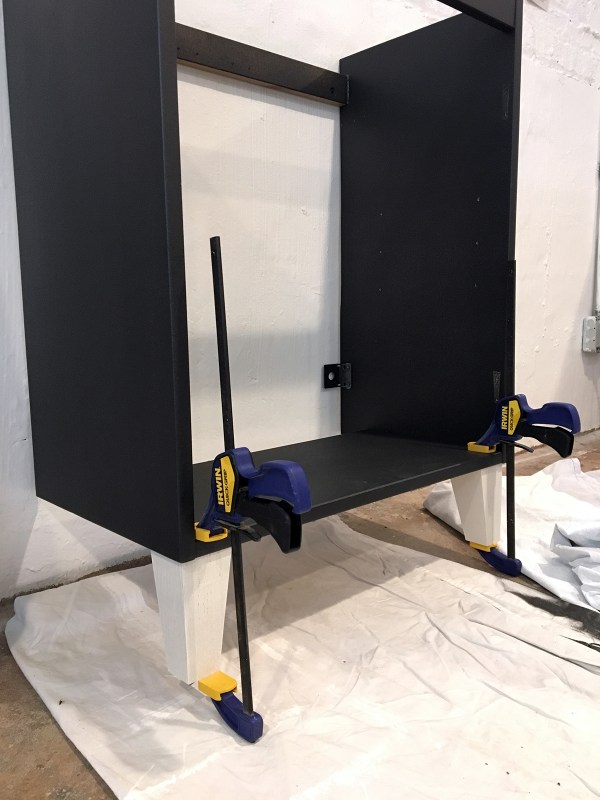
The feet were a little chunkier than my mental ideal, so I shaved an inch off both flat sides with my miter saw. Craziness like this is why Jarrod calls me “Particular Palermo.” I assembled the painted frame per the IKEA instructions, and then used both glue and screws to secure the feet to the vanity.
I started by drilling pilot holes into the bottom of the vanity, safely on either side of the cam bolt (but not so wide that there was a risk of the screws coming through the taped side of the leg). Anyone who has assembled IKEA furniture knows this bolt + metal dowel combo is what makes the furniture sturdy, so I didn’t want to mess with that.

On the other side of the vanity base, I used a countersink bit in the pilot hole so the screws would be flush with the wood.

I used Liquid Nails construction glue and clamps to hold the legs in place.
After the glue dried, I drilled in my screws and then painted the legs.
I installed adjustable feet in the legs using these threaded furniture glides.

The vanity is fully wall-mounted, so the legs are mostly just for show, but they do offer secondary support. I can easily twist the adjustable feet to raise/lower them, which lets me slide the rug under!

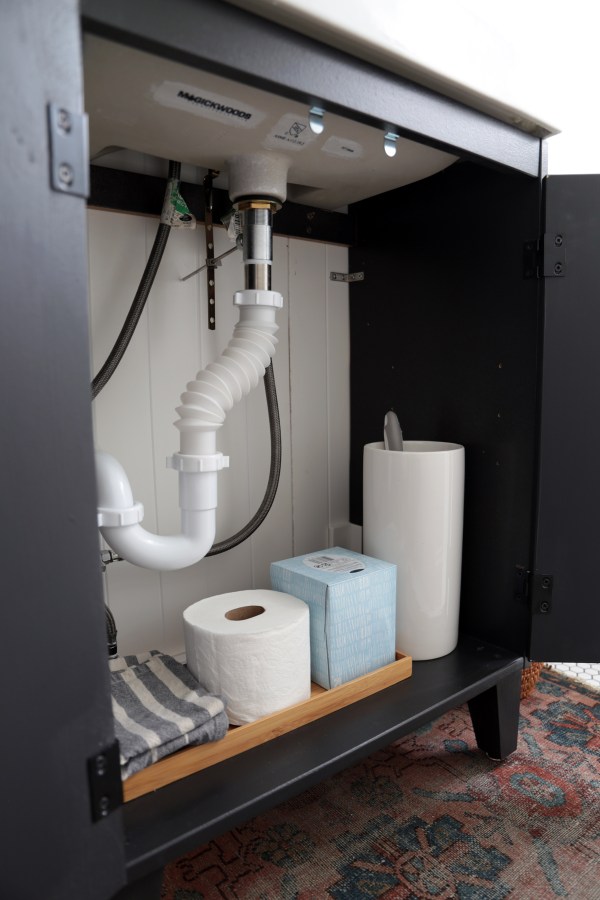
The screws are barely noticeable when the doors are open. The vanity came with a shelf which I didn’t use because the plumbing didn’t leave enough room for it. This isn’t a problem, however, because there’s plenty of space for the few things I want to keep in there.
I added Tolson cabinet knobs from Rejuvenation.
I didn’t have to wrestle with IKEA plumbing because I used the existing sink and a new MOEN faucet. If you need tips for installing IKEA plumbing, see my previous post: How I Installed an IKEA Bathroom Vanity.


And that’s it! A pretty easy hack for a very pretty vanity.


Love it! What about installing the shelf (or part of it, if it needs to be cut to fit so that there’s a short bottom area just tall enough for toilet paper, and a regular shelf on top? Or am I too used to city living and needing every bit of space? :)
You better believe that if I really needed the space, I’d be hacking that shelf, too! Your idea would work great. One of the nicest things about having this house is that I no longer have to wring maximum storage out of every space.
Wow, what a transformation, I love the DIY approach to this IKEA product, learning a few tricks here :)
I’d love to know what sink you used.
The previous owner of the house purchased the sink – it’s made by Magick Woods (http://magickwoods.com/), but it doesn’t look like they make it anymore.
This is brilliant! Thank you for sharing!! Quick question – is your sink an IKEA sink that was previously installed?
Thanks, Jess! No, the sink isn’t from IKEA – it’s from a company called Magick Woods, and it doesn’t look like they sell this particular sink anymore.
Did you use a matte or eggshell paint, and did you use a poly acrylic or anything as a protective finish? I love this bathroom! Great work!
Thank you! I used Benjamin Moore Regal Select Exterior paint (because I had planned to also paint an exterior door in this color). It’s the Low Lustre finish. I also used a water-based poly in a satin finish.