I’ve been working overtime on the house these past several weeks, trying to wrap up as many things as possible before the end of the year. Deadlines are motivating, even when they’re totally arbitrary. As a result, I have a couple of projects to catch you up on. First up: our finally finished entryway.
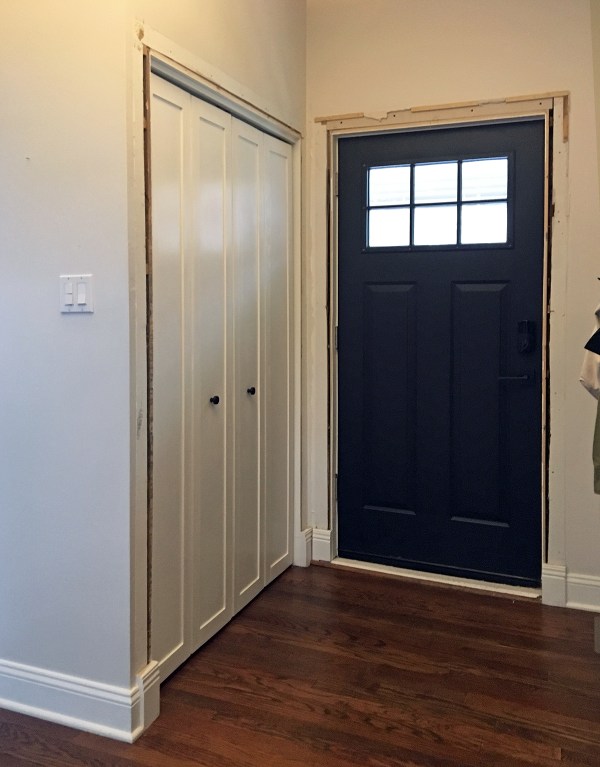
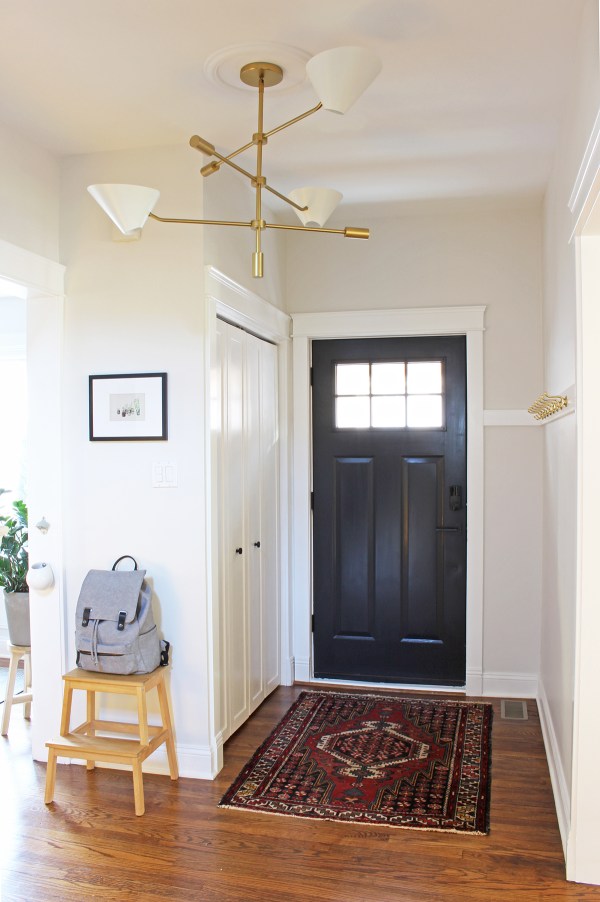
The last time you saw our entryway – nearly two years ago – I listed three remaining to-dos: installing a new door, replacing the moulding, and making a coat rack. As of last weekend, all of that is now done!
I bought this JELD-WEN Craftsman 6-Lite Primed Steel door from Home Depot and painted it black. In the end, I probably wouldn’t recommend this door for dark paint. The white plastic grid is affixed to the glass, which means you can see the back of it but you can’t paint the back of it – it has to stay white, which contrasts sharply with dark paint. It’s fine – it’s something I notice, but others probably don’t.

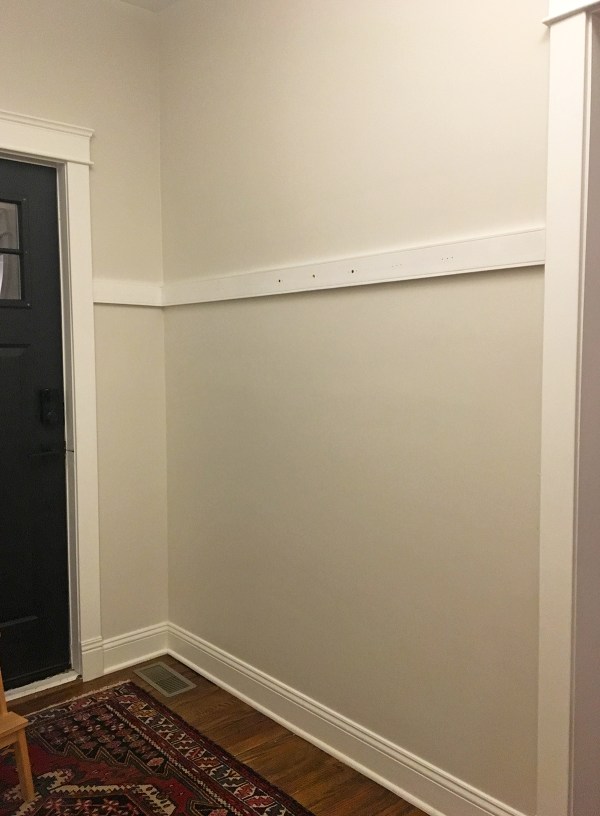
Next, I removed and replaced the moulding around the front door and closet. You’ll have to wait until the end of the post for an After shot.
Then came my DIY hook rail. I wanted the rail to look different than my door trim, so it was clear that it wasn’t just more of the same moulding. I bought a piece of primed trim with squared edges (the door trim has slightly rounded edges) and, using my table saw, I routed out shallow, decorative notches at the top and bottom of the wood.
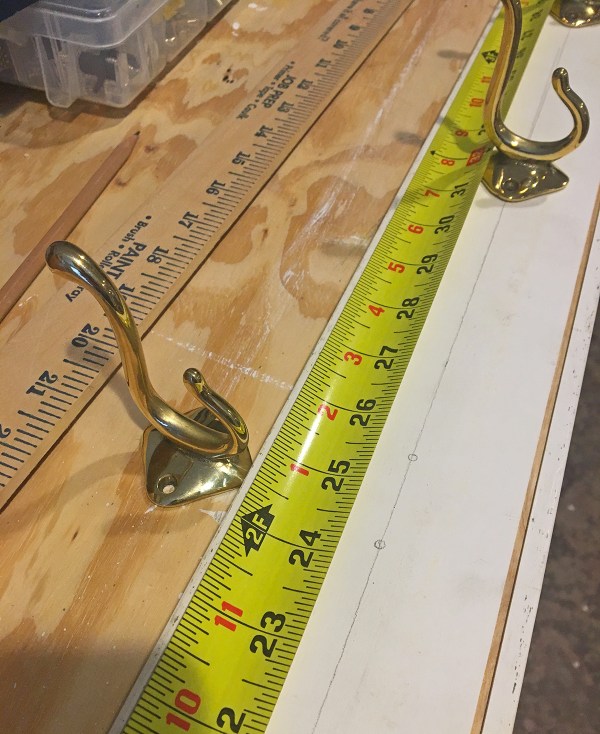
I measured out the placement of my 8 hooks and drilled pilot holes – I did this before painting, so I wouldn’t have to worry about marking up or scratching the painted finish. The brass hooks are from House of Antique Hardware; I got them for 15% off on Black Friday. Emily over at The Sweet Beast also used them in her awesome stairway makeover. (Side note: one time I Googled “sweet beast” and ended up here instead of Emily’s blog, and now I just go there on purpose sometimes. Check out this fantastic beast!)
I used painters tape to mark off where the studs are in the wall. I installed the rail by screwing into the studs that aligned with my hooks. That let me cover the screw heads with the hooks. For safe measure, I also used a toggle bolt behind one of the non-stud hooks.
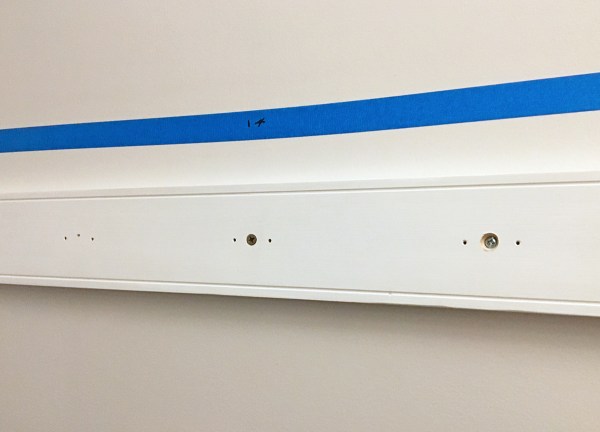
With the rail up and the pilot holes ready to go, adding the hooks was quick work.
And here’s the finished product: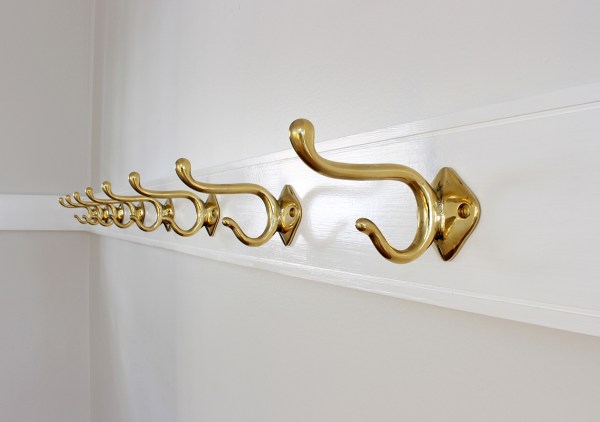
Here you can see the new moulding around the door and closet. I like how continuing the rail around the corner helps balance the off-set door.

When we bought the house: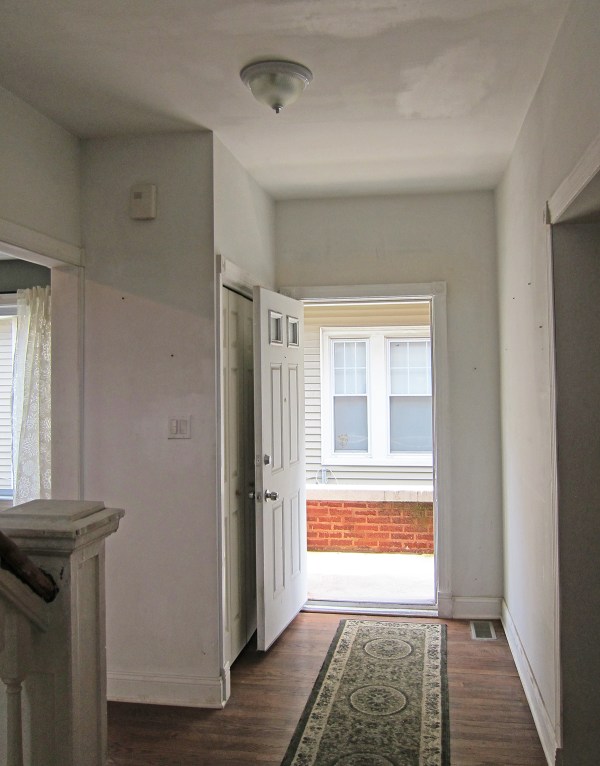
And now!

that’s insanely gorgeous! Great job.
MARTI, USUAL FINE JOB. QUESTION? LIVING IN CHICAGO, SNOW, RAIN, ETC., WHAT ARE YOU GOING TO DO WITH MOISTURE ON YOUR HARDWOOD FLOOR UNDER YOU COAT HOOKS?, JUST A THOUGHT. KEEP UP THE GOOD WORK. MUCH LOVE, DAD
On Sun, Dec 23, 2018 at 11:33 AM Project Palermo wrote:
> Marti posted: “I’ve been working overtime on the house these past several > weeks, trying to wrap up as many things as possible before the end of the > year. Deadlines are motivating, even when they’re totally arbitrary. As a > result, I have a couple of projects to catch you” >
So good.
Great job! It looks very clean and modern. We have the same exact door from Home Depot!
How high is your is your hook rail and how high are your ceilings?
The center of the hook rail is 63″ and the ceiling is 9 feet.
Hi! Beautiful job! Can you share where you got the light fixture? Or the manufacturer? Thanks!
Thank you! The light fixture is from West Elm.