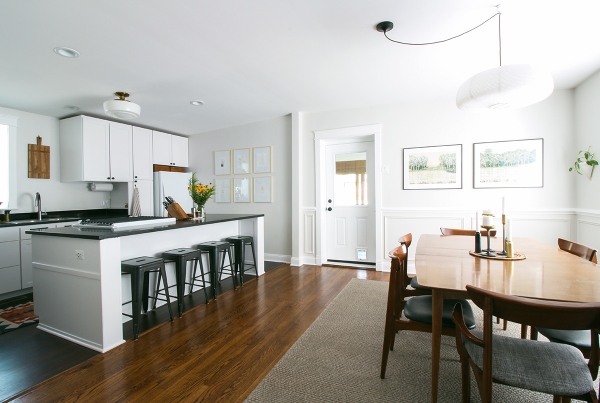
And we’re back, for the final roundup of kitchen details. You can check out my kitchen makeover here and the first roundup here.
Exhaust Fan
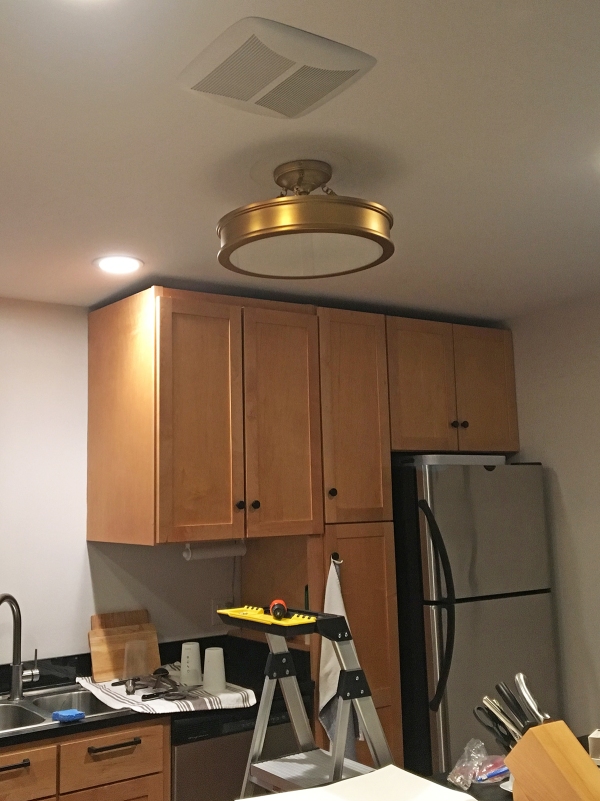
The fan installed in the ceiling over the range was a bathroom exhaust fan. The sticker on it literally said “Not for use in cooking area.” In terms of air movement, it did exactly nothing, so I removed it. It was unexpectedly difficult – it took some jaws-of-life style prying and cutting. Here’s an extremely flattering photo of me holding the extricated fan like a trophy bass.
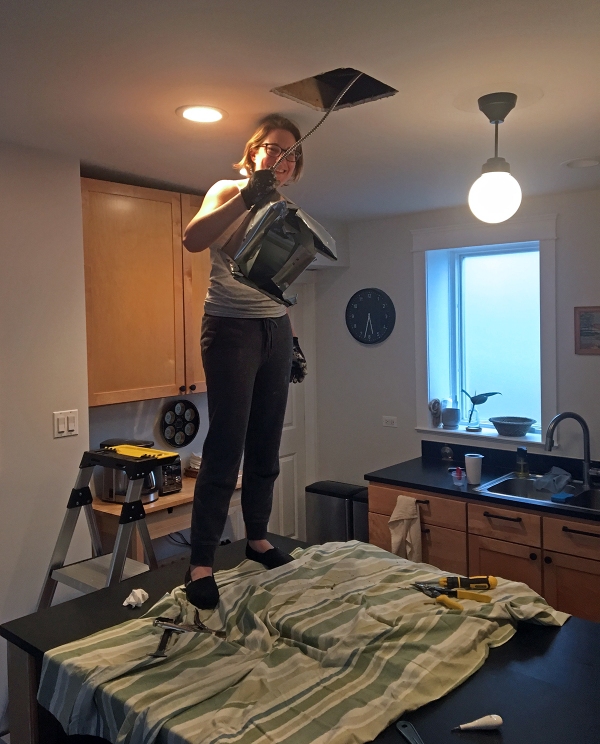
I mounted some wood scraps to the studs inside the hole so that I had something to affix a drywall patch to.

Home Depot sells small drywall “project panels,” which saves you from having to buy a full sheet – I cut one to fit.
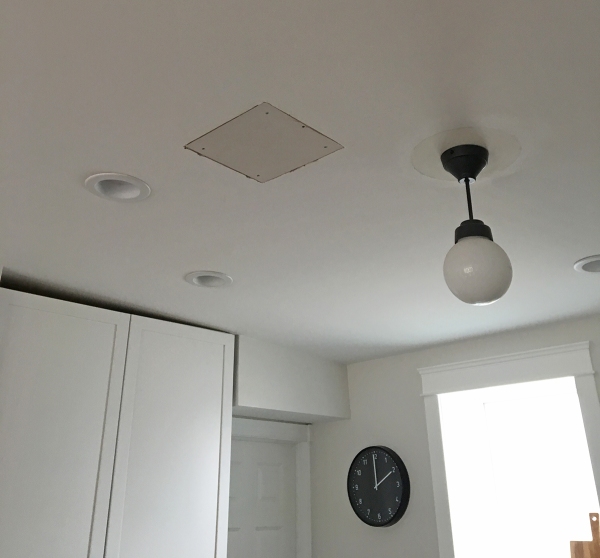
Then I patched and painted the ceiling, and now it’s like it was never there.
This means we don’t have an exhaust fan in the kitchen, of course, but I’ve never lived anywhere that had a functional one, so it’s not something I feel a strong need for.
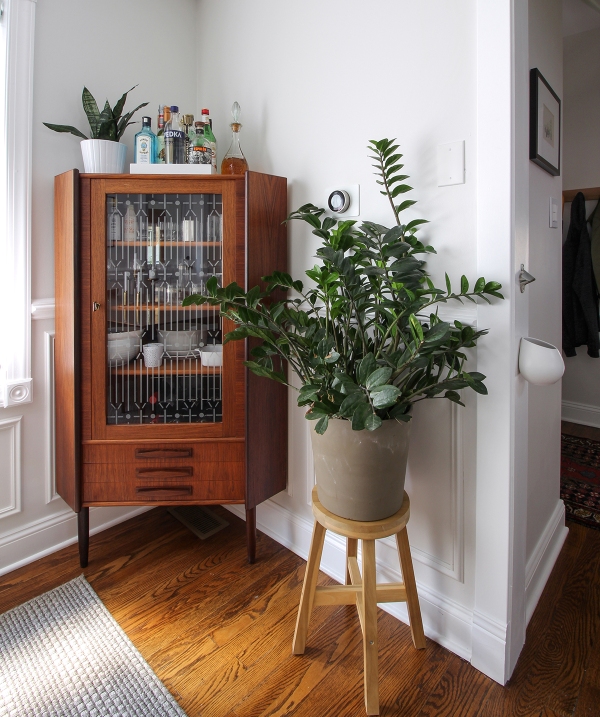
Space Above the Fridge
How do you fill a gap between your fridge and cabinets? Short answer: baskets.
Long answer: Plan to build an open shelf. Mock it up with scrap wood. Decide it accentuates the gap to the right of the fridge. Pass.

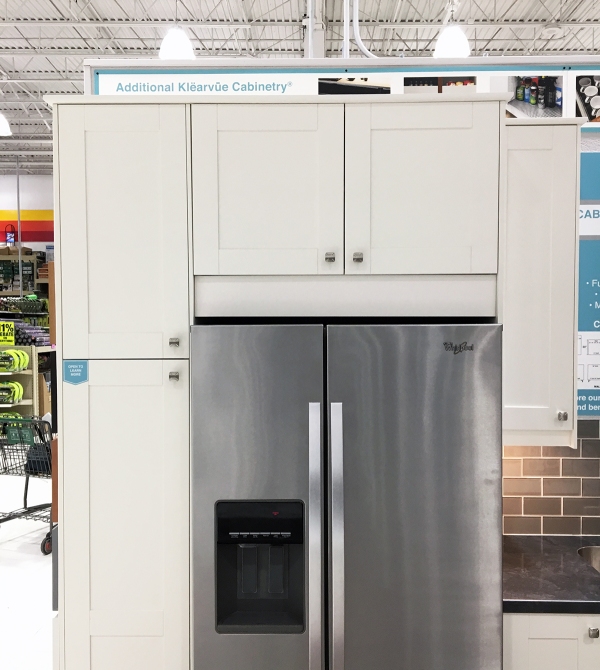
Consider a flush-mounted filler piece. See something very similar on a Menard’s demo kitchen. Decide it looks terrible and feel grateful Menard’s made that mistake so you don’t have to. Pass.
Short answer: baskets! These Sedona Honey Low Open Totes from Crate & Barrel fit perfectly and coordinate with the color of the wood elements elsewhere in the room.

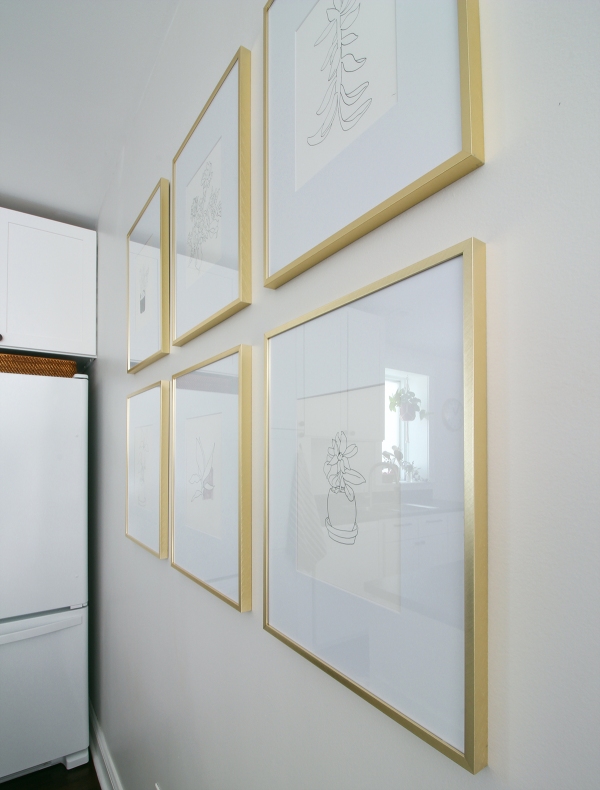
Frame Grid
Here’s one mistake I made in decorating the kitchen: the frame grid was originally one size smaller. I bought and hung the 5×7 size because I thought the larger size would overwhelm the wall. The smaller size looked okay – I lived with it for a while but it never felt right.

I finally pulled the trigger and ordered six of the larger size, hung them, stepped back, and said “Duh.” It was obviously the correct way to go. These are the 8×10 Brass Frames from Target (the outer dimension is 14.4″ x 18.4″).
Getting these six frames perfectly aligned took some effort, so I wanted them to stay that way. The bottom row is particularly in danger of getting bumped by someone walking on that side of the island. The frame edge was too narrow to use 3M Command Strips, so I came up with a solution: I cut pieces of scrap wood to the perfect depth and hot glued them to the bottom of the frame backing. The frames hang on nails, with added support/stability from the Command strip.

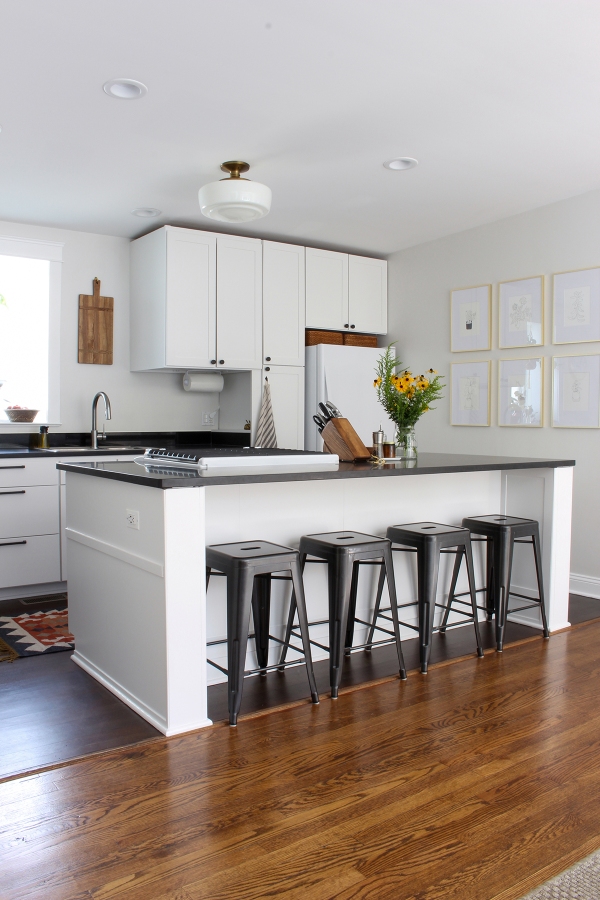
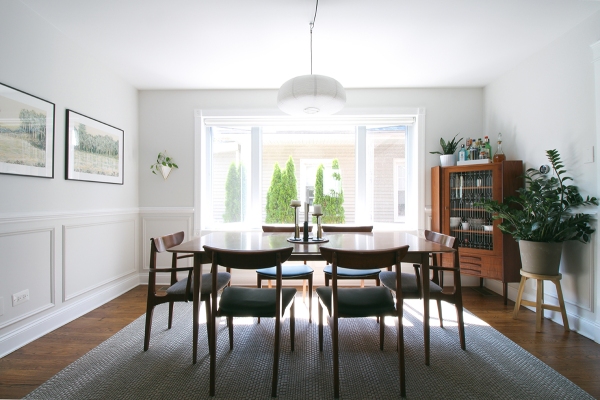
Kitchen Light Fixture
Here’s another mistake I made in the kitchen – four mistakes, in fact: I bought, installed, and returned four light fixtures over the island before I found The One. But I wouldn’t say they were real errors. Sometimes I can visualize what I want and get it right in one shot, but other projects require me to see the options in place before I can choose my choice. I didn’t document all of the rejects, but here are two examples:
This Minka Lavery Harbour Point Semi-Flushmount Ceiling Light seemed like a contender online.
Installed, however, it looked like a brass spaceship… and even more like a UFO when I turned on the light. Pass.

I really liked the look of this West Elm Stem + Sphere Semi-Flushmount, but I decided not to keep it because it looked too new – with all the other newness in the room, I wanted something that looked more classic.

Also: the brass finish isn’t as nice as the brass on the West Elm fixture in our entryway, and one of the globes had a glass inconsistency that created a dark spot like a moon crater. Pass.

In the end, a classic schoolhouse light from Rejuvenation made the most sense here. It’s the Eastmoreland 8″ Semi-Flush Mount with 16″ Opal Shade. It’s big enough to hold its own, pretty enough to not be boring, and simple enough that I can install something more interesting over the dining table without it looking like a carnival in here.
Outlets and Plate Covers
I replaced the beige outlets in our island with new white ones, and I swapped out the beige plate covers with nice metal ones.

I like these pressed metal plates from House of Antique Hardware. Stacy over at Blake Hill House gave me the idea to use a USB outlet. We always have this multiple adapter plugged in here, so we are prepared for any charging emergency. You show up at our house with your iPod Classic at 4%? We got your back.

Seriously: even if you can’t update the outlets themselves, replacing the plates is such an easy, inexpensive upgrade. I always did this as a renter with plates that had been covered in years of paint (see this old post: It’s Electric).
Phone and Ethernet Jacks
Speaking of plate covers: virtually every room in our house has an ethernet jack. There’s a professional-grade routing hub in our basement – I have no idea why. There was also a phone jack on the wall.

I removed both jacks and covered the holes with blank plates that I painted to match our walls. A small change that feels so much better. I could eventually patch these holes, but since I’m not finished renovating the house yet it seemed smart to keep them open in case it’s helpful to have an access point or something.

Dimmer Switches
I also installed dimmer switches for all of the kitchen and dining room lights. I like these Leviton Decora Rocker Slide Universal Dimmers from Home Depot.

I did all of the aforementioned electrical work myself (light fixtures, outlets, jack removal, dimmers) except for one switch. It was my first time installing a dimmer on a three-way pole – meaning a single fixture controlled by switches on opposite sides of the room. I installed the dimmer, turned the power back on, and the fuse tripped. I figured I had done something wrong with the circuit loop and decided to play it safe and call an electrician.

Emilio got me squared away quickly, and even took the time (unprompted!) to thoughtfully explain what I had done wrong and to draw a diagram for future reference – all without a whiff of condescension. Emilio is my guy. If you need an electrician, I’d be happy to refer him.
Arbor Vitae Trees
Last year, I had three arbor vitae trees planted. Our dining room window is huge, which is great for natural light, but not so great for the view.

The bottom of this window is 7 feet above ground level, so most arbor vitae available from big box stores were too short to provide the privacy and greenery I wanted here. Knowing how slowly they grow, I splurged on more mature trees – I didn’t want to wait years and years for them to reach this window’s height. I never mind sharing numbers, so I’ll tell you that they were $800 total, including installation, which required some major digging.
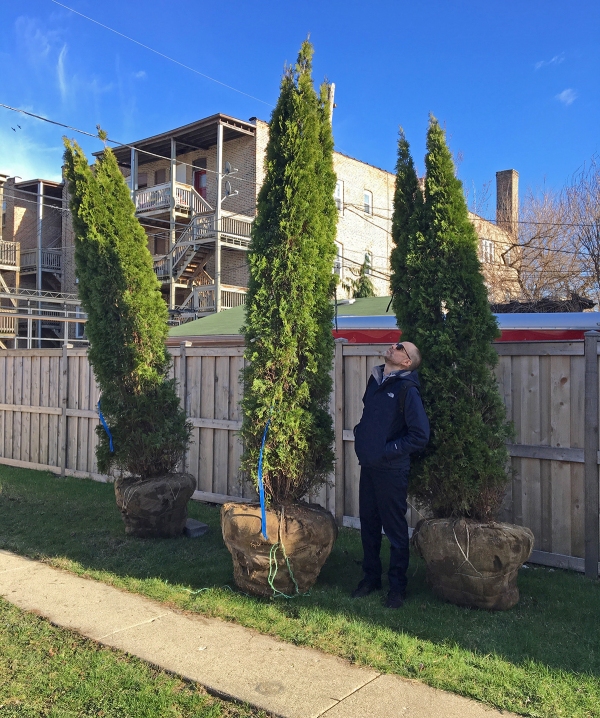
Here’s Jarrod for scale – he’s 6’2″ (I just asked him – he said he’s shrinking in height but getting wider to make up for it). Seeing greenery instead of our neighbor’s vinyl siding was such a huge improvement for our view.
I made this GIF when they were being planted, thinking it would be a triumphant reveal… but they were planted crooked. The landscapers had to return, dig them up, and redo them.

The trees should fill out and up in the coming years, providing increased privacy. I say should because arbor vitae are pretty finicky – they grow slowly and seem prone to dying. It was the only evergreen option for this narrow side lot, so I’m keeping my fingers crossed.
What’s Left
The kitchen and dining room are now 95% finished, which feels great. It joins the ranks of our half-bathroom and master bedroom (I owe you an update on this one) – rooms that are ~done~. The remaining tasks are:
- Move the electrical box to be centered over the table
- Install a permanent light fixture – I’m circling around this Conical Drum Pendant from Rejuvenation
- Replace the window – this will happen along with all the other windows in 2019 or, more likely, 2020
- Replace the window trim to match the rest of the room, after the window is replaced
But, next up: I’m moving on to a different room, which I’ll show you next week!

Everything you finish is magic, Marti. I hope you like the USB outlets in your kitchen! :)
Love the blind closing and opening with the trees appearing effect. Good work as always. wish you lived next door, so I could say “hey, how do you…?”