I did a six-month check-in of the kitchen and bathroom, and now it’s time to share photos of the living room and sunroom. This space is the one that’s changed the most since we bought the house. I know these photos may look stark in comparison, but that’s because my grand plans have not yet been realized. GRAND PLANS, Y’ALL.
Before:
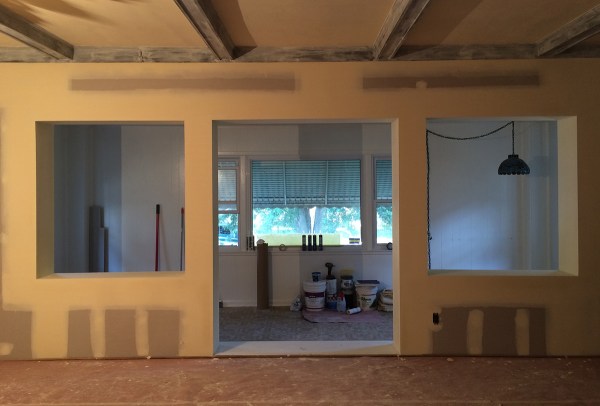
Now:
Whoa.
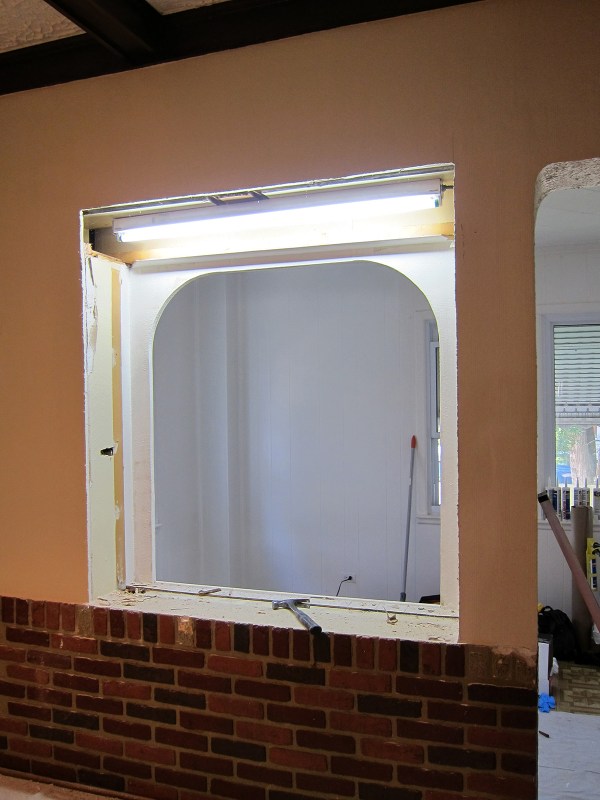
The sunroom used to be an exterior front porch. It was enclosed decades ago. The pizzeria window arch crimes were committed in the 1970s or 1980s, I think. I would have totally kept them if they were in a basement rec room, but for our living room: nope. They also blocked a lot of precious light from reaching our living room.
What’s been done:
- The plaster cake frosting ceiling was scraped, smoothed, and painted.
- The ceiling beams were painted.
- The plaster walls were covered with 1/4″ drywall and painted.
- The window arches were made larger, squared off, and drywalled. The lattice, posts, and fluorescent lights were removed.
- The panelling on the other side of the arches was removed and replaced with drywall.
- The doorway to the sunroom was squared off.
- The faux bricks were scraped off the wall.
- Curtains were hung.
Other than curtains, I did none of that work. Our amazing painter did it, and he did it for less money than some contractors quoted me for the paint job alone. Eduardo wasn’t cheap because he did shoddy work, either. He was a total pro. I am very grateful that our first experience hiring a contractor was so successful!
I’ve got a lot of progress shots for you. Eduardo started by sawing into the wall to square off the windows.

After removing the fluorescent lights, I asked him to cap off the electrical wires in the wall so that I can use them to install sconces. Don’t know if I will, but I like having the option.
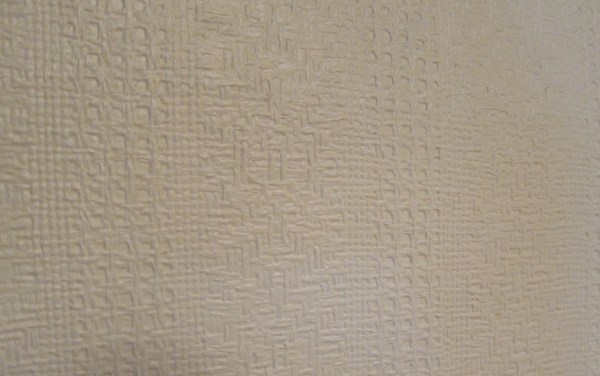
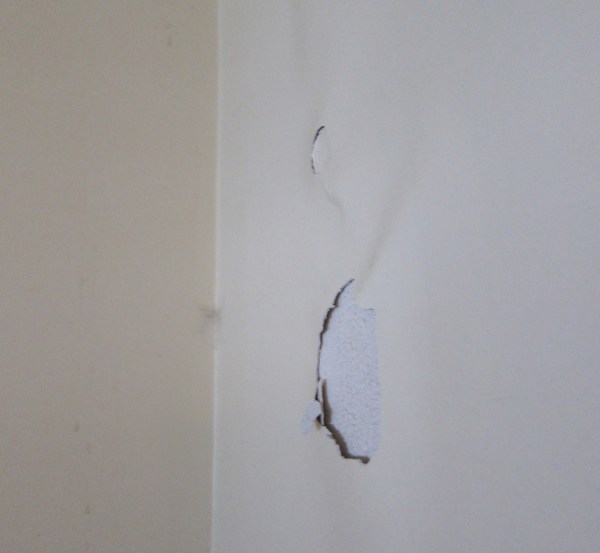
The walls were covered in a yellowed-with-age wallpaper that was bubbling in some areas, and melded with the plaster in others.
I learned while gathering quotes that I had three options for the walls:
- Attempt to remove the wallpaper, which would damage the plaster and require laborious work from a skilled plaster contractor.
- Remove the plaster walls entirely and replace them with 1/2″ drywall.
- Cover the existing plaster walls with 1/4″ drywall.
Different people had different ideas about the best way to proceed. I chose #3 because it was Eduardo’s recommendation, and because it seemed like the correct middle-ground approach. My only regret with this option is that it may have been helpful or interesting to see what it looks like behind our walls. But it also may have been horrifying.

After the drywall was up, Eduardo slayed the cake frosting plaster ceiling. This is what he used to scrape it off. I can’t even imagine the arm exhaustion.

Bless this man.

Ceiling smoothed, drywall hung, and beams primed:

First coat of paint:
Now let’s step back in time for a proper Before:
Now:
Before:
Now: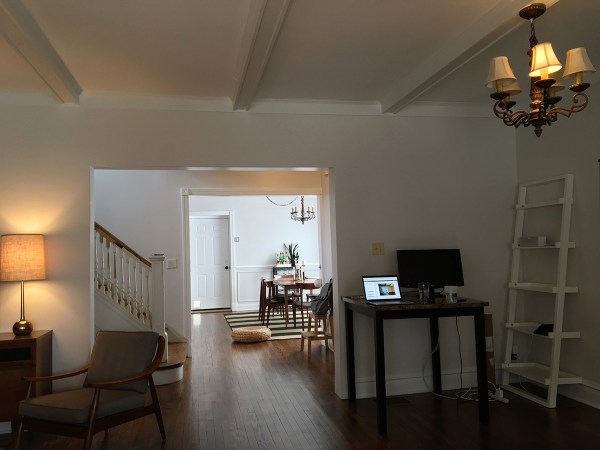
Obviously this is not our permanent furniture arrangement! That’s a junk table left behind by the previous owners that I’ve been using as a desk. And nothing has really been decorated yet, though I did hang up the furoshiki scarf that I framed and my engineering prints.
Before:
Now: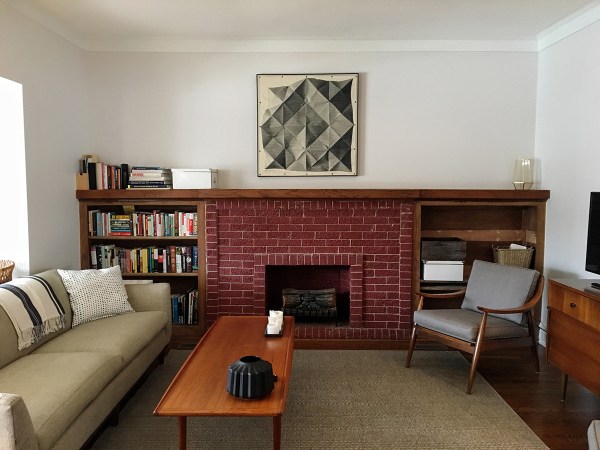
What I plan to do, short term (within a year or two):
- Figure out the living room furniture arrangement and start buying pieces as I find them/can afford them. It will be a mix of new and used things. I’ve got a lot of Craigslist alerts set up!
- Create a desk area on the south side of the room.
- Lamps and light fixtures and plants and art.
- Tackle that terrible sunroom ceiling. Those tiles are glued to the original(?) beadboard ceiling. I’ll use that if it can be restored.
- Tackle the sunroom floor. The peel-and-stick tiles are in bad shape. Not sure what I’ll do yet: hardwood, tile, linoleum (real linoleum, not vinyl), or I might try peel-and-stick tiles myself as a budget-friendly option. There will be a lot of rugs going on throughout the first floor, so I kinda like this floor space left bare. Especially since it will be filled with plants!
- Paint the fireplace brick (it’s already painted – that’s red paint with gray paint mortar).
- Rebuild the bookshelves and condition that wood – it looks parched.
- Add trim to the windows and doorways.
The openings look starkly modern and characterless right now. They’ll fit the bungalow style better once I add substantial Craftsman trim, which I’ll be doing throughout the house — something like the trim in our previous apartment, or like this:

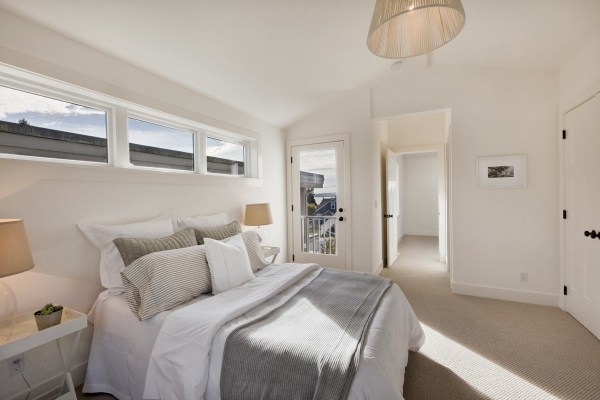
I didn’t really hesitate to paint the beams white because the color was a gross reddish-brown and because this room doesn’t get much natural light. The only moment of regret I’ve had was upon seeing Jessica Helgerson’s amazing work in this house:
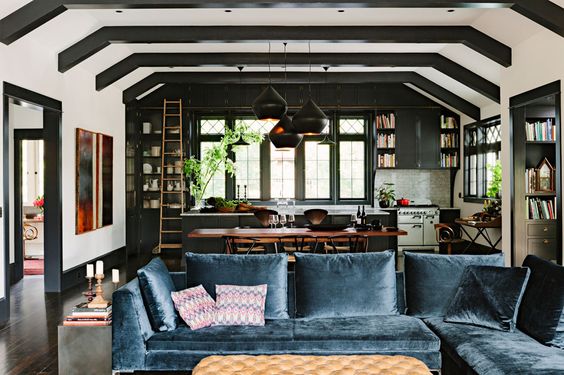
Those awesome black beams had me second-guessing, but that ceiling is higher than ours and that space is one thousand times (and one million dollars) cooler than ours. More pics of this former library-turned-house are available in this NY Times feature.
Back to reality!
Before:
Now:
As I mentioned previously, the brick on the original exterior wall is real. The “bricks” on the interior side was not. They were plastic!
Before:

Now:
Before:
Now: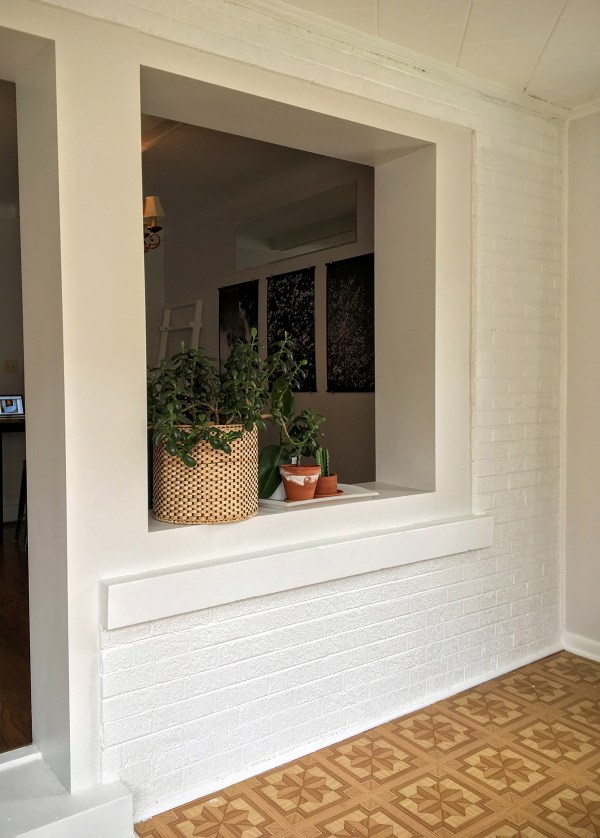
What I plan to do, longer term (within two to, I don’t know, seven years):
- New windows! That huge plate glass picture window is a straight-up Don’t in the Design Guidelines for Historic Chicago Bungalows. I won’t follow those guidelines to the letter — for one thing, they’re overly preachy; for another, this house’s preservation levy was breached decades ago — but it’s a helpful resource for bungalow details.
- Install a transom-height window in the south wall of our living room.
Adding a high, south-facing window would let in so much light that we’re not currently getting, while maintaining privacy. I actually hung a mirror (which you can see in the photo above) to help me visualize it. It will be approximately 6′ wide by 12″ or 16″ tall. Something kind of like this:
Cutting a hole through a perfectly functional wall is incredibly daunting, but I think it’d be worth the nerves and the money. I need all the natural light I can get.
Speaking of more light: we removed the awning from the front of the house! I’ll include photos of that change when I do an exterior post. It made such a big difference.
Before:
Now: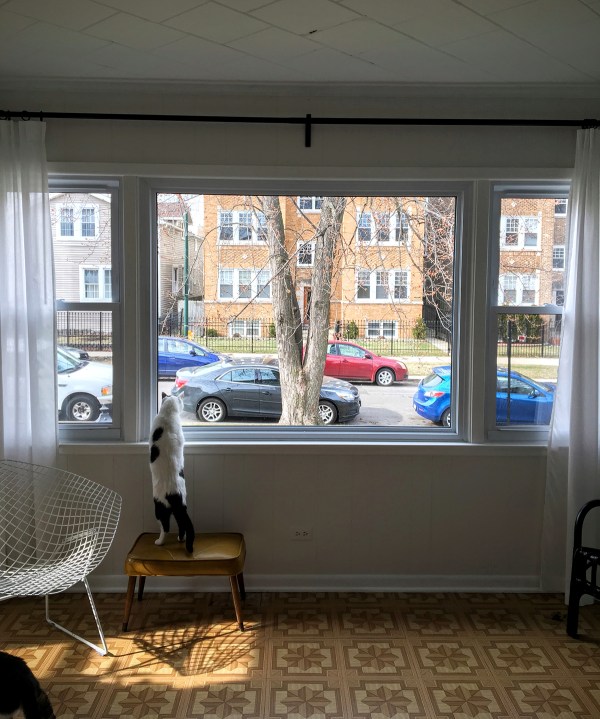
I’m currently building a long console table so the cats can enjoy the window.
Painting original trim tends to bring out the DIY blog trolls. If you think I did something sacrilegious, please make any comments foul-mouthed and funny.


First off, love that you squared the arches, they look amazing. Secondly, I think I would have painted the beams black or striped and stained them darker (more neutral). I LOVE the character that a beams can add to the ceiling. Taking down that awning was a great idea, it seemed to open up the space somehow even though it wasn’t actually in the space. If your cats are anything like my cat, they will love a table to lounge about on in front of the window. My little hobo is sprawled out on the window ceil right now. Your house progress posts are really hyping up my need to buy a house. I am trying to wait until next year, but I am watching the market, paying attention to property values and new neighborhoods. Even though we currently live in Maryland, Virginia is calling my name. That being said, I appreciate your posts… keep up the good work on the house, it is looking great!
Yeah, my only regret with the white is that it doesn’t show off the beams quite as well. The good thing is that I can always repaint them – that’d be a lot easier now that all the other hard work has been done!
I hope the housing market swings in your favor and you can get something great!
Me too! I am definitely over renting. I’m ready to put down roots again.
Painting those beams is on par with human trafficking, the existence of Donald Trump, and the extinction of the Kiwi bird. I have one question for you, you Charleton? How DARE you?
Just kidding. I think it was the right move with the beams. Typically, these old porches would have had quarry tile on them. Charcoal quarry tile is really inexpensive, simple, feels natural but classic? I am dealing with similar light, trim color, and layout issues. Love following along with the progress!
YES, that’s the type of scathing commentary I want! Poor Kiwis.
I don’t think I’d ever heard of quarry tile, and I like the idea of doing something period-appropriate. Charcoal is definitely the color I’d want to go with out there, too. Thanks for the suggestion!
YASSSS, please paint the trim! Do it with a smirk on your face too :D
LOL. Thanks for your support!
What a transformation! I love it. Taking all of that texture off made a world of difference. I would like to sit in that room, drink a cup of coffee and soak in some sunshine.
Thank you! Yes, it’s amazing how much the ceiling texture affected the room. Good riddance!
if there is anything I can relate to, it is grand plans vs. current reality. I can already tell it’s so much brighter!
I checked out your blog — you’re biting off even more than we are! Impressive. Love your house and look forward to following along.
Hi! I just found your blog via a friend of a friend on FB and have caught up – love reading about your experiences. And I’m impressed by what you’ve gotten done so far! We’ve been working on our place for about 3 years, and we’re not nearly as far along as you are. We’re slowly but surely updating a 1908 frame bungalow over in Jefferson Park.
I was wondering if you might share Eduardo’s contact info – our living room plaster is dire, and although we’ve done most of the plaster work in the rest of the house, it’s time to bring in a pro to just cover up the worst walls and feel like we’re living in a house instead of a construction zone. :)
Thanks so much, and I am looking forward to reading more as you guys progress!
Hi, Richelle! Thanks for checking out my blog! And I’m glad to know another northwest Chicago blogger – I added you to Feedly in case you resurrect your site. Your home looks lovely.
Very happy to share Eduardo’s contact info – it’s his personal cell phone, so I’ll email it to you instead of posting online.