This stage of the One Room Challenge is challenging because I don’t want to reveal too much of the room! I’m saving pulled-back shots for the final post – not that it’s going to be a stunner of a space. As I’ve said, this is a functional room, not a showcase. Anyway, this is a bit of a grab-bag post, covering three elements: the shelving unit, litter box, and light fixture.
Shelving Unit
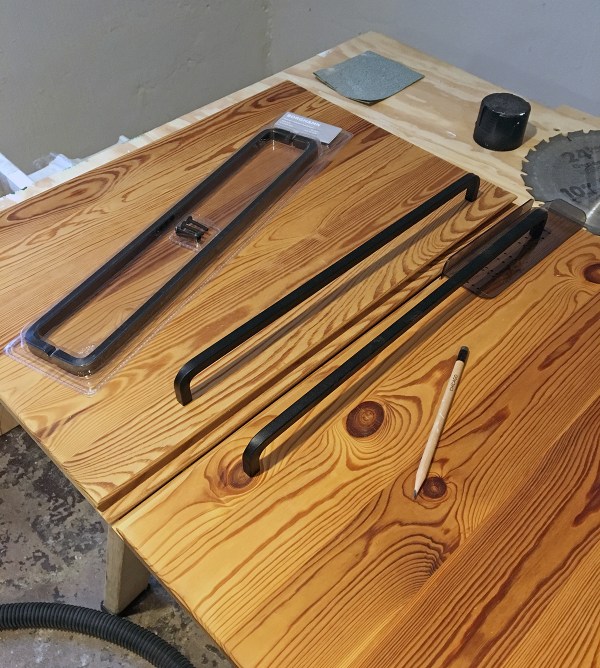
I’ve had an Ivar shelving system since 2012, when I bought it for $60 off Craigslist. Longtime readers of this blog (thanks for sticking around!) may remember it from our last apartment’s catch-all room. IKEA still sells this series and I definitely recommend it – it’s a sturdy workhorse, and easily configurable to fit your space and storage needs. This past week, I added IKEA’s Borghamn handles to jazz it up.
Putting something in front of a window isn’t a ~best practice~ but it’s the only option here. Would I do this in a living room? Nope. Am I fine with it in a utility room? Yup!
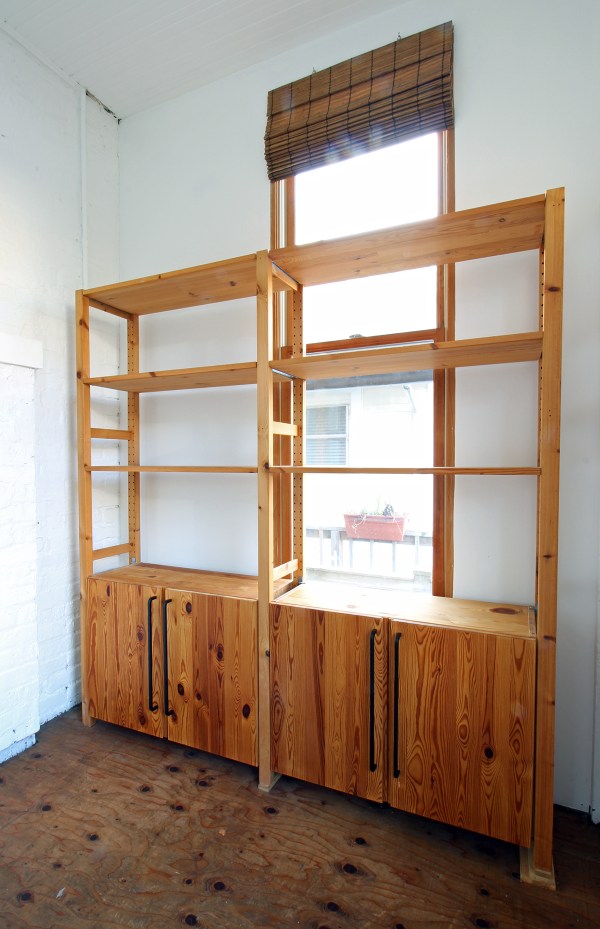
I haven’t loaded up the shelves yet because I need to move it to put a rug under it. And, I need to cut better looking risers to go under the middle and right legs. This used to be an exterior porch, so the floor slopes significantly to shed rain (a previous owner put the plywood over the original floor). The risers are necessary for the shelves to be level.
Litter Box
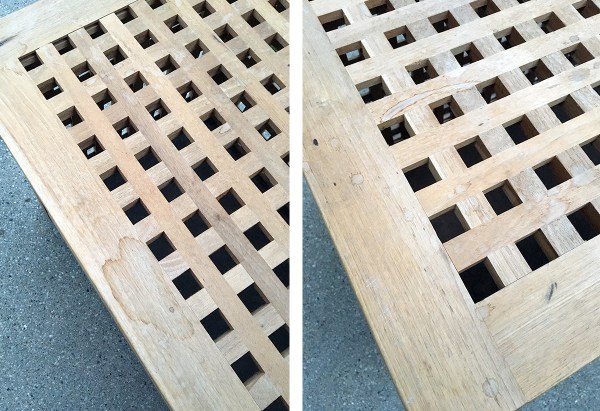
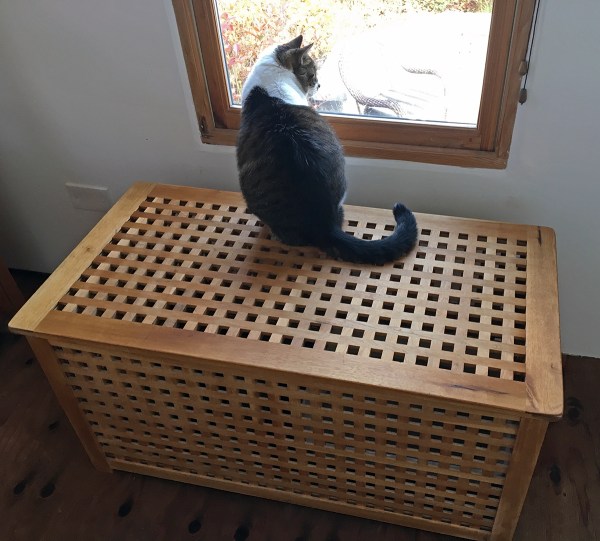
The litter box involves another IKEA piece: a Hol storage table/trunk I’ve owned since 2007. When I first bought it, I added hinges so we can flip open the lid and I cut a hole in the side for cat access. IKEA doesn’t sell the Hol line anymore, which is too bad because it’s perfect for a litter box. (You can still find them on eBay and Craigslist, if you’re in need of a litter box solution.) The holes provide light and ventilation while concealing the litter box.
The wood was looking worse for wear – there was water damage to the top, and the wood finish was parched overall.
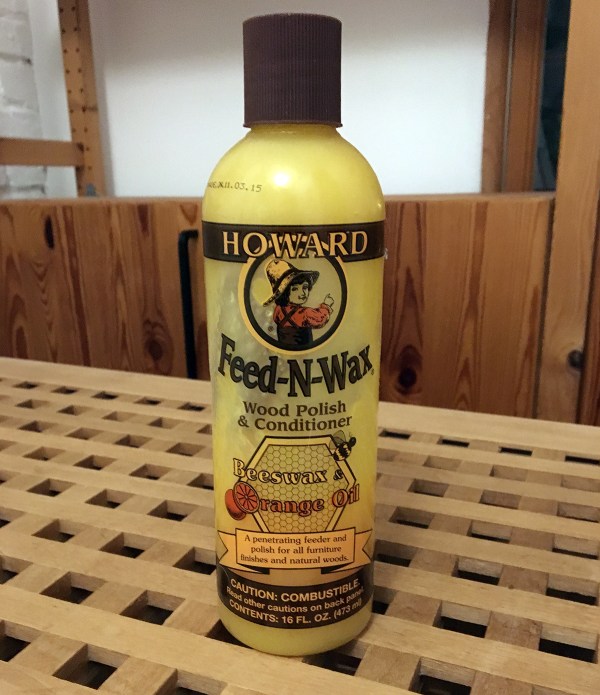
I sanded it quickly with fine grit sandpaper, washed it with Murphy’s Oil Soap, and conditioned it with Howard Feed-N-Wax. This product is wonderful: super easy to use, smells great, and makes an immediate improvement to the appearance of wood furniture. One bottle lasts forever.
The trunk also serves as one of Lola’s squirrel patrol posts.
Inside the trunk, there’s a rug to help catch tracked litter and a scoop hanging on a hook.
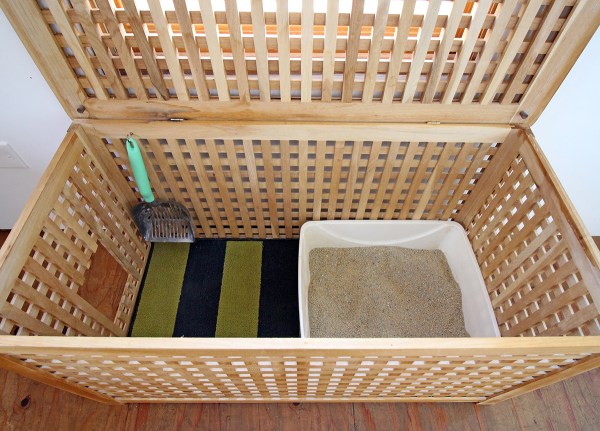
Lola expressed some confusion about WTF I was doing with his bathroom.

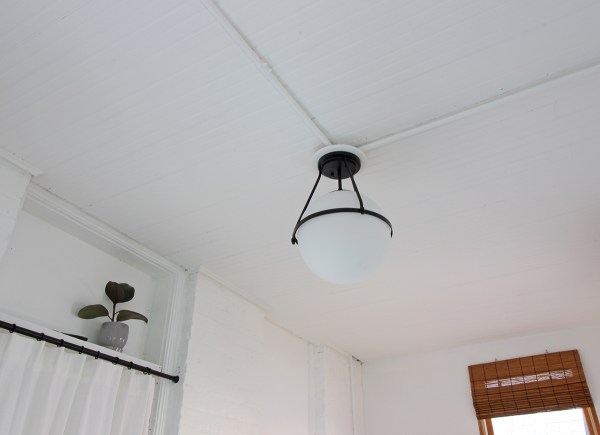
Light Fixture
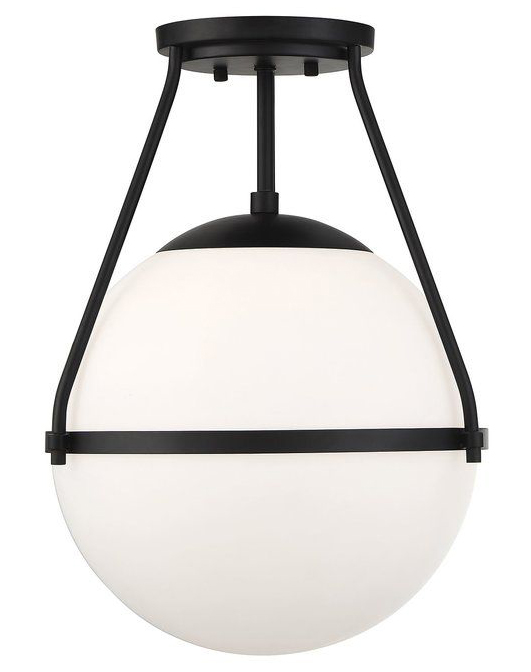
I ordered this pretty Langley Street Michaela 1-Light Semi Flush Mount light fixture from Wayfair.
The electrical conduit in the mudroom is mounted on the ceiling, instead of being hidden behind it.
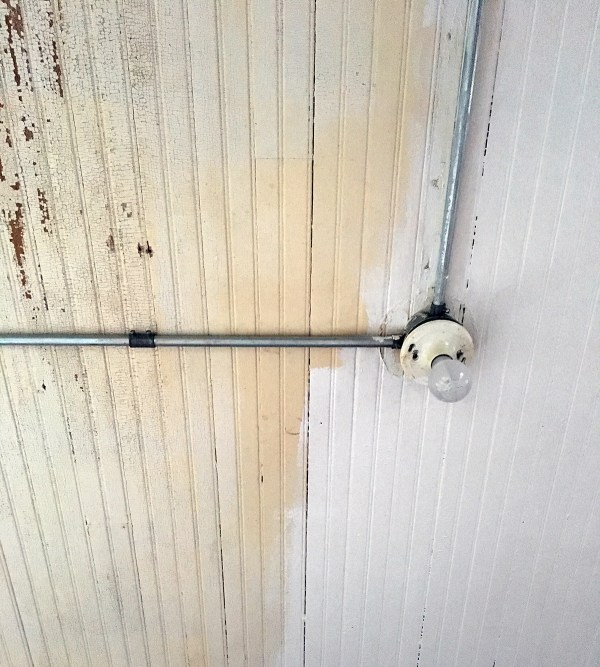
Painting the metal conduit same color as the ceiling helped conceal it, but the exposed junction box presented a challenge: any mounted light fixture would look less-than-great since it wouldn’t be flush with the ceiling.
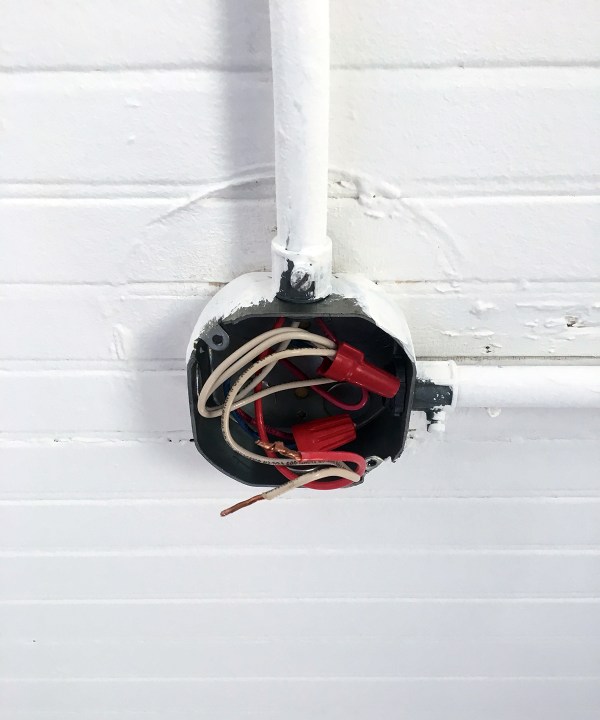
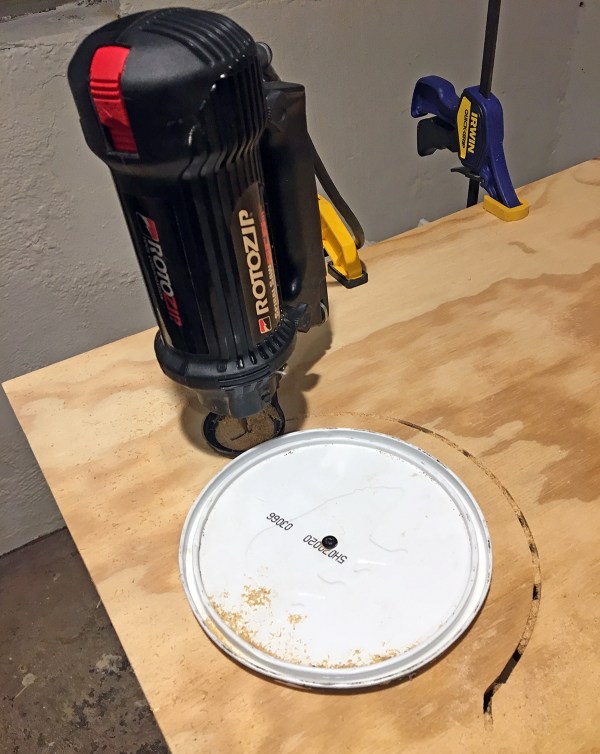
I searched online and couldn’t find any examples of how people have handled this situation. So, I came up with a solution on my own: I made a basic wood medallion to mount between the junction box and the fixture. I cut out a circle of plywood using my hand-me-down Rotozip saw (thanks, Dad!). To get a perfect circle, I used a paint can lid as a guide. Then, I cut out the center of the circle – making a wood donut – which I painted white. (Sorry, I failed to take photos!)
I mounted the light fixture in the usual manner, with the wood sandwiched in place between the fixture and junction box.
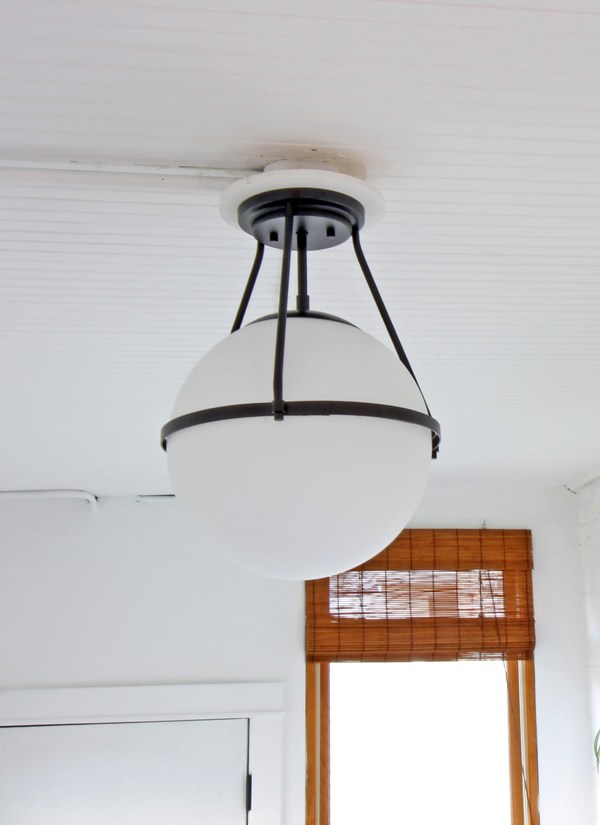
I’m very happy with this fixture. It’s large and well-made for the price ($120 when I bought it a couple of weeks ago, but I’ve since seen it on sale for as low as $106). Having a proper fixture in this space makes it look more like a real room and less like a storage closet.
Still on my to-do list: cut and bind a rug, organize the storage shelves, touch up paint, add some baseboard, and install a fun thing for Lola.
Bye for now – see you next week!
Previous ORC posts:
- One Room Challenge Week 1: Mudroom Makeover
- ORC Week 2: Drywall Finishing and So Much Painting
- ORC Week 3: Doorway Broom Closet
- ORC Week 4: Door Trim, Window Shade, and Plant Shelf
You can check out all the other guest participants on the ORC website.
New posts go up every Thursday.


The light fixture looks great! And I love the creative idea for the litter box.
Looking fantastic!!! The light fixture medallion solution is ingenious.
Love the progress. I’d love to see how you bind a rug that would certainly come in handy around here. Good luck and I’ll check back Thursday to see your reveal!
Love your blog! How does your kitty find the litter box? Is there a cat-door to the room somewhere?