Hello again! It’s Week 2 of the One Room Challenge – hop back to One Room Challenge Week 1: Mudroom Makeover for an introduction to this space.
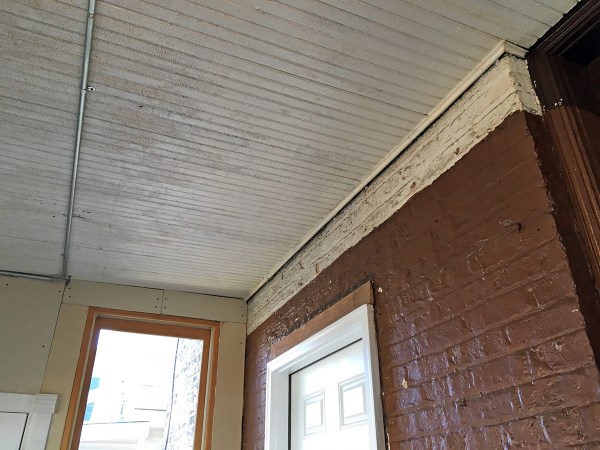
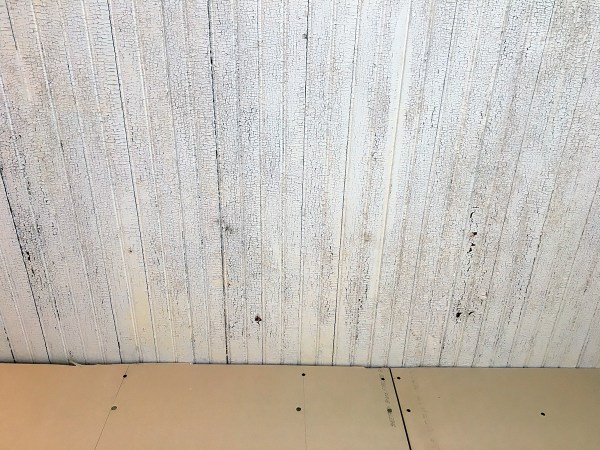
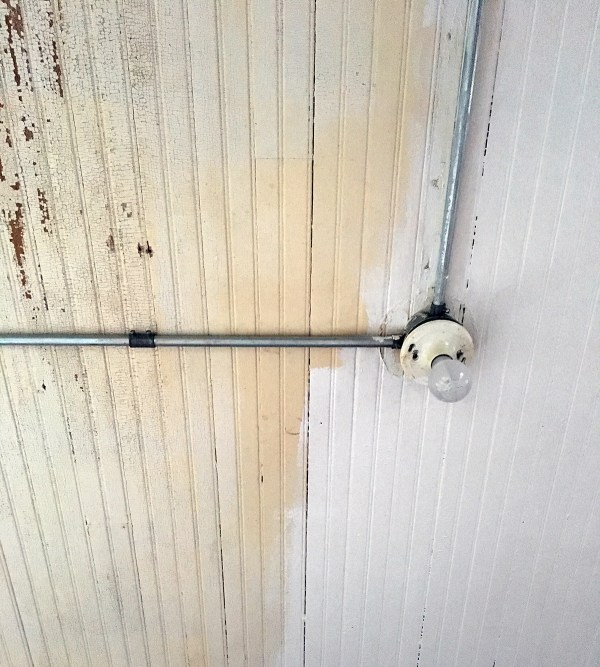
Let’s cut to the chase on one issue I hesitate to even mention: there was lead paint on the ceiling and upper part of the brick wall. Two different contractors who passed through this space looked up and said “Lead.” I believe this distinctive cracking is a tell-tale sign of old lead paint.
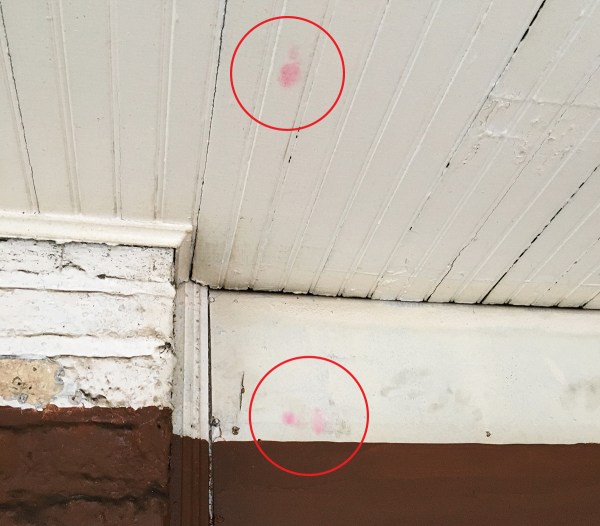
Sure enough, swab tests confirmed lead paint – I used these 3M LeadCheck swabs. Red means lead.
This wasn’t surprising because of how old our bungalow is and, to be honest, it’s not too disconcerting to me. If we had kids or planned to have kids, I would be more worried: lead is a very serious risk to children and pregnant women. Furthermore, the lead paint is on a stable surface that we don’t come in contact with – not, for example, on window trim that is subject to friction and heavy use.
I debated including this information in this post because people tend to be alarmists online. I could have simply said “I painted the room” and left it at that, but I prefer to be upfront about the issues I encounter when renovating. So, I’ll tell you what I did, but I’m definitely not saying it’s what you should do. You gotta follow your own arrow.
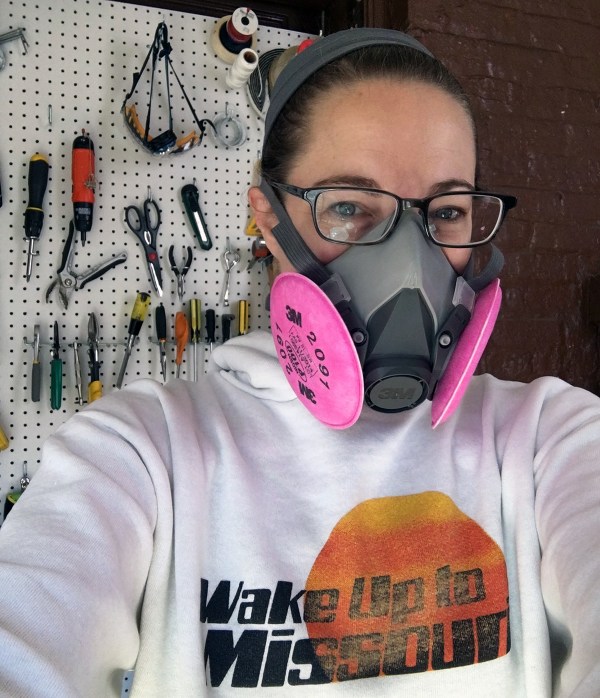
In short: I contained the work area, I wore a P100 filtration mask, I removed the paint that was loose, I scrubbed all surfaces thoroughly with TSP, I covered the ceiling and walls in 4 coats of paint (2 layers of primer and 2 layers of paint), and I disposed of all supplies once finished. I’ve also added lead testing to my annual physical checklist, so my doctor and I can monitor my lead levels over time and feel confident that my DIY hobby is not endangering my health. Cool? Cool.
Here’s the room ready for painting: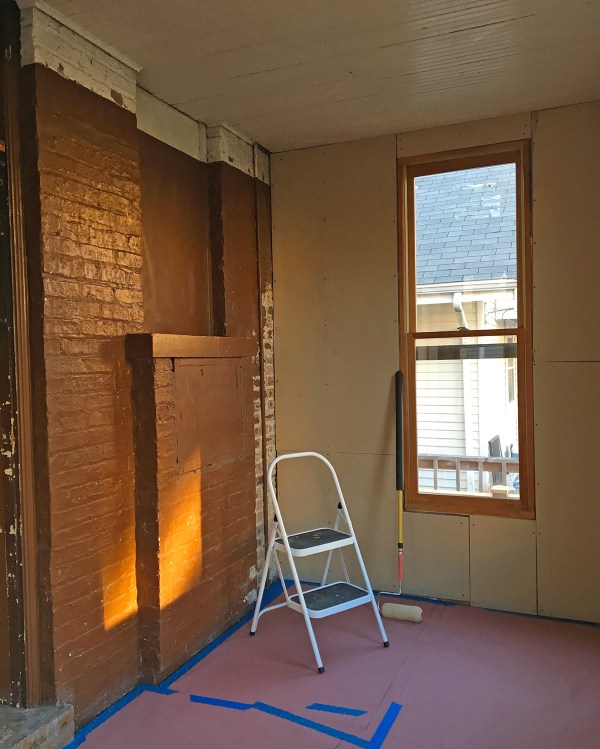
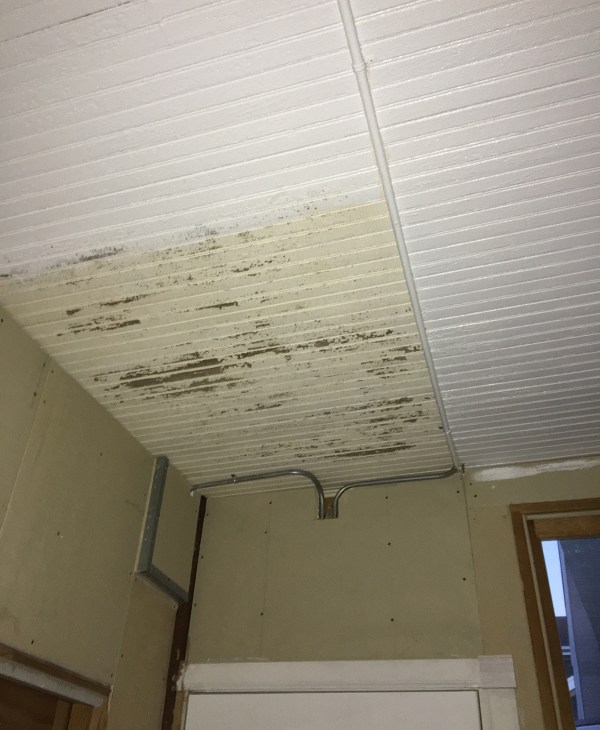
And here’s the room after the first coats of primer:
This is an awful photo, but I wanted to share a tip: when you’re painting a ceiling, especially white on white, painting in a darkened room actually makes it a lot easier to see what’s already been painted and what’s left to do.
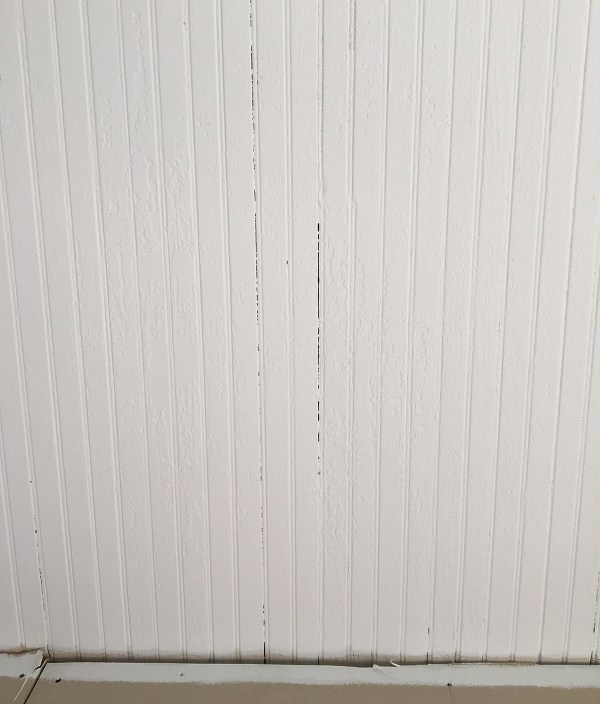
There were some visible gaps in the beadboard ceiling after it had been painted, so I caulked those.
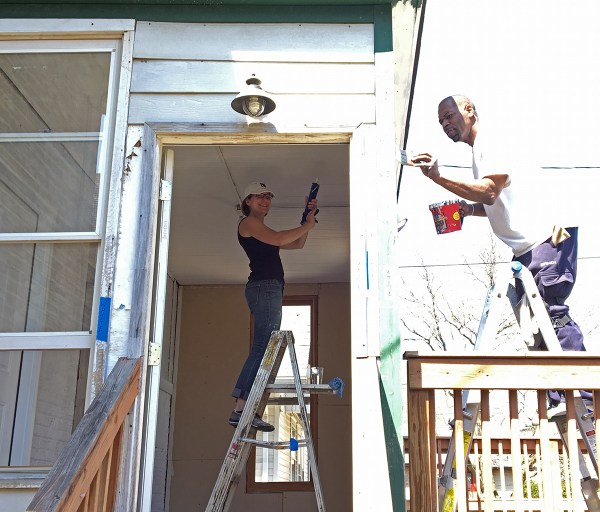
Here’s me caulking while a contractor was painting the exterior – you can see more details about our exterior work in this post: Backyard Patio, Painting, and Landscaping.
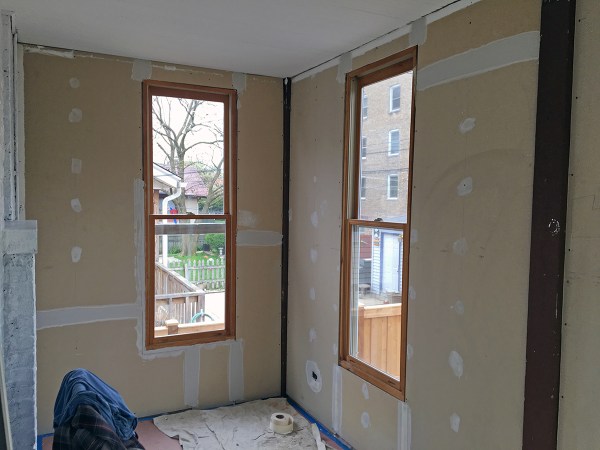
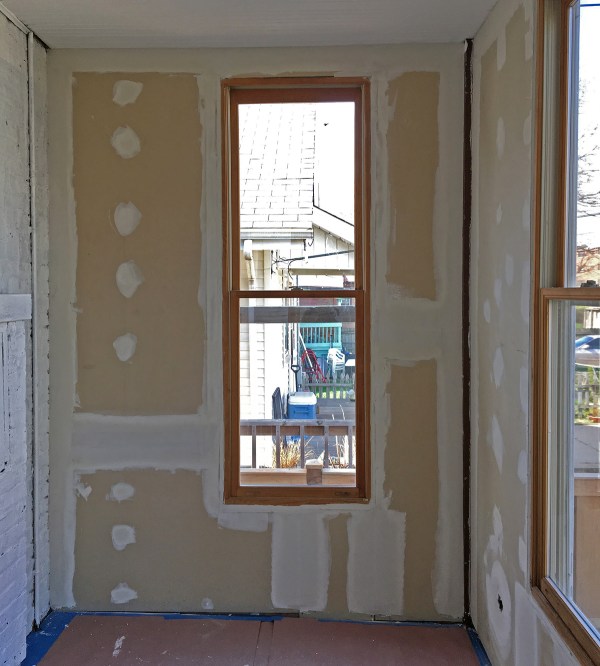
As I previously mentioned, a prior owner had drywalled this space but did not finish the job. After the ceiling and brick wall were painted, I hired someone to tape and mud the drywall. This wasn’t a skill I was interested in learning myself, and I didn’t want to buy tools that I likely wouldn’t use again.
I hired a contractor via the Albany Park Workers Center. They help day laborers find work and provide them with written contracts to reduce the risk of wage theft (a sad possibility for workers who are vulnerable due to reasons like immigration status). I wouldn’t go this route for bigger jobs, where I prefer to vet who I hire based on online reviews and/or personal referrals, but it was handy and affordable for a one-off low-stakes job like this.
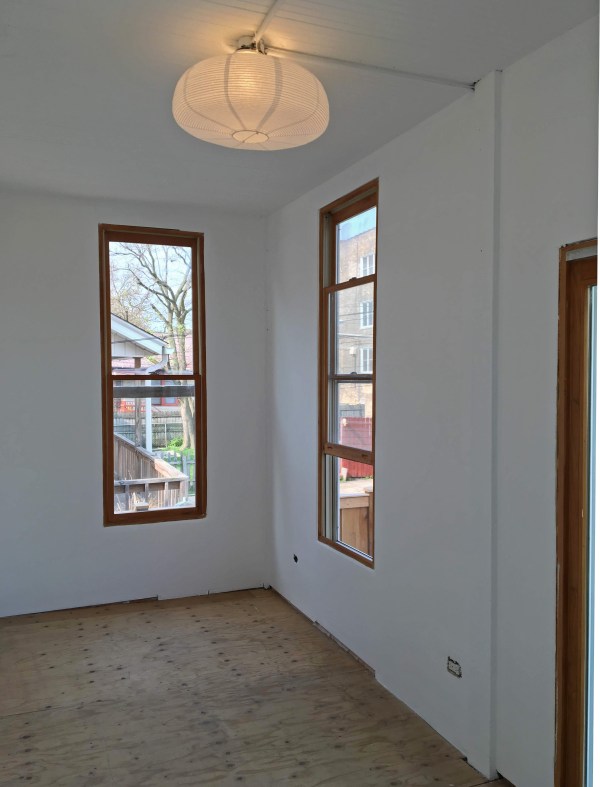
Once the mudding was dry and sanded, I painted the drywall – again, with 2 coats of primer and 2 coats of paint.
Before: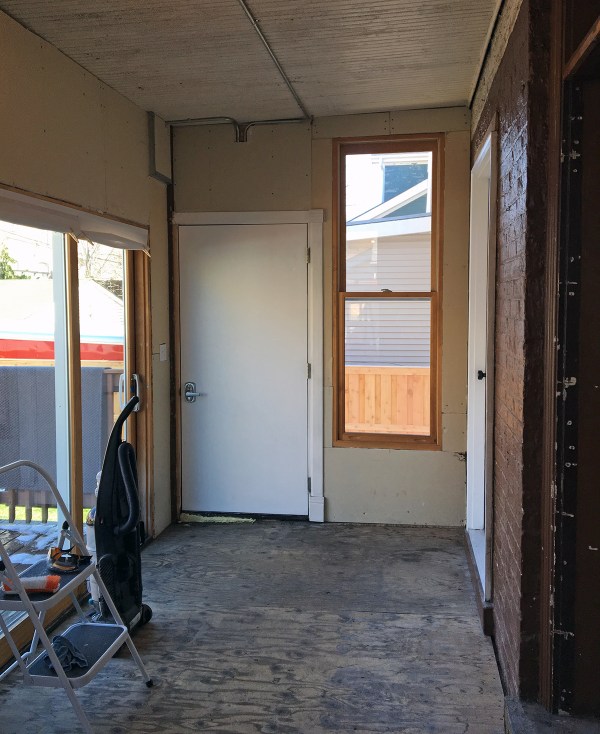
Progress: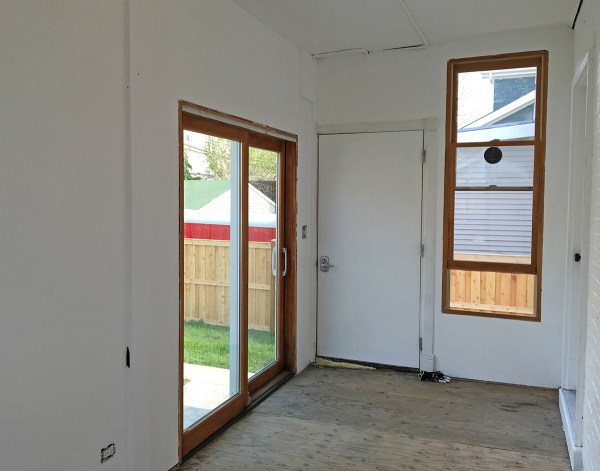
Before: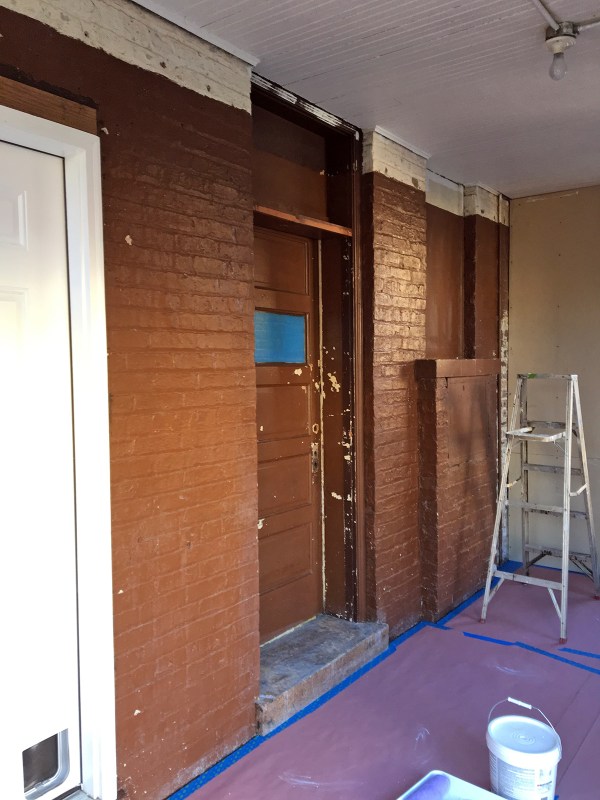
Progress: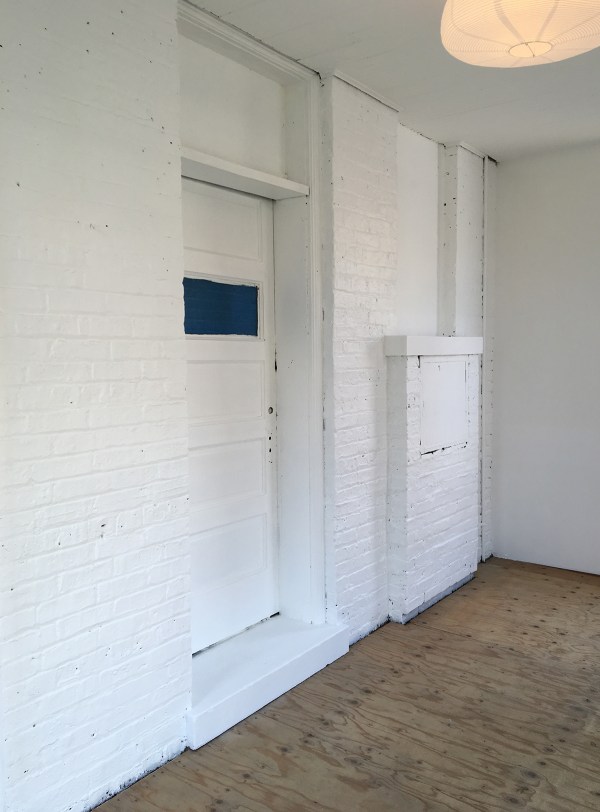
So much better! In the posts to come: shades, storage, cat amenities, and more.
P.S. If you’re a new reader, welcome! Please check out the Bungalow Tour page for an introduction to our house.
You can check out all the other guest participants on the ORC website.
New posts go up every Thursday.


Wow, this is quite an undertaking, and it already looks like it will be well worth all the sweat and tears! Excited to see how it turns out. I love that you kept the old character of the brick and ceiling.
Looking good so far, here’s my question: will you fill the spots where you didn’t get full coverage on the brick with caulk as well or leave it as is? I was looking at it and my OCD was going haywire lol I was sitting there like, if they use a paint brush they may can get those spots 😂🙈. Don’t be insulted, I mean no harm… my brain is very broken 😂
Haha, I’ll probably go back over and caulk or paint in the most obvious holes! But perfection isn’t the goal back here, so I’m not sweating it.
Fresh paint: The magic eraser. :) Looks great!
Very helpful tips! I”m building a site for a drywall contractor so reading these blogs really helps me get a well rounded idea of the niche I’m building around. Thanks again!
As a contractor, I can suggest that it is better to use drywall. It will strengthen and improve the design of the house.