The 2016: Year of the Exterior blogging bonanza continues with painting, patio installation, and landscaping. This is where we started:
Let’s dive in!
Lipstick on a Pig
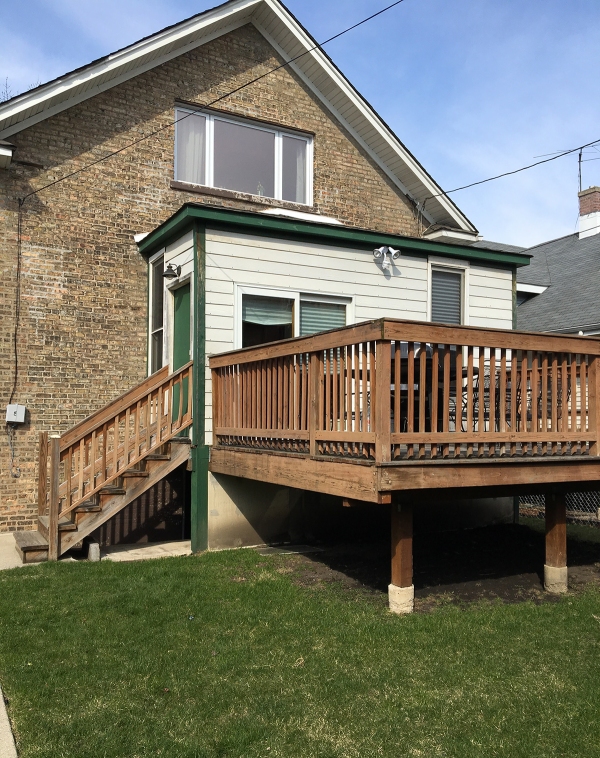
Here’s the situation with the tacked-on room at the back of the house: it used to be an exterior porch. At some point, it was enclosed – very, very poorly. So poorly that they didn’t even finish the job, even though they started it years ago. The drywall on the interior was never mudded (you can get a glimpse of it through our kitchen door). The proportions of the windows don’t make any sense. The siding was installed totally incorrectly (visible screws!). It freezes in the winter and bakes in the summer. It’s a cobbled-together garbage mess… but it’s sturdy, and it’s not unsafe. Fixing it will essentially require that we tear it down and rebuild it ($20k-ish?), which isn’t in the budget for the foreseeable future and simply isn’t a priority. It may never be. It functions fine for what it is (a mudroom), and my goal was to make it look as decent as possible for as little money as possible.
Which is a long way of saying: I put some lipstick on that pig.
When I posted about re-routing our dryer vent, I mentioned that it previously vented under the back porch: that’s what led to the mold you see on the siding. I scrubbed it and power washed it.

I hired a pro to paint the front of our house (more on that in the next post). I planned to paint the mudroom myself, but we were on a tight schedule with only a few days of cooperative weather, so I added $200 to our painting bill. Worth it, especially since there were ladders involved.
Behold the wonders of paint.

The light is from Amazon (Outdoor Aluminum Barn Light). I installed it myself, and it fits perfectly under the eave.
Jarrod and I did paint the garage on our own:

Goodbye Deck, Hello Patio
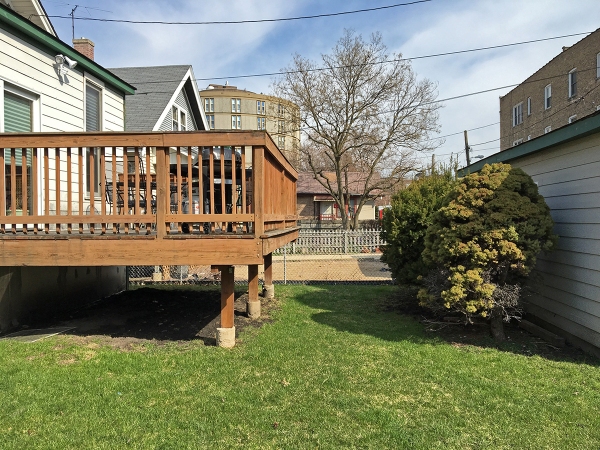
The existing deck had to go. It was rotten and splintering. It also had no stairs, so you couldn’t access it directly from the yard.
I stressed a little about the decision between building a new deck vs. putting in a patio, but it was pretty clear that a patio was the right choice for us. A patio makes maximum use of our available yard space. The deck took up far more room than just its footprint – it loomed over the yard such that no one (people nor plants) would want to hang out around the perimeter. For example, there was a good 3 feet between the fence and the deck that was wasted space.

I chose Brussels Block paving stones from Unilock. We used the Limestone color, laid in a random-ish pattern. I like the tumbled, worn finish. It’s a nice break from the brick city that is our house.

I try to be upfront about costs around here: I hope it’s helpful, not obnoxious. Paver patios are incredibly expensive – there’s just no way around it. To be very honest, this luxury wouldn’t have been in our budget had we not made some bonus money by renting our house out for filming (see Let’s All Watch Easy on Netflix). Since that money was unexpected, it felt like ~fun~ money, and it seemed fitting to put it toward something we really wanted.
Which is a long way of saying: we paid $6,800 for the patio plus the corner seat wall. That includes installation and all materials.
This patio could very well outlive us. If we spend decades in this house, it will have been a smart move. If something unexpected happens and we move in 5 years, it will have been a foolish purchase and a cautionary tale. $$ ¯\_(ツ)_/¯ $$
Thanks to our drive-through gate, the crew was able to back up right next to the deck.
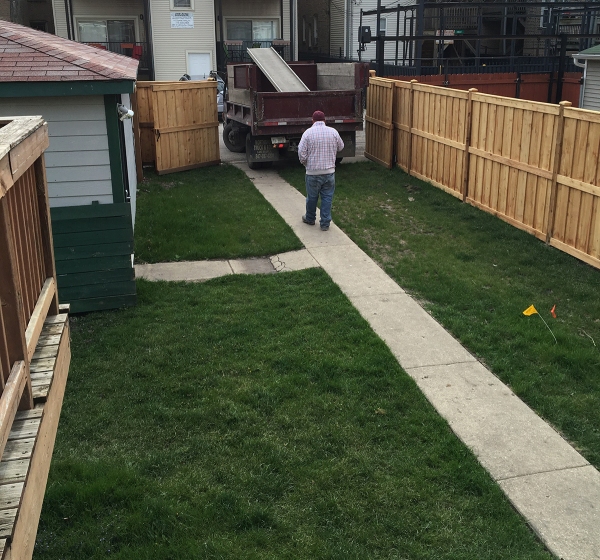
Demo went very quickly. They sprayed the patio outline (that’s a pano photo – it’s not curved) and then dug it out.


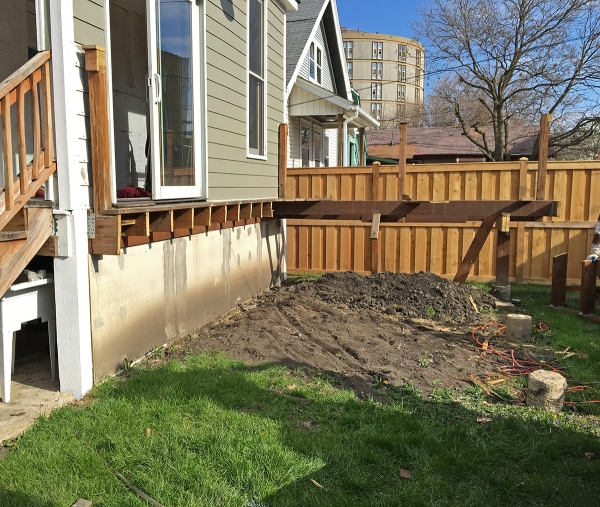
Next came a gravel and sand base, which was compacted.

I went to work the next day and when I came back we had a patio. Magic! Well, kinda magic. There was still a lot of work to do.

Another Coat of Lipstick on the Pig
Again, my goal was to make the mudroom as decent as possible for as little money as possible. I’ve done a few things to make it look more intentional, and have a few things left to do.
I started by washing and painting the wallboard below the beam.

Then I bought two pieces of cheap lattice, which I cut to fit.
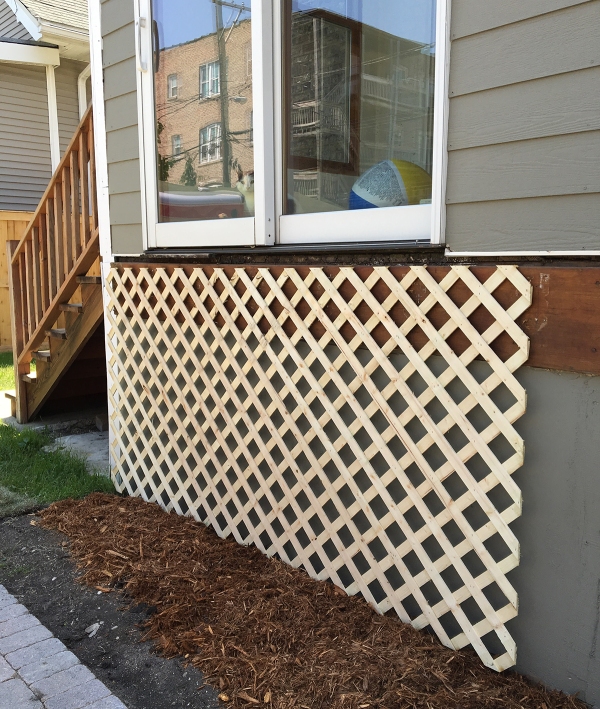
I stained them using Ready Seal and a pump sprayer.

And then I affixed them to the wall using decking screws.
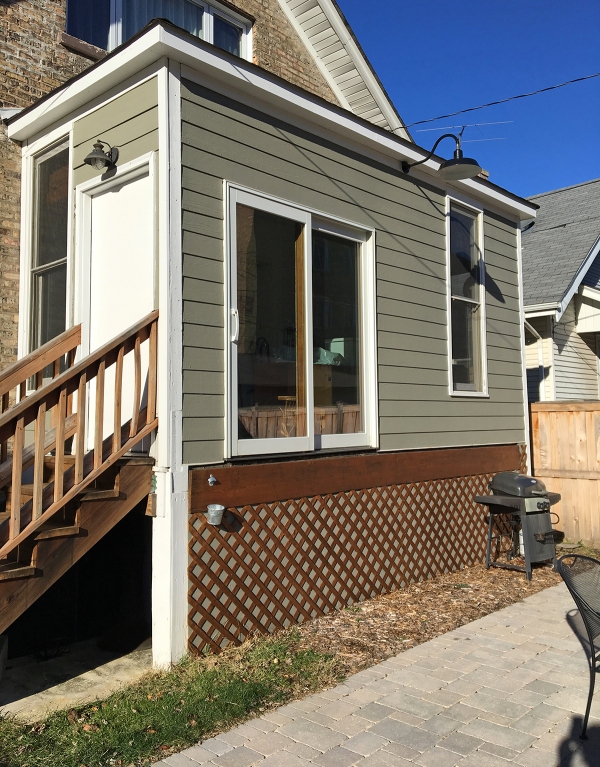
Yes, it looks weird to have a sliding door to nowhere. I’m not sweating it. I actually see these a lot around Chicago – people use them as big back windows with Juliet balconies. In 2017, I’m going to put up a railing, plant some tall grass/sedges, and make a better area for our grill.
Plants, Plants, Plants!
As low-grade hippies, Jarrod and I decided to go with native landscaping. That means all of the plant varieties we used grow naturally in midwest prairies and woodlands. They contribute to the ecosystem of birds, bees, and other animals that live in Chicago. (If you’re interested, see the Chicago Botanic Garden’s Landscaping with Native Plants.) We hired Monica of Red Stem Native Landscapes. She was great to work with. In the future, we’ll tackle smaller landscaping projects on our own, but there was so much work to be done that it made sense to get help.
As someone who loves plants, I cannot tell you exciting it was to have a truck full of trees and shrubs arrive. Some of these were for the backyard, some of them were for the front, and some were for other people that I wanted to steal.

We got an Armstrong Maple for the back corner. These trees grow fast and tall – but not wide – which makes it perfect for a Chicago backyard.

We put shrubs and plants around the patio. They’ll fill in and envelop the space, softening the hard edges of the patio. The Blackhaw Viburnum shrub in the corner, for example, will grow at least 10 feet tall.

Here’s a shot after the shrubs went it, but before the plants arrived:

For fun, let’s compare that to a before:
Yep, that’s better. Let’s keep moving. When the baby plants arrived, we still hadn’t totally finished painting, because painting is the very worst thing in the entire world.

The plants weren’t much to look at during the toddler stage. Most of their energy is spent establishing roots. Monica said the rule of thumb with native plant growth is “First year sleep, second year creep, and third year leap.”
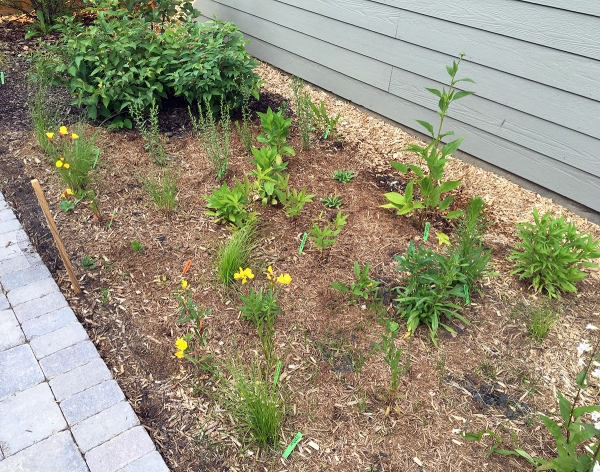
With that in mind, I was pleasantly surprised by the growth and flowering we saw in our first year.


Ooof, this post was a beast! Thanks for sticking around until the end. See you tomorrow for the final post: the front yard.

Dude, this looks amazing! I love the olive-gray-green paint that you used!
Thank you! I am in love with this color. Can’t wait to pair it with black-exterior window frames down the road.
YES! Black window frames are everything.
I am so impressed with your design concepts as well as your handiwork. That goes for previous outdoor postings and well, just everything you’ve done. So much fun to read as well.
By the way, I had a sliding door to nowhere for ages but it was one we needed to use. The kids knew how to jump to the side to hit the deck but we had to caution the older folk every time. :)
Thanks so much, Darcy! We’ve had fun jumping out our door to nowhere as well.
This is looking really great. We are debating whether we bite the bullet and remove our enclosed 2-flat rickety porch or do our best to make it less treacherous. Are you planning to insulate and extend duct work into your mudroom/back space area in the future?
Ooof, I’m glad our porch is only one story – those two-flat porches seem like a huge project.
When/if we do tackle our mudroom, I’d definitely insulate (it has zero insulation now, as far as I can tell) and consider extending the ductwork from the basement, depending on cost.
Wow Marti, this is amazing. We decided to dig out our septic tank to get it pumped for the first time since we bought the house 16.5 years ago. When we found it we realized it was UNDER our deck. To give you the condensed version we took off deck boards dug out the septic and added a riser so we would not have to repeat the process in 5 years.
But, as a result we realized how bad our deck support was. Now we are rebuilding our deck with an unmovable deadline of May 7th when we celebrate my son’s college graduation/22nd birthday party. I am making the most of our unseasonable summer like weather and working until dark every evening trying to replace out treated lumber with a composite design.
So did you decide to leave the door but without steps? I didn’t see a picture other than the lattice picture showing the door. The patio looks great! That fire pit will be a great gathering spot this fall :)
I was reading it again and saw you mentioned this. Sorry!!
what colour did you paint the siding? it’s so lovely!
It’s Gunsmith Gray from Benjamin Moore. It’s a really beautiful color! I talk about it a bit in this post: https://projectpalermo.com/2016/12/30/front-yard-painting-and-landscaping/
Beautiful garden!